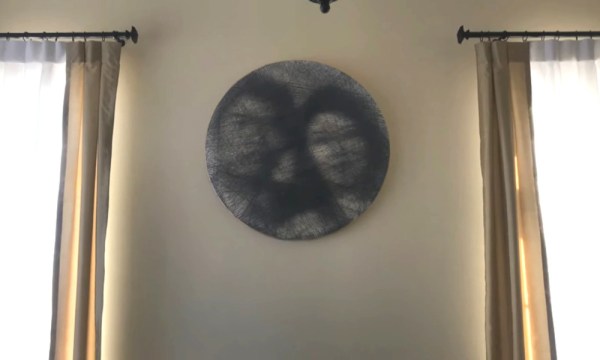
We’ve all been there — through the magic of the internet, you see someone else’s stunning project and you just have to replicate it. For [Jenny Ma], that project was computer-generated string art, as in the computer figures out the best nail order to replicate a given image, and you lay out the thread yourself.
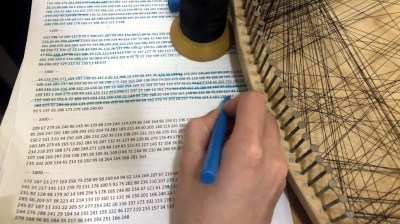 So, how does it work? Although a few algorithms are out there already, [Jenny] wanted to make her own using Python. Essentially it crops the image into a circle and then lays out evenly-spaced software nails around the circumference. The algorithm starts from a random nail and then determines the best next nail to wrap around by drawing a line from that nail to every other nail and choosing the darkest one based on the darkness of the image underneath that little line. It repeats this one chord at a time, subtracting from the original image until every pixel has been replaced with a thread or lack thereof, and then it spits out an ordered list of nail numbers.
Once the software was ready, [Jenny] made a wood canvas that’s 80 cm (31.5″) in diameter and started laying out the nail hole locations. There wasn’t quite enough room for 300 nails, so instead of starting over, [Jenny] changed the algorithm to use 298 nails and re-ran it.
[Jenny] does a great job of discussing the many variables at play in this hardware representation of software-created art. The most obvious of course is that the more nails used, the higher the resolution would be, but she determined that 300 is the sweet spot — more than that, and the resolution doesn’t really improve. We have to wonder if 360 nails would make things any easier. Check out the build video after the break.
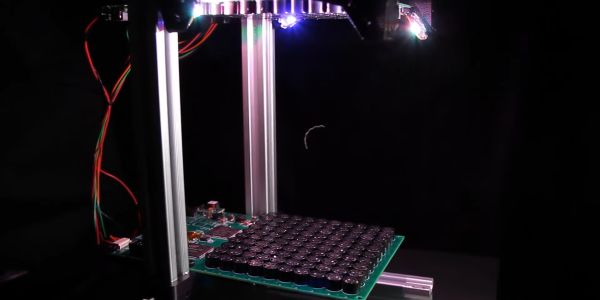
Want to cut out most of the manual labor altogether? Build yourself a string art machine.
Continue reading “An Algorithm For Art: Thread Portraits” →