For all of us fascinated with 3D printing, it’s easy to forget that 3D printer jams are an extra dimension of frustration to handle. Not to mention that our systems don’t really lend themselves well to being easily disassembled for experiments. For anyone longing for a simpler tune-up experience, you’re in luck. [MihaiDesigns] is dawning on what looks to be a cleanly designed solution to nozzle-changing, servicing, and experimenting.
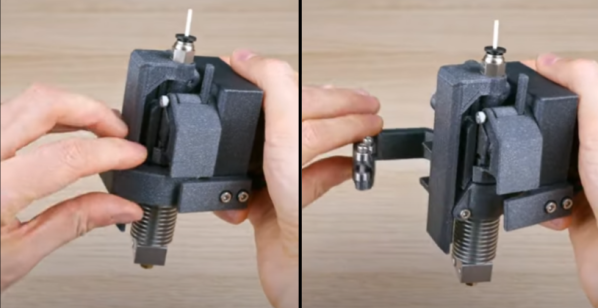
The video is only 39 seconds, but this design is packed with clever editions that come together with a satisfying click. First, the active part of the extruder is detachable, popping in-and-out with a simple lever mechanism that applies preload. For consistent attachment, it’s located with a kinematic coupling on the side with a magnet that helps align it. What’s neat about this design is that it cuts down on the hassle of wire harnesses; tools are set to share the same harness via an array of spring-loaded pogo pins. Finally, a quick-change extruder might be neat on its own, but [MihaiDesigns] is teasing us with an automatic tool change feature with a handy lever arm.
This is a story told over multiple sub-60-second videos, so be sure to check out their other recent videos for more context. And for the 3D printing enthusiasts who dig a bit further into [MihaiDesigns’] video log, you’ll be pleased to find more magnetic extruder inventions that you can build yourself.
The world of tool-changing 3D printers is simply brimming with excitement these days. If you’re curious to see other machines with kinematic couplings, have a peek at E3D’s toolchanger designs, Jubilee, and [Amy’s] Doot Changer.
Continue reading “Removable Extruder Pulls Out The Stops On Features”