Air Filter DRM? Hacker Opts Out With NFC Sticker

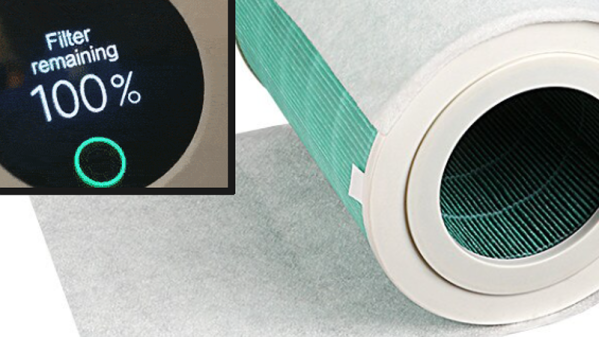
[Flamingo-tech]’s Xiaomi air purifier has a neat safety feature: it will refuse to run if a filter needs replacement. Of course, by “neat” we mean “annoying”. Especially when the purifier sure seems to judge a filter to be useless much earlier than it should. Is your environment relatively clean, and the filter still has legs? Are you using a secondary pre-filter to extend the actual filter’s life? Tough! Time’s up. Not only is this inefficient, but it’s wasteful.

Every Xiaomi filter contains an NTAG213 NFC tag with a unique ID and uses a unique password for communications, but how this password was generated (and therefore how to generate new ones) was not known. This meant that compatible tags recognized by the purifier could not be created. Until now, that is. [Flamingo-tech] has shared the discovery of how Xiaomi generates the password for communication between filter and purifier.

A small NFC sticker is now all it takes to have the purifier recognize a filter as new.

[Flamingo-tech] has long been a proponent of fooling Xiaomi purifiers into acting differently. In the past, this meant installing a modchip to hijack the DRM process. That’s a classic method of getting around nonsense DRM on things like label printers and dishwashers, but in this case, reverse-engineering efforts paid off.

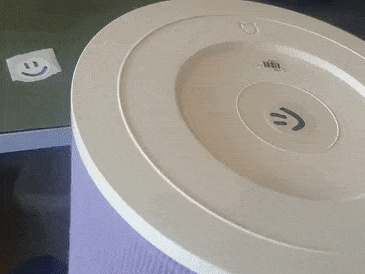
It’s now possible to create simple NFC stickers that play by all the right rules. Is a filter’s time up according to the NFC sticker, but it’s clearly still good? Just peel that NFC sticker off and slap on a new one, and as far as the purifier is concerned, it’s a new filter!

If you’re interested in the reverse-engineering journey, there’s a GitHub repository with all the data. And for those interested in purchasing compatible NFC stickers, [Flamingo-tech] has some available for sale.

Loki Is Part Cyberdeck, Part Sinclair Spectrum, And Pretty Tricky

You’ve got to watch out for Loki — he’s a trickster, after all, and he might make you think this semi-cyberdeck mash-up machine is named after him, when the backstory on this build is more interesting than anything in the current Marvel scene.

According to [Steve Anderson], Loki was the name of a mocked-up machine that Sinclair teased in the mid-1980s as a competitor for the Amiga. [Steve] coveted the vaporware machine and never quite got over it, but rather than pine for something that never existed, he created his own Loki. He only loosely qualifies the machine as a cyberdeck — it has some features of the genre, like a Raspberry Pi and a cast-off iPad screen for a display, but isn’t really intended to be as portable as a real cyberdeck. To scratch his Sinclair itch, the machine also includes a ZX Uno, which is an FPGA emulator of the Sinclair Spectrum. The keyboard is hand-wired using mechanical switches, and is backed up by a Pico running custom software so it can talk both USB and PS/2.

[Steve] has much more detail on Loki and his other cyberdeck builds over on his blog, which you should probably check out. Somewhat surprisingly, it doesn’t look like he’s entered Loki in our new Cyberdeck Contest that just launched. Hopefully that’s just an oversight.

Turning A Pair Of Syringes Into A Tiny Water Pump

There is something inherently fascinating about tiny mechanical devices, especially when you’re used to seeing much larger versions. This is the case with [Penguin DIY]’s tiny centrifugal water pump built from 5 ml syringes.

The pump is powered by a small 8 mm diameter brushed DC motor, likely the same type that is used for small toy-grade quadcopters. The tiny impeller is a section of the syringe’s original plunger, with its cross-shaped body acting as the impeller blades. [Penguin DIY] first experimented with the original plunger seal to protect the motor from water, but it quickly melted from friction with the spinning shaft. Silicone sealant was used instead, and the motor shaft was covered with a layer of oil to prevent the sealant from sticking to it. Then the blob of sealant was flattened with a translucent plastic disc to allow clearance for the impeller.

A hole was drilled in the side of the syringe where the impeller sits, and a nozzle cut from the tip of another syringe was glued in place as the outlet. It’s notoriously difficult to get anything to stick to polypropylene syringes, but [Penguin DIY] says in the comments he was able to find an “organic superglue” that worked. With the motor and impeller inserted, the remaining space was also sealed with silicone.

This tiny pump packs a surprising amount of power, and was able to empty a 1.5 l bottle in about one minute with enough pressure to send the jet of water flying. There are still some issues that need to be addressed, though. With the motor completely sealed, it could burn itself quite quickly. A commenter also mentioned that it might suck water into the motor past the shaft after a hot run, as the air inside the motor cools and contracts. Even so, this little pump might be practical for applications that only require short runs, like watering potted plants. If you need more power you could always 3D print a larger pump.

Continue reading “Turning A Pair Of Syringes Into A Tiny Water Pump”

The LCD being replaced in an old laptop

Hackaday Prize 2022: Repairing A Vintage Laptop With Modern Components

Laptop computers may be ubiquitous today, but there was a time when they were the exclusive preserve of rich businesspeople. Back in the early ’90s, the significant added cost of portability was something that few were willing to pay. As a result, not many laptops from those days survive; for those that do, keeping them running can be quite a challenge due to their compact construction and use of non-standard components.

[Adalbert] ran into these problems when he got his hands on a Toshiba T3200SXC from 1991. As the first laptop ever to feature a color TFT display, it’s very much worth preserving as an historical artifact. Sadly, the original display was no longer working: it only displayed a very faint image and went completely blank soon after. Leaky capacitors then destroyed the power supply board, leaving the laptop completely dead. [Adalbert] then began to ponder his options, which ranged from trying to repair the original components to ripping everything out and turning this into a modern-computer-in-an-old-case project.

In the end he went for an option in between, which we as preservationists can only applaud: he replaced the display with a modern one of the correct size and resolution and built a new custom power supply, keeping the rest of the computer intact as far as possible. [Adalbert] describes the overall process in the video embedded below and goes into lots of detail on his hackaday.io page.

Connecting a modern LCD screen was not as difficult as it might seem: where the old display had an RGB TTL interface with three bits per color, the new one had a very similar system with six bits per color. [Adalbert] made an adapter PCB that simply connected the three bits from the laptop to the highest three bits on the screen. A set of 3D-printed brackets ensured a secure fit of the new screen in the classic case.

The internal power supply module of a laptopFor the power supply [Adalbert] took a similar approach. He designed a PCB with several DC/DC converters that fit easily inside the computer’s case, leaving enough space to add a battery. This made the old Toshiba more portable than it ever was — believe it or not, the original T3200SXC could only be used with a mains connection.

Once the laptop was restored to working order, [Adalbert] added a few finishing touches: a sound card and speakers made it suitable as a gaming platform, and a network card gave it rudimentary online capabilities. The end result is a T3200SXC that looks and feels exactly the way it did when it was new, but with a few added features. That’s a really satisfying result: many classic laptop projects add modern computing hardware, or even completely replace the original contents. You might also want to check out [Adalbert]’s unusual 3D printer based PCB manufacturing technique that he used for the new power supply.

Continue reading “Hackaday Prize 2022: Repairing A Vintage Laptop With Modern Components”

50-Year-Old 8-Track Changer Repair And Hack

For reasons still unclear, [Techmoan] has procured an RCA 8-track changer that holds five tape cartridges in a custom carrier. It somewhat works, but had a bit of mechanical issues here and there which needed some maintenance. Additionally, the player is designed for the US market and 60 Hz mains, but [Techmoan] is in the UK with 50 Hz.

Although electronics are used for the basic tape player portion, everything else is operated by mechanical gears, levers, and motors. The system plays both sides of each tape cartridge through to completion, and then switches automatically to the next one in the stack. Cartridges could be up to 90 minutes each, making for over seven hours of playing time. Oddly, the system does not repeat automatically after the fifth tape ends –operator intervention is required. It’s not entirely clear whether these carousels were primarily intended to play background music inside businesses, or built for niche consumer applications.

After discovering there was no setting to adjust the tape’s speed for 50/60 Hz operation, [Techmoan] could have ordered or fabricated a larger-diameter pulley for the motor drive shaft. But in true hacker style, he instead solves the problem with cellophane packing tape. By trial and error, he builds up the pulley diameter by winding lengths of tape until the music sounds just “good enough” to his ear. Then he pulls out the wow and flutter meter to really zero in — and gets it bang on. He says that this changer is needed for a future video, so we’re looking forward to see how it will be employed.

If you like these old mechanical logic controls, check out the video below the break. If you want dig into the workings of an 8-track player, check out Jenny List’s retro teardown from 2017.  Does anyone still use 8-track tapes any more?

Continue reading “50-Year-Old 8-Track Changer Repair And Hack”

SATAn Turns Hard Drive Cable Into Antenna To Defeat Air-Gapped Security

It seems like [Mordechai Guri]’s lab at Ben-Gurion University is the place where air-gapped computers go to die, or at least to give up their secrets. And this hack using a computer’s SATA cable as an antenna to exfiltrate data is another example of just how many side-channel attacks the typical PC makes available.

The exploit, deliciously designated “SATAn,” relies on the fact that the SATA 3.0 interface used in many computers has a bandwidth of 6.0 Gb/s, meaning that manipulating the computer’s IO would make it possible to transmit data from an air-gapped machine at around 6 GHz. It’s a complicated exploit, of course, and involves placing a transmitting program on the target machine using the usual methods, such as phishing or zero-day exploits. Once in place, the transmitting program uses a combination of read and write operations on the SATA disk to generate RF signals that encode the data to be exfiltrated, with the data lines inside the SATA cable acting as antennae.

SATAn is shown in action in the video below. It takes a while to transmit just a few bytes of data, and the range is less than a meter, but that could be enough for the exploit to succeed. The test setup uses an SDR — specifically, an ADALM PLUTO — and a laptop, but you can easily imagine a much smaller package being built for a stealthy walk-by style attack. [Mordechai] also offers a potential countermeasure for SATAn, which basically thrashes the hard drive to generate RF noise to mask any generated signals.

While probably limited in its practical applications, SATAn is an interesting side-channel attack to add to [Dr. Guri]’s list of exploits. From optical exfiltration using security cameras to turning power supplies into speakers, the vulnerabilities just keep piling up.

Continue reading “SATAn Turns Hard Drive Cable Into Antenna To Defeat Air-Gapped Security”

On the left side, there's a smartphone. On the right side, there's a hairdryer turned on. On the smartphone screen, you can see the working end of the hairdryer shown, as well as a jet of air coming out of that end. In the background, there's an LCD screen showing a noise pattern.

Observe Airflow Using Smartphone And Background-Oriented Schlieren

Multiple people have recently shared this exciting demonstration (nitter) with us – visualizing airflow using a smartphone, called ‘background-oriented schlieren’. On a hot summer day, you might see waves in the air – caused by air changing density as it warms up, and therefore refracting the light differently. Schlieren photography is an general set of techniques for visualizing fluid flow, but of course, it can also be applied to airflow. In this case, using some clever optical recognition tricks, this schlieren method lets you visualize flow of air using only your Android smartphone’s high resolution camera and a known-pattern printed background! Continue reading “Observe Airflow Using Smartphone And Background-Oriented Schlieren”