Junkbox Build Keeps Tesla Coils Perfectly Varnished

Admittedly, not a lot of people have a regular need to varnish coils. It’s mainly something that Tesla coil builders and other high-voltage experimenters are concerned with. But since that group probably constitutes a not insignificant fraction of the Hackaday audience, and because there are probably more applications for this homebrew coil varnishing setup, we figured it would be a good idea to share it.

For [Mads Barnkob], coil maintenance isn’t something to take lightly. If you check out his Kaizer Power Electronics channel on YouTube, you’ll see that he has quite a collection of large, powerful Tesla coils, some of which are used for demos and shows, and others that seem to be reserved mainly for blowing stuff up. To prevent one of his coils from joining the latter group, keeping the coat of insulating varnish on the secondary coil windings in tip-top condition is essential.

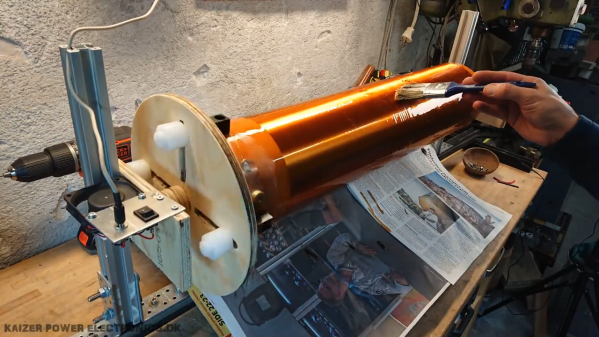
The setup seen in the video below helps with that tedious chore. Built entirely from scraps and junk bin parts, the low-speed, low-precision lathe can be set up to accommodate coils of all sizes. In use, the lathe turns the coil very slowly, allowing [Mads] to apply an even coat of varnish over the coil surface, and to keep it from sagging while it dries.

[Mads]’ setup is probably not great for coil winding as it is, but for coil maintenance, it’s just the thing. If your needs are more along the lines of a coil winder, we’ve got a fully automated winder that might work for you.

Continue reading “Junkbox Build Keeps Tesla Coils Perfectly Varnished”

Just In Case You Want To Charge Your Neighbor’s Tesla

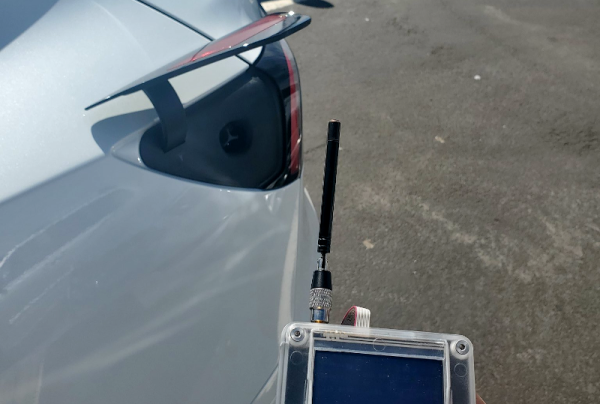
Tesla vehicles have a charging port that is under a cover that only opens on command from a charging station. Well, maybe not only. [IfNotPike] reports that he was able to replay the 315MHz signal using a software defined radio and pop the port open on any Tesla he happened to be near.

Apparently, opening the charging port isn’t the end of the world since there isn’t much you can do with the charging port other than charging the car. At least, that we know of. If history shows anything, it is that anything you can get to will be exploited eventually.

Continue reading “Just In Case You Want To Charge Your Neighbor’s Tesla”

High Tech Pancake Tesla Coil Brings The Lightning

For several years now we’ve been following [Jay Bowles] as he brings high-voltage down to Earth on his Plasma Channel YouTube channel. From spark gaps made of bits of copper pipe to automotive ignition coils driven by the stalwart 555 timer, he’s got a real knack for keeping his builds affordable and approachable. But once in a while you’ve got to step out of your comfort zone, and although the dedicated DIY’er could still replicate the solid state “pancake” Tesla coil he documents in his latest video, we’d say this one is better left for the professionals.

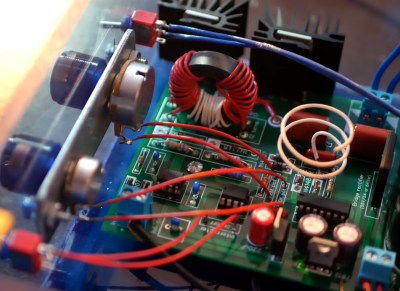
The story starts about nine months ago, when [Jay] was approached by fellow YouTuber [LabCoatz] to collaborate on a PCB design for a solid state Tesla coil (SSTC). Rather than a traditional spark gap, a SSTC uses insulated-gate bipolar transistors (IGBTs) triggered by an oscillator, which is not only more efficient but allows for fine control of the primary coil. The idea was to develop an AC-powered coil that was compact, easy to repair, and could be controlled with just a couple dials on the front panel. The device would also make use of an antenna feedback system that would pick up the resonant frequency of the secondary coil and automatically adjust the IGBT drive to match.

Being considerably more complex than many of the previous builds featured on Plasma Channel, it took some time to work out all the kinks. In fact, the majority of the video is [Jay] walking the viewer through the various failure modes that he ran into while developing the SSTC. Even for somebody with his experience in high-voltage, there were a number of headscratchers that had to be solved.

For example, the first version of the design used metal bolts to attach the primary and secondary coils, until he realized that was leading to capacitive coupling and replaced them with acrylic blocks instead. If his previous videos surprised you by showing how easy it could be to experiment with high-voltages, this one is a reminder that it’s not always so simple.

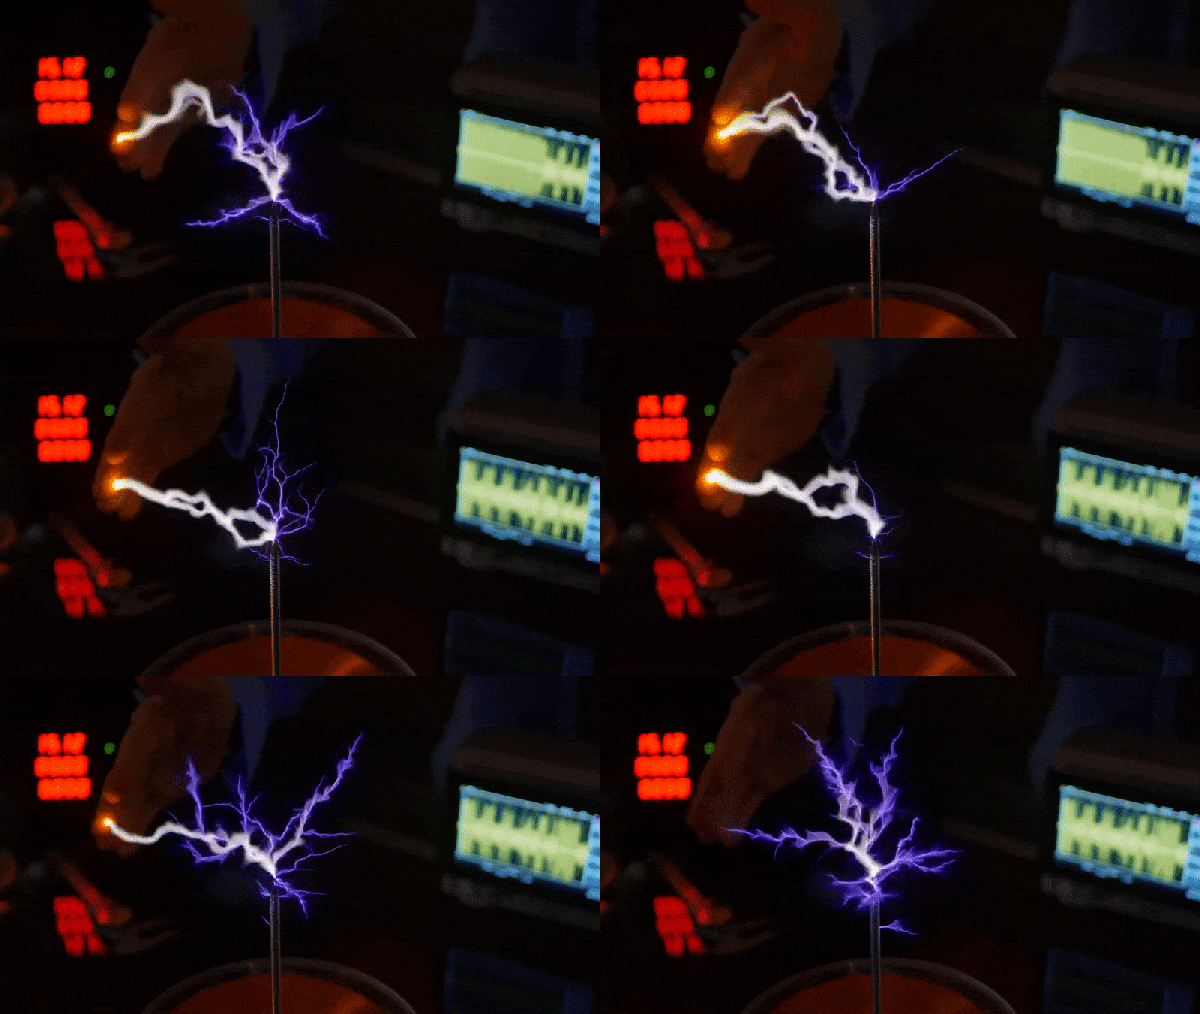
But in the end [Jay] does get everything sorted out, and the results are nothing short of spectacular. Even on the lower power levels it throws some impressive sparks, but when cranked up to max, it offers some of the most impressive visuals we’ve seen so far from Plasma Channel. It was a lot of work, but it certainly wasn’t wasted effort.

Fascinated by the results, but not quite ready to jump into the deep end? This affordable and easy to build high-voltage generator featured on Plasma Channel back in 2020 is a great way to get started. If you still need more inspiration, check out the fantastic presentation [Jay] gave during the 2021 Remoticon.

Continue reading “High Tech Pancake Tesla Coil Brings The Lightning”

Hacking A Proper Dash Into The Tesla Model 3

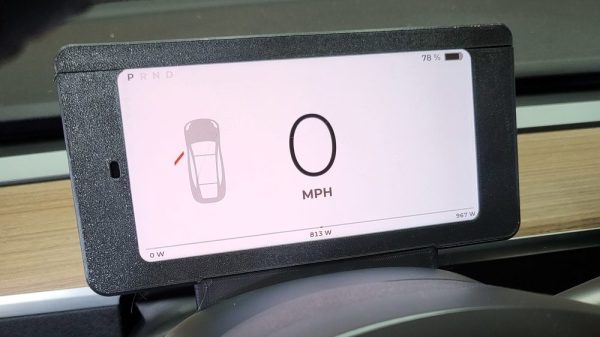
The Tesla Model 3 and Model Y are popular electric vehicles that dispense with some of the usual provisions you’d expect in a typical car. Namely, there’s no dash cluster in front of the driver; instead, all information is solely displayed on the center console screen. [Nick Nguyen] wasn’t a fan of this setup, and decided to hack together a dash cluster of his own. 

The CANdash works in a simple fashion, snooping the Tesla’s CAN bus for all the information relevant to the vehicle’s operation. It’s capable of displaying everything from speed to the remaining range in the battery, while also allowing the user to keep an eye on things like coolant temperatures and whether the Tesla Autopilot system is currently available.

The build relies on a CANserver, an ESP32-based device specifically built for hooking up to the CAN bus on Tesla vehicles and sharing the data externally. The data can then be piped wirelessly to an Android phone running CANdash to display all the desired information. With the help of an aftermarket dash clip or a 3D printed custom mount, the phone can then be placed behind the steering wheel to display data in the usual location.

It’s a simple, straightforward hack that gives Tesla owners a useful feature that they’re otherwise missing from the factory. The US automakers cars are proving to be fertile ground for hackers and DIYers, with one man recently saving thousands on a battery swap with a simple mod. Video after the break.

Continue reading “Hacking A Proper Dash Into The Tesla Model 3”

Exploring Tesla Model S High Voltage Cabling

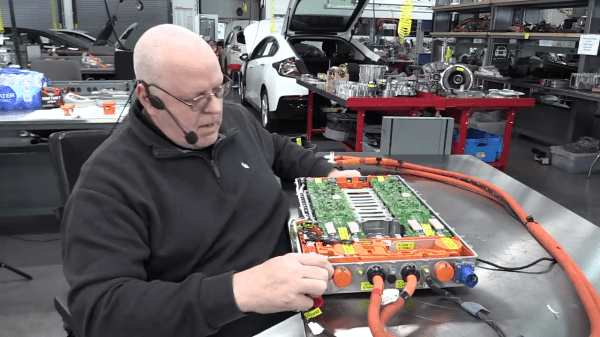
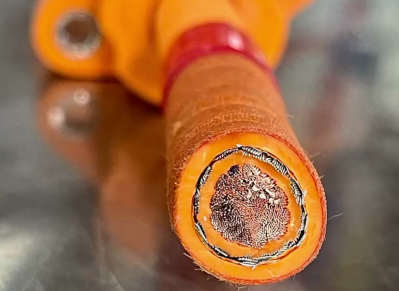
When he’s not busy with his day job as professor of computer and automotive engineering at Weber State University, [John Kelly] is a prolific producer of educational videos. We found his video tracing out the 22+ meters of high voltage cabling in a Tesla Model S (below the break) quite interesting. [John] does warn that his videos are highly detailed and may not be for everyone:

This is not the Disney Channel. If you are looking to be entertained, this is not the channel for you.

We ignored the warning and jumped right in. The “high” voltages in the case of an electric vehicle (EV) like the Model S is approximately 400 volts. Briefly, external input via the charge connector can be single or three phase, 120 or 250 VAC, depending on your region and charging station. This get boosted to a nominal 400 VDC bus that is distributed around the various vehicle systems, including the motors and the battery pack.

Rear Modules

    • Charge receptacle
    • On-board charger module
    • Rapid splitter
    • Rear motor inverter

Front Modules

    • High voltage junction block
    • Cabin air heater
    • DC to DC converter
    • Battery coolant heater
    • Air conditioning compressor
    • Front motor inverter

He goes through each module, showing in detail the power routing and functionality, eventually assembling the whole system spanning two work benches. We liked his dive into the computer-controlled fuse that recently replaced the standard style one, and were impressed with his thorough use of labels.

If you’ve ever been curious about the high voltage distribution of a EV, grab some popcorn and check out this video. Glancing through his dozens of playlists, [John]’s channel would be a good place to visit if you’re interested any topic related to hybrids and electric vehicles, drive trains, and/or transmissions. We’ve written about some Tesla teardowns before, the Model 3 and the Model S battery packs. Have you worked on / hacked the high voltage system in your EV? Let us know in the comments below.

Continue reading “Exploring Tesla Model S High Voltage Cabling”

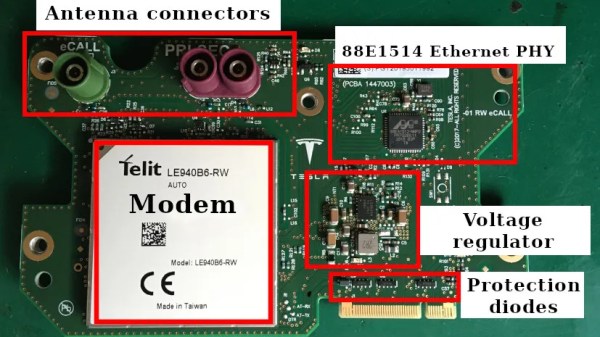
An image describing parts of a Tesla modem board

LTE Modem Transplant For A Tesla Imported Into Europe

When modern connected cars cross continents, novel compatibility problems crop up. [Oleg Kutkov], being an experienced engineer, didn’t fret when an USA-tailored LTE modem worked poorly on his Tesla fresh off its USA-Europe import journey, and walks us through his journey of replacing the modem with another Tesla modem module that’s compatible with European LTE bands.

[Oleg]’s post goes through different parts on the board and shows you how they’re needed in the bigger picture of the Tesla’s Media Computer Unit (MCU), even removing the LTE modem’s shield to describe the ICs underneath it, iFixit teardown diagram style! A notable highlight would be an SIM-on-chip, essentially, a SIM card in an oh-so-popular DFN package, and thankfully, replacing it with a socket for a regular SIM card on some extender wires has proven fruitful. The resulting Tesla can now enjoy Internet connectivity at speeds beyond those provided by EDGE. The write-up should be a great guide for others Tesla owners facing the same problem, but it also helps us make electric cars be less alike black boxes in our collective awareness.

Not all consequences of Tesla design decisions are this minor; for instance, this year, we’ve described a popular eMMC failure mode of Tesla cars and how Tesla failed to address it. Thankfully, Tesla cars are becoming more of a hacker community target, whether it’s building a computer-vision-assisted robot to plug in a charging cable, getting it repaired for a fraction of the dealership cost, or even assembling your own Tesla from salvage parts!

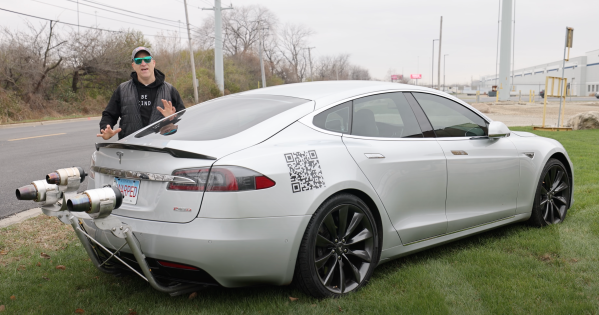
Showing off the jet powered tesla

Tesla Model S Gets Boost With Jet Engine Upgrade

Tesla is well known for making cars that can accelerate quickly, but there’s always room for improvement. [Warped Perception] decided that his Tesla Model S P85D needed that little bit of extra oomph (despite the 0-60 MPH or 0-97 km/h time of 3.1 seconds), so he did what any sensible person would: add three jet turbines to the back of his car.

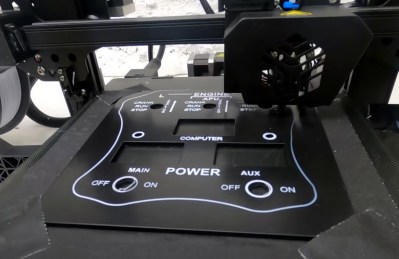
The best part of this particular build is the engineering and fabrication that made this happen. With over 200 pieces and almost all personally fabricated, this is a whirlwind of a build. The control panel is first, and there’s a particularly clever technique of 3D printing the lettering directly onto the control panel for the flat stuff. Then for the pieces with angles that would prevent the head from moving freely, he printed onto a plastic sheet in reverse, applied glue, then stuck the letters to the plate as a sheet. A top layer of clear coat ensures the letters won’t come off later.

Using a 3D printer to apply lettering on the control panel.

He installed the control electronics in the trunk with wiring strung from the car’s front to the rear. Three Arduinos serve as controllers for the jets. Afterward, came the bracket to hold the engines and attach it to the car’s underside. Unfortunately, supplies were a little hard to come by, so he had to make do with what was on hand. As a result it didn’t come out as strong as he would have hoped, but it’s still pretty impressive.

[Warped Perception] does a few tests before taking it out on the road. Then, he shifted the car into neutral and could drive the car solely on jet power, which was one of his goals. While we don’t love the idea of testing a jet engine on public roads, it certainly would discourage tailgaters.

Next, he finds a quieter road and does some speed tests. Unfortunately, it was drizzling, and the pavement was damp, putting a damper on his 0-60 standing times. Electric-only he gets 4.38 seconds, and turning on the jets plus electric shaves that down to 3.32 seconds. Overall, an incredible build that’s sure to draw a few curious glances whenever you’re out on the town.

If you’re looking to upgrade your Tesla, perhaps instead of jet engines, you might opt for a robot to plug it in for you?

Continue reading “Tesla Model S Gets Boost With Jet Engine Upgrade”