With 18650 cells as cheap and plentiful as they are, you’d think building your own custom battery packs would be simple. Unfortunately, soldering the cells is tricky, and not everyone is willing to invest in a spot welding setup just to put the tabs on them. Of course that’s only half the battle, you’ll still want some battery protection and management onboard to protect the cells.
The lack of a good open source system for pulling all this together is why [Timothy Economu] created DKblock. Developed over the last three years, his open source system allows users to assemble large 18650 battery packs for electric vehicles or home energy storage, complete with integrated intelligent management and protection systems. Perhaps best of all there’s no welding required, the packs simply get bolted together.
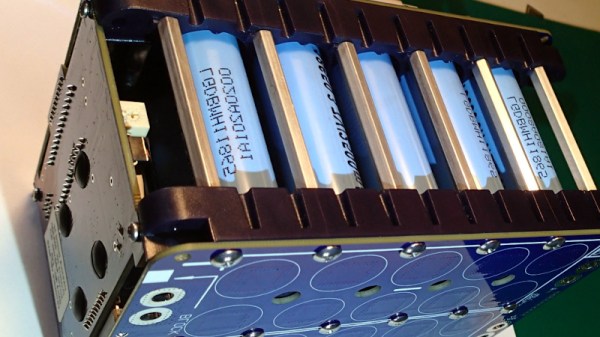
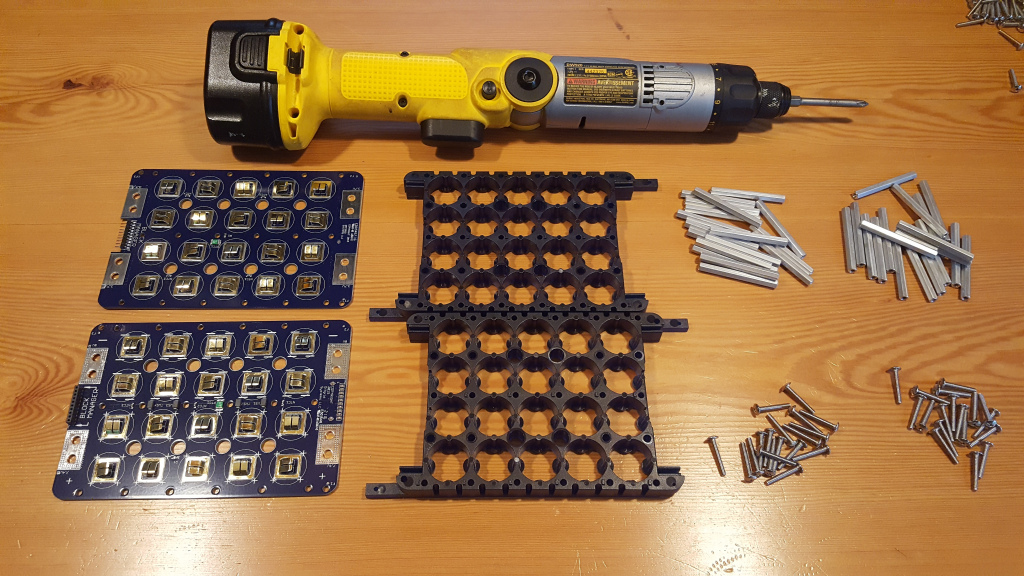 Each block of batteries is assembled using screws and standoffs in conjunction with ABS plastic cell holders. A PCB is placed on each side of the stack, and with tabs not unlike what you’d see in a traditional battery compartment, all the cells get connected without having to solder or weld anything to them. This allows for the rapid assembly of battery packs from 7.2 VDC all the way up to 150 VDC , and means individual cells can easily be checked and replaced in the future should the need arise.
For monitoring the cells, a “Block Manager” board is installed on each block, which communicates wirelessly to a “Pack Supervisor” board that monitors the overall health of the system. Obviously, such a robust system is probably a bit overkill if you’re just looking to build a pack for your quadcopter, but if you’re looking to build a DIY Powerwall or juice up a custom electric vehicle, this could be the battery management system you’ve been looking for.