Making sure that an electric fence which is keeping one’s cattle and sheep from wandering off is still working properly seems like a fairly daunting task, especially when this fence is quite a distance from one’s home so checking up on it is time-consuming. After a friend of [kiu] got called a few times by the police because some of the sheep had pulled a prison break, the obvious technological solution was to IoT-enable the fence with LoFence.
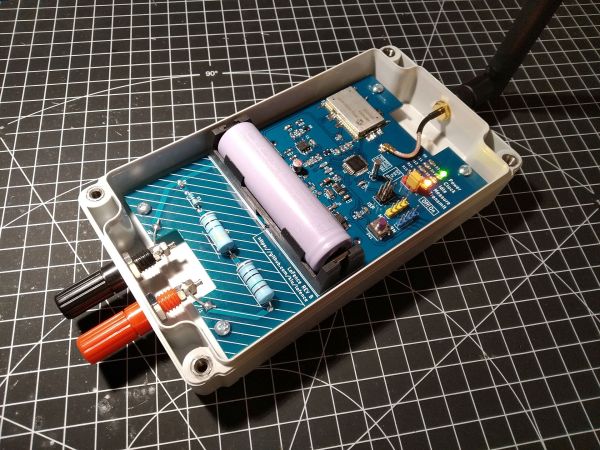
This solution is nothing if not elegant in its simplicity. For phoning home with status data, the system uses the Microchip RN2483 IC, which handles pretty much all aspects of LoRaWAN, so that one merely has to send data to its serial interface to transmit. Because this system uses The Things Network (TTN) there are no service costs due to the low data rates. This was the easy part, aside from having to add a LoRaWAN gateway to boost the signal in the area with the electric fence.
With that side covered, the rest of the build features an AVR ATmega328p MCU, a resistor divider and op-amp (TLV9062) along with some passives. The resulting circuit measures voltage, essentially to detect whether the fence is still forming a full circuit. Hacking into the little box that energizes the fence might be a possible upgrade there, but at least it is a fairly uncomplicated way to measuring things. Electric fences do work best with a voltage on them, after all.
At the other end of the LoRaWAN network, the data is parsed and analyzed by a service so that it can be displayed on a Grafana dashboard, ensuring that a single glance suffices to see the current state of the fence and whether one has to dash out in the rain at 1 AM to fix it or not.