The Pros And Cons Of Microcontrollers For Boost Converters

It never fails — we post a somewhat simple project using a microcontroller and someone points out that it could have been accomplished better with a 555 timer or discrete transistors or even a couple of vacuum tubes. We welcome the critiques, of course; after all, thoughtful feedback is the point of the comment section. Sometimes the anti-Arduino crowd has a point, but as [Great Scott!] demonstrates with this microcontroller-less boost converter, other times it just makes sense to code your way out of a problem.

Built mainly as a comeback to naysayers on his original boost-converter circuit, which relied on an ATtiny85, [Great Scott!] had to go to considerable lengths to recreate what he did with ease using a microcontroller. He started with a quick demo using a MOSFET driver and a PWM signal from a function generator, which does the job of boosting the voltage, but lacks the feedback needed to control for varying loads.

Ironically relying on a block diagram for a commercial boost controller chip, which is probably the “right” tool for the job he put together the final circuit from a largish handful of components. Two op amps form the oscillator, another is used as a differential amp to monitor the output voltage, and the last one is a used as a comparator to create the PWM signal to control the MOSFET. It works, to be sure, but at the cost of a lot of effort, expense, and perf board real estate. What’s worse, there’s no simple path to adding functionality, like there would be for a microcontroller-based design.

Of course there are circuits where microcontrollers make no sense, but [Great Scott!] makes a good case for boost converters not being one of them if you insist on DIYing. If you’re behind on the basics of DC-DC converters, fear not — we’ve covered that before.

Continue reading “The Pros And Cons Of Microcontrollers For Boost Converters”

Review: FG-100 DDS Function Generator

I don’t have a signal generator, or more specifically I don’t have a low frequency signal generator or a function generator. Recently this fact collided with my innocent pleasure in buying cheap stuff of sometimes questionable quality. A quick search of your favourite e-commerce site and vendor of voice-controlled internet appliances turned up an FG-100 low frequency 1Hz to 500kHz DDS function generator for only £15 ($21), what was not to like? I was sold, so placed my order and eagerly awaited the instrument’s arrival.

The missing function generator is a gap in the array of electronic test instruments on my bench, and it’s one that maybe isn’t as common a device as it once might have been. My RF needs are served by a venerable Advance signal generator from the 1960s, a lucky find years ago in the back room of Stewart of Reading, but at the bottom end of the spectrum my capabilities are meagre. So why do I need another bench tool?

It’s worth explaining what these devices are, and what their capabilities should be. In simple terms they create a variety of waveforms at a frequency and amplitude defined by their user. In general something described as a signal generator will only produce one waveform such as a sine or a square wave, while a function generator will produce a variety such as sine, square, and sawtooth waves. More accomplished function generators will also allow the production of arbitrary waveforms defined by the user. It is important that these instruments have some level of calibration both in terms of their frequency and the amplitude of their output. It is normal for the output to range from a small fraction of a volt to several volts. How would the FG-100 meet these requirements? Onward to my review of this curiously inexpensive offering.

Continue reading “Review: FG-100 DDS Function Generator”

Open Gaming To Everyone With A Controller Meant To Be Hacked

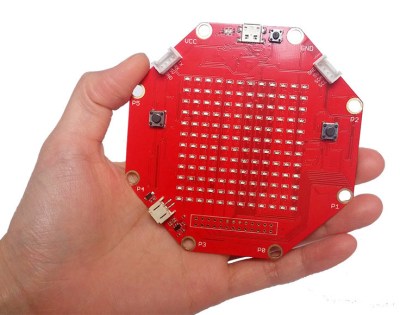
Gaming controllers have come a long way from an Atari 2600’s single button and digital joystick. As games grew more sophisticated, so did the controllers. This development had a dark side – controllers’ growing complexity have made it increasingly difficult for different-abled bodies to join in the fun. Microsoft has extended an invitation to this audience with their upcoming Xbox Adaptive Controller.

Creative minds have been working on this problem for a while, building an ecosystem of controller hacks to get more people into gaming. These projects require solving problems in two broad categories: the first is to interface with input devices that match a specific user’s needs, the second is then integration into target game device’s control infrastructure.

The value of XAC is eliminating the second category of work and making it reliable: it takes care of all the housekeeping overhead of creating a custom Xbox controller, from power management to wireless communication. As for input device interface, every control needed to play on a Xbox is individually mapped to a standard 3.5 mm jack. Some are pure digital ports, others can transfer an analog value. A 3.5mm plug is a proven consumer-friendly interface that’s easy to work on by anyone who wants to pick up a soldering iron, making this array of jacks a wide-open gateway to limitless possibilities. The 3.5 mm jacks make it easy to build specific configurations, and make it easy for less-technical people to reconfigure for a different player or different game.

We love to see our hacker creativeness applied to help people live normal lives. Making it easy to hack up a custom gaming controller may not be earth shattering, but don’t underestimate the importance of letting people feel included. It does transform lives, one at a time. Plus, it looks like fun to play with.

Continue reading “Open Gaming To Everyone With A Controller Meant To Be Hacked”

Long PCB Shows Effects Of Ludicrous Speed

Transmission lines can seem like magic. When you make use of them it seems strange that a piece of wire can block or pass certain frequencies. It is less common to use transmission lines with pulses and typically your circuit’s transmission line behavior isn’t all that significant. That is, until you have to move a signal a relatively long distance. [Robert Baruch] has been using a long PCB to test pulse behavior on a bus he’s working on. He actually has a few videos in this series that are worth watching.

What makes it interesting is that [Robert] has enough distance on the board to where light-speed effects show up. By using a very nice DPO7104 oscilloscope and a signal generator, he shows how the signal reflects on the line at various points, adding and subtracting from it. The measurements matched theory fairly closely. You shouldn’t expect them to match exactly because of small effects that occur randomly throughout the system.

Continue reading “Long PCB Shows Effects Of Ludicrous Speed”

Arduino Star Tracker Raises The Bar

Proving that astrophotography doesn’t have to break the bank, [Gerald Gattringer] has recently documented his DIY “barn door” style star tracker which is built almost entirely from scratch. Short of the Arduino and stepper motor, all the components were either made by hand or are standard hardware store finds.

The build starts with three aluminum plates which [Gerald] cut by hand with an angle grinder. He then drilled all the necessary screw holes and a rectangular opening for the threaded rod to pass through. He even used epoxy to mount a nut to the bottom plate which would eventually attach it to the tripod.

The plates were then roughed up and spray painted black so they wouldn’t reflect light. The addition of a couple of screws, nuts, and a standard hinge.

Motion is provided by a 28BYJ-48 stepper which is connected to the drive nut by way of a belt. The spinning nut is used to raise and lower the threaded rod which opens and closes the “door”. To control the motor, [Gerald] is using an Arduino Nano coupled with a ULN2003 Darlington array which live on a routed PCB he made with his school’s Qbot MINImill. While some might say the Arduino is unnecessary for this project, it does make the final calibration of the device much easier.

We’ve covered a number of similar star trackers here on Hackaday, including one that you crank by hand. But the professional looking final result really makes this build stand out.

Location Sharing With Google Home

With Google’s near-monopoly on the internet, it can be difficult to get around in cyberspace without encountering at least some aspect of this monolithic, data-gathering giant. It usually takes a concerted effort, but it is technically possible to do. While [Mat] is still using some Google products, he has at least figured out a way to get Google Home to work with location data without actually sharing that data with Google, which is a step in the right direction.

[Mat]’s goal was to use Google’s location sharing features through Google Home, but without the creepiness factor of Google knowing everything about his life, and also without the hassle of having to use Google Maps. He’s using a few things to pull this off, including a NodeRED server running on a Raspberry Pi Zero, a free account from If This Then That (IFTTT), Tasker with AutoRemote plugin, and the Google Maps API key. With all of that put together, and some configuration of IFTTT he can ask his Google assistant (or Google Home) for location data, all without sharing that data with Google.

This project is a great implementation of Google’s tools and a powerful use of IFTTT. And, as a bonus, it gets around some of the creepiness factor that Google tends to incorporate in their quest to know all the data.

Continue reading “Location Sharing With Google Home”

Prop WWII Machine Gun Courtesy Of Home Depot

There’s perhaps nothing worse than working on a project and realizing you don’t have the part you need to complete it. You look through all your stuff twice, maybe three times, on the off chance it’s hiding somewhere. Perhaps even reach out to a few nearby friends to see if they might have something you can use. Forget local stores, what you need is so specific that nobody’s going to keep it in stock. You’re stuck, and now everything has to be put on hold.

That’s precisely what happened to [Nathan Cragun] recently. He needed a Japanese Type 96 Light Machine Gun for a particular scene in the independent World War II film he’s working on, and couldn’t find one anywhere. Out of options, he ended up building a replica with parts from the hardware store. OK, so it isn’t exactly like being short a passive component or two on that new PCB you’re putting together. But while we can’t say a project of ours has ever been short a 70+ year old Japanese machine gun, we can definitely relate to the feeling.

To start his build, [Nathan] printed out a full size diagram of the Type 96 and starting placing PVC pipes on top of it to get a sense for how it would all come together. Once the basic tubular “skeleton” of the weapon was completed, he moved on to cutting the rest of the parts out of EVA foam.

The major pieces that needed to be made were the stock and receiver, but even small details like the spiral ribbing on the barrel and the sights were created to scale using pieces of foam. In a particularly nice touch, [Nathan] even made the magazine removable. If we had to guess, some Japanese soldiers will be shown reloading the weapon onscreen for added authenticity.

The important thing to remember with a filming prop like this is that it doesn’t need to look perfect, just close. It might be used in the background, or seen only for a second during a fast pan. Even in professionally produced TV and movies, many of the props are little more than carved foam. With the excellent job [Nathan] did painting and weathering this build, we have no doubt it will look completely believable in the final production.

We’re no strangers to prop builds here at Hackaday, but they are generally of the science fiction or video game variety, so a historical build is a nice change of pace.