LED “Candle” Gets The 555 Treatment

Regular readers may recall we recently covered a neat Arduino trick that allowed you to “blow out” an LED as if it was a candle. The idea was that the LED itself could be used as a rudimentary temperature sensor, and the Arduino code would turn the LED on and off when a change was detected in its forward voltage drop. You need to oversample the Arduino’s ADC to detect the few millivolt change reliably, but overall it’s pretty simple once you understand the principle.

But [Andrzej Laczewski], like many of our beloved readers, feels the Arduino and other microcontrollers can be a crutch if used exclusively. So he set out to replicate this hack with that most cherished of ICs, the 555 timer. In the video after the break, he demonstrates his “old-school” LED candle for anyone who thinks the only way to control an LED is with digitalWrite.

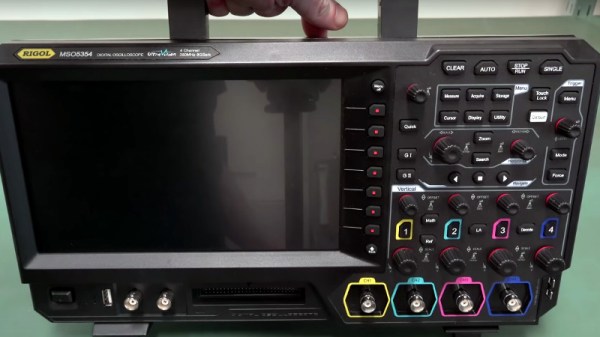
Not to say it’s easy to replicate the original Arduino project with a 555, or that it’s even practical. [Andrzej] simply wanted to show it was possible, which is something we always respect around these parts. He goes into great detail on how he developed and tested the circuit, even including oscilloscope screenshots showing how the different components work together in real-time. But the short version is that a MOSFET is used to turn the LED on and off, a comparator detects change in the LED’s voltage drop, and the 555 is used to control how long the LED stays off for.

Ever the traditionalist, [Andrzej] wrapped up this build by etching his own PCB using a variation of the classic laser toner transfer method. If this all looks a bit too much like Black Magic to you, there’s no shame in sticking with the Arduino version. At 1/20th of the parts count, and with no calibration required, who’s to say which version is “simpler”.

Continue reading “LED “Candle” Gets The 555 Treatment”

Monitoring blinking LED for home power usage

Monitoring Power By Counting Blinks

What do you do when you want to add a new feature to some electronics but you can’t or don’t want to tear into the guts? You look for something external with which you can interface. We like these hacks because they take some thinking outside the box, literally and figuratively, and often involve an Aha! moment.

[Simon Aubury’s] big household load was electric heating and his ancient heaters didn’t provide any way to monitor their usage. His power meters weren’t smart meters and he didn’t want to open them up. But the power meters did have an external LED which blinked each time 1 Wh was consumed. Aha! He could monitor the blinks.

Home power usage graph
Maximum is white, average is orange, and minimum is blue.

Doing so was simple enough. Just point photoresistors at the two meter’s LEDs and connect them and capacitors to a Raspberry Pi’s GPIO pins. Every time a pulse is detected, his Python code increments the LED’s counter and every fifteen minutes he writes the counters to an SQL database. Analysing his data he saw that nothing much happens before 5 AM and that the lowest daytime usage is around noon. The maximum recorded value was due to a heater accidentally being left on and the minimum is due to a mini holiday. Pretty good info given that all he had to go on was a blinking light.

Where else are there LED indicators which you can tap into? Here’s an only slightly more invasive usage where a washing machine’s “end of cycle” LED  was removed and the power going to it was rerouted to an Arduino for remote monitoring.

GPS Overlays Give Real Life Racing A Video Game Feel

Racing is certainly exciting for the person rocketing around the track fast enough to get the speedometer into the triple digits, and tends to be a decent thrill for the spectators if they’ve got good seats. But if you’re just watching raw race videos on YouTube from the comfort of your office chair it can be a bit difficult to appreciate. There’s a lack of context for the viewer, and it can be hard to get the same sense of speed and position that you’d have if you saw the event first hand.

In an effort to give his father’s racing videos a bit more punch, [DusteD] came up with a clever way of adding video game style overlays to the recordings. The system provides real-time speed, lap times, and even a miniature representation of the track complete with a marker to show where the action is taking place. The end result is that recordings of Dad’s exploits on the track could pass as gameplay footage from Gran Turismo (we know GT doesn’t have motorcycles, but you get the idea).

The first part of the system is the tracker itself, which consists of a GPS receiver, an Arduino Pro Micro, and an SD card module. [DusteD] powers the device with two 18650 cells in parallel, and a DC-DC boost converter to step it up to 5V. Everything is contained in a 3D printed enclosure that he designed in OpenSCAD, with the only external elements being a toggle switch, a momentary switch, and most critically, a set of LEDs.

These LEDs play into the second part of the system, the software. The blinking LEDs are positioned so they’ll get picked up by the camera, which is then used to help synchronize the data stored on the SD card with the video. [DusteD] came up with some software that will take the speed and position information from the card, and turn it into PNG files with transparent backgrounds. These are then placed on top of the video with the help of FFmpeg. It takes a little adjustment to get everything lined up properly, but as the video after the break shows the end result is very impressive.

This build reminds us of the Raspberry Pi powered GPS helmet camera we featured a few years back, and it’s interesting to see how the two projects achieved what’s essentially the same goal in different ways.

Continue reading “GPS Overlays Give Real Life Racing A Video Game Feel”

Make The Surface Dial Do More Things, Such As MIDI

The Surface Dial is a $100+ rotary control. You can turn it, and it’ll make some basic stuff happen on your Microsoft Surface. It’s silver and sleek and elegant but fundamentally, it just works via emulated keyboard shortcuts. This doesn’t really do much for translating analog rotational motion into digital feedback in a nice way, so [SaveTheHuman5] created Elephant to fix this issue.

As standard, there are two ways to work with the Surface Dial as an end-user. The easiest way is to use existing utilities to map dial actions to shortcut keys. However, for interfacing with knobs and sliders in user interfaces, this is clunky. Instead, [SaveTheHuman5] drilled down and created their own utility using the Surface Dial API provided by Microsoft. This allows raw data to be captured from the dial and processed into whatever interactions your heart desires – as long as you’ve got the coding muscles to do it!

The Elephant software allows the knob to be used in two distinct modes – mouse capture, and MIDI. Mouse capture allows one to use a regular mouse to select UI objects, such as knobs in a music application, and then turn the Surface Dial to adjust the control. Anyone that’s struggled with tiny emulated rotary controls on a VST synth before would instantly know the value of this. In MIDI mode, however, the knob simply presents itself as a MIDI device outputting commands directly which would be more useful in performance environments in particular.

Overall, it’s a tidy hack of an otherwise quite limited piece of hardware – the only thing we’d like to see is more detail on how it was done. If you’ve got a good idea on how this could work, throw it down in the comments. And, if your thirst for rotary controls is still not satiated, check out this media controller. Video after the break.

Continue reading “Make The Surface Dial Do More Things, Such As MIDI”

A Servo Powered Robotic Arm, But Like You’ve Never Seen Before

We’ve written about a lot of DIY robotic arms. Some of them are high-performance, some are inexpensive, and some are just uniquely fun. This one certainly falls into the last category; whilst watching an episode of Black Mirror, [Gear Down For What] was struck by inspiration for a thin robotic limb. After some iterations he has a final prototype, and it’s quite something to see in action.

To make a robotic arm as slender as possible, the actuators can’t be mounted on the arm itself but must instead drive the arm remotely. There are a number of ways of doing this, and though [Gear Down For What] considered using pneumatics or hydraulics, he opted to keep it simple with RC servos which produced a nifty solution that we really like.

The arm is made out of a series of 3D printed ball joints, allowing rotation in any direction. The tricky bit is transferring the force from the servos to each joint. Initially bare fishing line was considered, but this made the remote joints difficult to control when lower joints were moving. The solution was to use the fishing line inside of tubing, similar to the way that bike brakes operate. This allows the force to be carried to the appropriate joint regardless of lower movement. Each joint needs an x and y tension to allow it to rotate in any direction, which means an army of sixteen servos is needed to operate the eight segment arm.

Robotic arms are always fun to build and we’ve seen some pretty neat uses for them, such as mapping magnetic fields in 3D, or teaching sign language.

Continue reading “A Servo Powered Robotic Arm, But Like You’ve Never Seen Before”

Chemistry And Lasers Turn Any Plastic Surface Into A PCB

On the face of it, PCB production seems to pretty much have been reduced to practice. Hobbyists have been etching their own boards forever, and the custom PCB fabrication market is rich with vendors whose capabilities span the gamut from dead simple one-side through-hole boards to the finest pitch multilayer SMD boards imaginable.

So why on Earth would we need yet another way to make PCBs? Because as [Ben Krasnow] points out, the ability to turn almost any plastic surface into a PCB can be really handy, and is not necessarily something the fab houses handle right now. The video below shows how [Ben] came up with his method, which went down a non-obvious path that was part chemistry experiment, part materials science. The basic idea is to use electroless copper plating, a method of depositing copper onto a substrate without using electrolysis.

This allows non-conductive substrates — [Ben] used small parts printed with a Formlabs SLA printer — to be plated with enough copper to form solderable traces. The chemistry involved in this is not trivial; there are catalysts and surfactants and saturated solutions of copper sulfate to manage. And even once he dialed that in, he had to figure out how to make traces and vias with a laser cutter. It was eventually successful, but it took a lot of work. Check out the video below to see how he got there, and where he plans to go next.

You’ve got to hand it to [Ben]; when he decides to explore something, he goes all in. We appreciate his dedication, whether he’s using candles to explore magnetohydrodynamics or making plasma with a high-speed jet of water.

Continue reading “Chemistry And Lasers Turn Any Plastic Surface Into A PCB”

This Is Your Solution For Open Source Motion Tracking

The HTC Vive Tracker adds real-world objects to your virtual world. While these real-world objects in virtual environments are now mostly limited to a Nintendo Zapper for a Duck Hunt clone and a tennis racket, the future is clear: we’re going to be playing Duck Hunt and Wii Sports while wearing headsets. The future is so bright, it burns.

Of course, with any piece of neat computing hardware, there’s an opportunity for building an Open Source clone. That’s what [Drix] is doing with his Hackaday Prize entry. He’s created an Open Source Vive Tracker. It’s called the HiveTracker, and it is right now the best solution for tracking objects in a 3D space.

After a few missteps with ultrasonic and magnetic approaches, the team decided to piggyback on the HTC Vive lighthouses. These two base stations scan a laser beam across the room, first vertically, then horizontally. It’s an incredible piece of technology that [Alan Yates] talked about at the 2016 Hackaday Superconference.

While most microcontrollers don’t operate fast enough to see these laser sweeps, the team behind the HiveTracker found one microcontroller, with Bluetooth, and a feature called ‘PPI’. This programmable peripheral interconnect is kinda, sorta like a cross-bar, but designed for more real-time control of applications. With the right software, the team behind the HiveTracker was able to detect the lighthouses and send position and orientation data back to a computer.

This is a stupendous amount of work, and the results are remarkable. You can check out the video below and see that, yes, this is a real, Open Source Vive Tracker.

Continue reading “This Is Your Solution For Open Source Motion Tracking”