Collecting old CPUs and firing them up again is all the rage these days, but how do you know if they will work? For many of these ICs, which ceased production decades ago, sorting the good stuff from the defective and counterfeit is a minefield.
Testing old chips is a challenge in itself. Even if you can find the right motherboard, the slim chances of escaping the effect of time on the components (in particular, capacitor and EEPROM degradation) make a reliable test setup hard to come by.
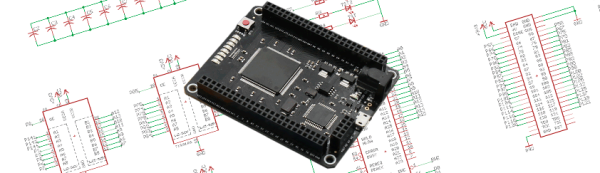
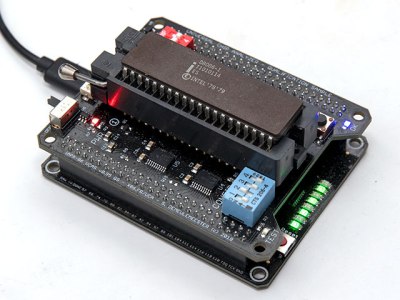
Enter [Samuel], and the Universal Chip Analyzer (UCA). Using an FPGA to emulate the motherboard, it means the experience of testing an IC takes just a matter of seconds. Why an FPGA? Microcontrollers are simply too slow to get a full speed interface to the CPU, even one from the ’80s.
So, how does it actually test? Synthesized inside the FPGA is everything the CPU needs from the motherboard to make it tick, including ROM, RAM, bus controllers, clock generation and interrupt handling. Many testing frequencies are supported (which is helpful for spotting fakes), and if connected to a computer via USB, the UCA can check power consumption, and even benchmark the chip. We can’t begin to detail the amount of thought that’s gone into the design here, from auto-detecting data bus width to the sheer amount of models supported, but you can read more technical details here.
The Mojo v3 FPGA development board was chosen as the heart of the project, featuring an ATmega32U4 and Xilinx Spartan 6 FPGA. The wily among you will have already spotted a problem – the voltage levels used by early CPUs vary greatly (as high as 15V for an Intel 4004). [Samuel]’s ingenious solution to keep the cost down is a shield for each IC family – each with its own voltage converter.
On Saturday, the Hackaday Community from across Ireland and other parts of Europe poured into the performance hall at Dublin’s Project Arts Centre for a massive collection of talks. From rediscovering century’s old technology, to cutting edge research projects, we heard talks from dozens of attendees on the technology that is interesting them most right now.
Choosing what to share about last weekend’s Uncon has been a particularly taxing process. So many and varied were the projects presented, and such was their high standard, that a writer faces a significant challenge to fit them into a single report. But we’ll give it a try. Read on for highlights of what was a weekend we will remember forever.
[Rachel]’s about to lull us into a false sense of security with talk of fashion, then go for the eyeballs!
From Wearables to Lab-Grown Eyeballs
Dublin by early April has lost some of winter’s chill, but the sun hadn’t regained control enough for the populace to have shed their coats and boots. It was in a slightly damp Temple Bar then that the Hackaday faithful convened at the Project Arts Centre, temporarily forsaking for us its role as one of Ireland’s most cutting-edge contemporary performing arts venues. We’d spent the previous day rounding up what seemed like Ireland’s entire stock of snack food to keep everyone happy, so it was into the upstairs performance hall for the day’s festivities. After putting in a talk topic and stopping by the swag table for goodies from our sponsor, DesignSpark, we all packed into the hall and began the Uncon.
First to brave the floor was [Rachel “Konichiwakitty” Wong], who started by talking about her interest in and flair for wearable electronics applied to fashion. This is not however what she does for a living, and she soon switched from the kawaii to the everyday work of a stem cell research scientist. This section of her talk was entitled “The Future Of Medicine, stem cells, tissue engineering, off-the-shelf pick-n-mix organs”. Because of the work being done by people like her our hospitals may one day be able to prescribe custom 3D-printed organs for their patients, and her talk was a fascinating overview of that field for those of us who can not grow eyeball tissue on our benches.
There followed the exciting Unconference format, in which attendees were scheduled on-the-fly in four talk sessions throughout the day. Each deliver a seven-minute presentation and although it’s not compulsory to give an Unconference talk, there were definitely more than enough people wanting to give it a go. It’s impossible to mention them all in a single Hackaday piece, but here follows a selection of the many that caught our eye.
Judging by the number of compilations that have been put online, one of the not-so-secret vices of the YouTube generation must be the watching of crash videos. Whether it is British drivers chancing their luck on level crossings, Russians losing it at speed on packed snow, or Americans driving tall trucks under low bridges, these films exert a compelling fascination upon the viewing public intent on deriving entertainment from the misfortunes of others. The footage is often peripheral or grainy, having inevitably been captured by a dashcam or a security camera rather than centre-stage on a broadcast quality system with professional operation. You can’t predict when such things will happen.
There was one moment, back in 1984, when predicting a major crash was exactly what you could do. It was a national event, all over the TV screens, and one which was watched by millions. The operators of British nuclear power stations wished to stage a public demonstration of how robust their transport flasks for spent nuclear fuel rods were, so after all the lab tests they could throw at one they placed it on a railway test track and crashed a 100mph express train into it.
Water escaping during drop test.
This was as much a PR stunt as it was a scientific endeavour, and they lost no time in promoting it across all media. The film below the break was part of this effort, and takes us through the manufacture of the flask forged in one piece from huge billets of steel, before showing us the tests to which it was subjected. The toughest of these, a drop-test onto a corner of a fully laden flask, resulted in a small escape of the water contained within it. It was thus decided to conduct the ultimate test to ensure full public confidence in nuclear transport.
The Old Dalby test track is a section of a closed-to-passengers line in the English Midlands that was retained by British Railways as a proving ground for new locomotives. In the ultimate test of rail transport for nuclear waste, a flask was placed on its side across a piece of the track, and a train formed of a withdrawn 1960s locomotive and a short rake of 1950s carriages was accelerated without a driver over several miles to 100mph.
An instant before impact, we see the underside of the derailed car. The flask is between it and the locomotive.
[Nigel Harris] for Rail magazine wrote an almost funerial description of the destruction of locomotive 46009 25 years later in 2009, and as he reported the flask survived with only superficial damage and a tiny loss in pressure. The event was hailed as a success by the nuclear industry, before fading from the public consciousness as nuclear power station operators prefer to remain out of the news.
It is questionable how much the Old Dalby crash was for the cameras and the public, and how much it was for the scientists and engineers. But such destructive tests do serve as a means to gain vital test data that could not be harvested any other way, and have been performed more than once in the aviation industry. Later in the same year a Boeing 720 was crashed for science in the USA, while more recently in 2012 a Boeing 727 was crashed in Mexico.
Crashing an express train into a nuclear flask is something not likely to be seen again, it was a one-off event. But one thing’s for sure, our inability to turn away from watching a train wreck is nothing new. YouTube and ubiquitous cameras certainly make crashes available with a few keystrokes. But from the 1984 cask crash test, to the the spectacle of Crush, Texas back in 1896, the sheer power shown in these crashes seems to have a siren song effect on us.
The Internet of Things is just around the corner, and somehow or another, all these bits of intelligent dust and juice bag squeezers will have to talk to one another. One of the better ways to get IoT bits talking to each other is MQTT, Message Queuing Telemetry Transport, a protocol designed for small code footprints and limited network bandwidth. It gets a lot of IoT hype, but it’s a great alternative to HTTP for your own small projects, so that’s what we’re talking about during this week’s Hack Chat.
MQTT is a machine-to-machine connectivity protocol, very useful in remote locations, where a small code footprint is required, where bandwidth is at a premium, or for turning a lamp on and off from your phone, while sitting in the same room. It’s ideal for mobile applications, and in the twenty or so years since its creation, MQTT has made inroads into all those ‘smart’ devices around your house.
For this week’s Hack Chat, we’re going to be discussing MQTT with the entire Hackaday.io community. There are dozens of people who have built MQTT-based projects that frequent the Hack Chat, and hundreds more that want to learn. Want to get in on the ground floor of the Internet of Things? This is the Hack Chat you want to check out. It’s a community pow-wow around connected devices.
Our Hack Chats are live community events on the Hackaday.io Hack Chat group messaging. This week the crew is going to sit down around the campfire around noon, Pacific time, Friday, April 13th (oooh, spooky). Want to know what time this is happening in your neck of the woods? Have a countdown timer!
Click that speech bubble to the right, and you’ll be taken directly to the Hack Chat group on Hackaday.io.
You don’t have to wait until Friday; join whenever you want and you can see what the community is talking about.
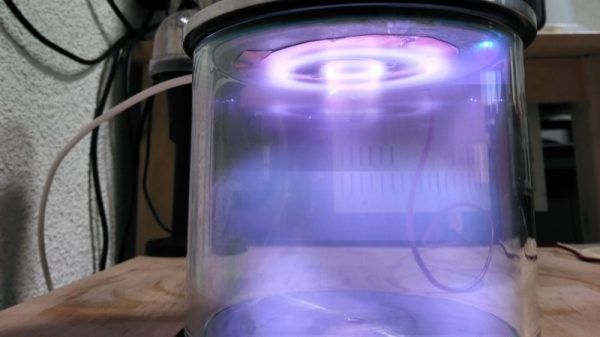
[Nixie] wants to sputter. We know, who doesn’t? But [Nixie] has a specific purpose for his sputtering: thin-film deposition, presumably in support of awesome science. But getting to that point requires a set of tools that aren’t exactly off-the-shelf items, so he’s building out a DIY sputtering rig on the cheap.
If you’re not familiar with sputtering, that’s understandable. In this context, sputtering is a process that transfers particles from one solid to another by bombarding the first solid with some sort of energetic particles, usually electrons or a plasma. When properly controlled, sputtering has applications from mass spectrometry to the semiconductor industry, where it’s used to either deposit thin films on silicon wafers or etch them away selectively.
No matter the application, sputtering needs a stable stream of plasma. [Nixie] has posted a series of articles on his blog walking us through his plasma experiments, from pulling a really strong vacuum to building a high-voltage power supply from a microwave oven transformer. It’s a project that needs a deep well of skills and tools, like glassworking, machining, and high-voltage electronics. Check out the plasma in the video below.
The image of the crackpot inventor, disheveled, disorganized, and surrounded by the remains of his failures, is an enduring Hollywood trope. While a simple look around one’s shop will probably reveal how such stereotypes get started, the image is largely not a fair characterization of the creative mind and how it works, and does not properly respect those who struggle daily to push the state of the art into uncharted territory.
That said, there are plenty of wacky ideas that have come down the pike, most of which mercifully fade away before attracting undue attention. In times of war, though, the need for new and better ways to blow each other up tends to bring out the really nutty ideas and lower the barrier to revealing them publically, or at least to military officials.
Of all the zany plans that came from the fertile minds on each side of World War II, few seem as out there as a plan to use birds to pilot bombs to their targets. And yet such a plan was not only actively developed, it came from the fertile mind of one of the 20th century’s most brilliant psychologists, and very nearly resulted in a fieldable weapon that would let fly the birds of war.
[Anjul Patney] and [Qi Sun] demonstrated a fascinating new technique at NVIDIA’s GPU Technology Conference (GTC) for tricking a human into thinking a VR space is larger than it actually is. The way it works is this: when a person walks around in VR, they invariably make turns. During these turns, it’s possible to fool the person into thinking they have pivoted more or less than they have actually physically turned. With a way to manipulate perception of turns comes a way for software to gently manipulate a person’s perception of how large a virtual space is. Unlike other methods that rely on visual distortions, this method is undetectable by the viewer.
Saccadic movements
The software essentially exploits a quirk of how our eyes work. When a human’s eyes move around to look at different things, the eyeballs don’t physically glide smoothly from point to point. The eyes make frequent but unpredictable darting movements called saccades. There are a number of deeply interesting things about saccades, but the important one here is the fact that our eyes essentially go offline during saccadic movement. Our vision is perceived as a smooth and unbroken stream, but that’s a result of the brain stitching visual information into a cohesive whole, and filling in blanks without us being aware of it.
Part one of [Anjul] and [Qi]’s method is to manipulate perception of a virtual area relative to actual physical area by making a person’s pivots not a 1:1 match. In VR, it may appear one has turned more or less than one has in the real world, and in this way the software can guide the physical motion while making it appear in VR as though nothing is amiss. But by itself, this isn’t enough. To make the mismatches imperceptible, the system watches the eye for saccades and times its adjustments to occur only while they are underway. The brain ignores what happens during saccadic movement, stitches together the rest, and there you have it: a method to gently steer a human being in a way that a virtual space is larger than the physical area available.
Embedded below is a video demonstration and overview, which mentions other methods of manipulating perception of space in VR and how it avoids the pitfalls of other methods.
 So, how does it actually test? Synthesized inside the FPGA is everything the CPU needs from the motherboard to make it tick, including ROM, RAM, bus controllers, clock generation and interrupt handling. Many testing frequencies are supported (which is helpful for spotting fakes), and if connected to a computer via USB, the UCA can check power consumption, and even benchmark the chip. We can’t begin to detail the amount of thought that’s gone into the design here, from auto-detecting data bus width to the sheer amount of models supported, but you can read more technical details here.
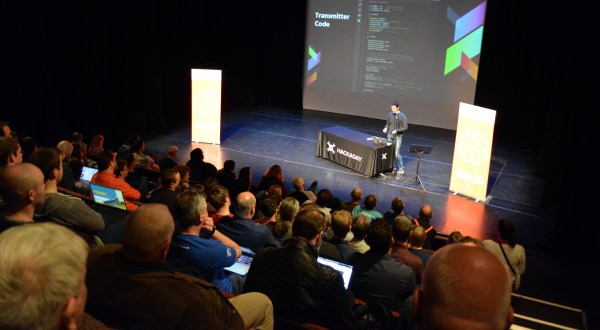
![[Rachel]'s about to lull us into a false sense of security with talk of fashion, then go for the eyeballs!](https://hackaday.com/wp-content/uploads/2018/04/rachel-konichiwakitty.jpg)