The Tiniest Working 68K System

68000 microprocessors appeared in the earliest Apple Macintoshes, the Commodore Amiga and Atari ST, and the Sega Genesis/Mega Drive among other familiar systems. If you were alive during the 16-bit era, there is a good chance that you will have owned a Motorola 68000 or one of its derivatives in a computer or game console. By the end of the 1990s it was clear that the 68K line had had its day on the desktop, but a new life for it at the consumer level was found in the PDA market. The first Motorola Dragonball was a 68000 series system-on-chip, and it was a few of these in a BGA package that [Plasmode] had in stock after ordering them in error believing them to be in a different package.

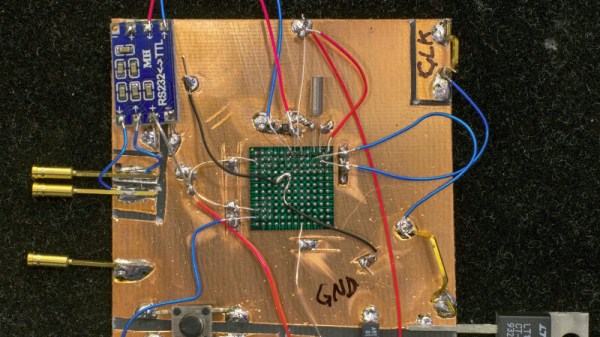
The Dragonball 68328 has an interesting bootstrap mode allowing it to run with no external ROM or RAM, and with only a serial connection to the outside world. Recognising this as having the potential for the smallest possible 68K system, he proceeded to make it happen with some impressive soldering direct to the solder balls of an upturned BGA package.

On a piece of PCB material are simply the 68328, a 32.768kHz crystal and capacitors, a MAX232 circuit for an RS232 serial connection, a reset button, and a power regulator. Using the Motorola DOS debug software which is still available for download after all these years, he was able to connect to his tiny 68K computer and run code. It’s not entirely useful, but of all the possible 68K configurations it has to be the smallest.

This isn’t the first minimal computer using only a processor chip and serial link, in the past we’ve shown you a PDP-11 in the same vein.

Biologic Additive May Lead To Self-Healing Concrete

If you get a cut or break a bone, your body heals itself. This everyday miracle is what inspired [Congrui Jin] to try to find a way to make concrete self-healing. The answer she and her colleagues are working on might surprise you. They are adding fungus to concrete to enable self-repair.

It isn’t just any fungus. The conditions in concrete are very harsh, and after testing twenty different kinds, they found that one kind — trichoderma reesei — could survive inside concrete as spores. This fungus is widespread in tropical soil and doesn’t pose any threat to humans or the ecology. Mixing nutrients and spores into concrete is easy enough. When cracks form in the concrete, water and oxygen get in and the spores grow. The spores act as a catalyst for calcium carbonate crystals which fill the cracks. When the water is gone, the fungi go back to spores, ready to repair future cracking.

Continue reading “Biologic Additive May Lead To Self-Healing Concrete”

Optical Tach Addresses The Need For Spindle Speed Control

With CNC machines, getting the best results depends on knowing how fast your tool is moving relative to the workpiece. But entry-level CNC routers don’t often include a spindle tachometer, forcing the operator to basically guess at the speed. This DIY optical spindle tach aims to fix that, and has a few nice construction tips to boot.

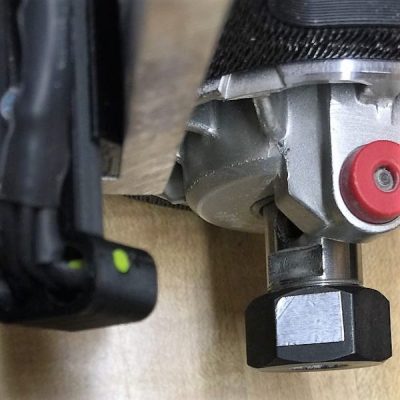
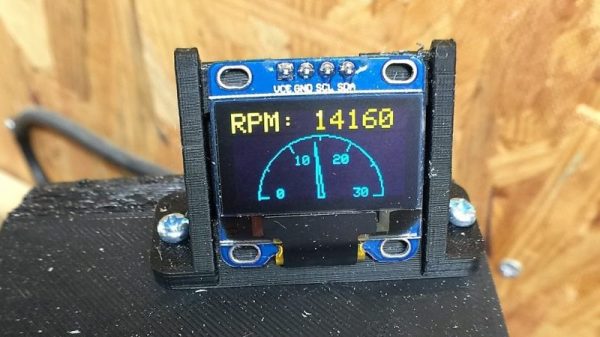
The CNC router in question is the popular Sienci, and the 3D-printed brackets for the photodiode and LED are somewhat specific for that machine. But [tmbarbour] has included STL files in his exhaustively detailed write-up, so modifying them to fit another machine should be easy. The sensor hangs down just far enough to watch a reflector on one of the flats of the collet nut; we’d worry about the reflector surviving tool changes, but it’s just a piece of shiny tape that’s easily replaced.  The sensor feeds into a DIO pin on a Nano, and a small OLED display shows a digital readout along with an analog gauge. The display update speed is decent — not too laggy. Impressive build overall, and we like the idea of using a piece of PLA filament as a rivet to hold the diodes into the sensor arm.

Want to measure machine speed but don’t have a 3D printer? No worries — a 2D-printed color-shifting tach can work too.

Continue reading “Optical Tach Addresses The Need For Spindle Speed Control”

Alexa Controls This Projector Thanks To ESP8266

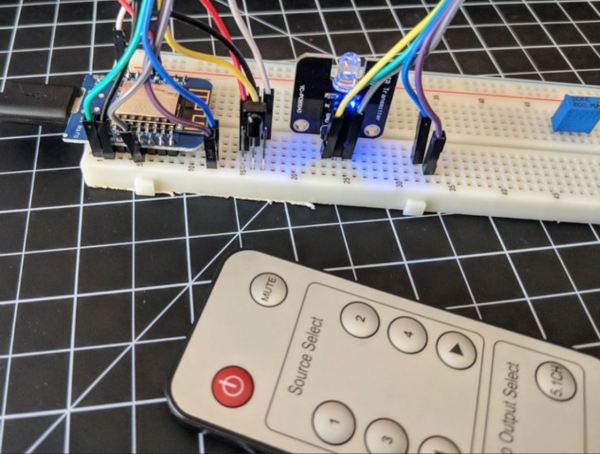
[jfessard] doesn’t have extra-sensory perception, but does have an ESP8266. The little board seems to pop up in every hack these days. Inspired by not wanting to get up from the bean-bag chair or leave the electronics-housing cabinet wide open to use an HDMI switcher, [jfessard] hacked together an Alexa-compatible projector control via the ESP8266!

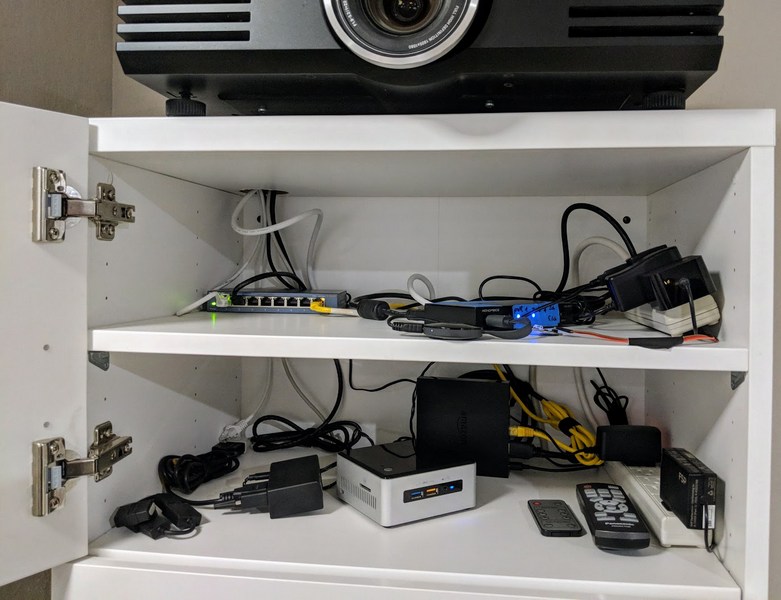
The core functionality here is the ability to turn the projector on and off, and to switch the HDMI source. [jfessard] connected the Panasonic PT-AE3000U projector to a Monoprice HDX-401TA 4×1 HDMI switcher. Tucked away in the cabinet below the projector, it is controlled using a IR LED transmitter breakout board sitting at the end of a fairly long set of jumper wire. The projector control itself is through a RS232 interface.

To make this easy to use with Amazon’s Alexa, [jfessard] turned to some libraries for the ESP8266 D1 Mini. The fauxmoesp library makes it look like a WeMo device, and the IRemoteESP8266 library made remote control code cloning a snap. One really frustrating part of this hack was the MAX232-style breakout board; getting a board to work when it’s labelled backwards takes a bit of head-scratching to figure out.

If the the projector ever gets too noisy, we suggest this hack that shushes the machine. For the moment, we’d rather take another look at this laser projector that mimics a cool ‘laser sky’ effect.

A Talking Clock For The 21st Century

The Talking Clock service is disappearing, and it’s quite possible that few of you will be aware of its passing. One of the staples of twentieth-century technology, the Talking Clock service was the only universally consumer-available source of accurate time information away from hourly radio time signals in the days before cheap radio-controlled clocks, or GPS. You’d dial (on a real dial, naturally!) a telephone number, to be greeted with a recorded voice telling you what the time would be at the following beep. Clocks were set, phone companies made a packet, and everybody was happy with their high-tech audio horology.

[Nick Sayer] used the USNO Master Clock telephone feed to see in the New Year, but had to make do with a voice from another time zone. It seems that there are no services remaining that provide one in Pacific time. His solution to the problem for a future year? Make his own Talking Clock, one that derives its time reference from GPS.

At its heart is a SkyTraq Venus838LPx miniature GPS module coupled to an ATMega32E5 microcontroller. The speech comes in the form of pre-recorded samples stored on an SD card. There is a small on-board amplifier to drive a single speaker. For extreme authenticity perhaps it could be attached to a GSM mobile phone module to provide a dial-up service, but he’s got everything he needs for a New Years Eve.

Want to hear what that that bit of nostalgia sounded like? Check out the quick clip below. As for modern replacements, we’ve had at least one talking clock here in the past, but not one using GPS.

Continue reading “A Talking Clock For The 21st Century”

Make Your Own Current Clamp Probe

If you want to measure AC or DC current with an oscilloscope, a current clamp is a great way to do it. The clamp surrounds the wire, so you don’t need to break the connection to take your measurements. These used to be expensive, although we’ve seen some under $100, if you shop. We don’t know if it was cost or principle that motivated [Electronoobs] to build his own current clamp, but he did.

This probe design is little more than a 3D printed case, an old power supply toroid, and a conventional alligator clamp to make the business end. The sensor uses a ferrite core and a hall effect sensor. The ferrite toroid is split in half, one half in each side of the clamp. An opamp circuit provides a gain of 100 to boost the hall effect sensor’s output.

In addition to building a homebrew probe, the video also shows a teardown of a Hantek current probe and explains the theory behind the different kinds of current probes, including some tricks like using a compensation winding to prevent core magnetization.

Does it work? You bet. After calibration, it did just fine. It’s not as pretty as a $100 unit, but beauty is in the eye of the beholder, and we are suckers for homebrew gear so we will say it is certainly more interesting. If you have a fair junk box (and a 3D printer), this probe could be made very inexpensively. The hall effect and a BNC connector are likely to be the most expensive parts. Even if you bought everything and used a non-printed case, we would be hard-pressed to think you’d spend more than $25.

If you want to see how the big boys do it, Keysight had a good break down last year. We’ve seen other homebrew builds for current probes and some of them are very accurate.

Continue reading “Make Your Own Current Clamp Probe”

IoT Doorman: Eye-Controlled Door For A Girl With Cerebral Palsy

Kyleigh has an eye-controlled computer on her wheelchair but something as simple as her bedroom door was still beyond her reach… until now! [Bill Binko], recently filmed a demo of an automatic, IoT door opener built for the young girl with cerebral palsy. [Bill] is a co-founder of ATMakers, an organization that enables makers interested in assistive technologies to collaborate with users to improve quality of life.

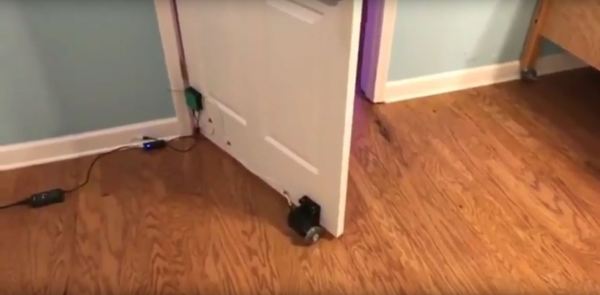
Using her eye tracking tablet (PRC Device), Kyleigh has two new icons that make the relevant call to a website, pushing a simple command to either open or close her bedroom door. The device attached to the door uses an Adafruit M0 WiFi Feather board, a DC stepper motor and wheel, a UBEC buck converter, and a potentiometer.

Since other family members are also going to be opening and closing the door, there’s potentiometer which measures the door position for proper operation next time Kyleigh wishes to use the door. The installation also maintains a fairly inconspicuous profile for the assistance it gives — the ‘brain’ is enclosed in a small box on the door, with the motor only slightly larger on the door’s base.

[Bill] believes the project has a few quibbles and wants to work out a smaller wait before the open/close process is executed and optimizing the open/close speed. You have to check out the video below to see that it works really really. We’re also excited to see Kyleigh using her gaze control to talk to an Amazon Echo. [Bill] foresee a door control improvement that links it to Alexa. And how much did it cost to improve the quality of life for this young girl? $70.

We love seeing makers help people, and cannot wait to see what 2018 will bring! If you’re looking for more inspiration, don’t miss the eye-controlled wheelchair project called Eyedrivomatic which won the 2015 Hackaday Prize. There’s also the top Assistive Technology projects from the Hackaday Prize.

Continue reading “IoT Doorman: Eye-Controlled Door For A Girl With Cerebral Palsy”