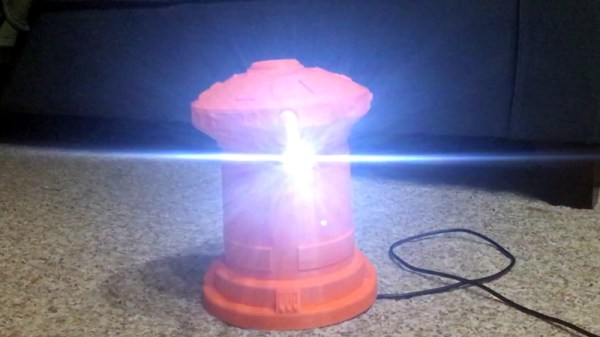
Like many of us, [Matthew Wentworth] is always looking for a reason to build something. So when he found a 3D model of the “DF.9” laser turret from The Empire Strikes Back intended for Star Wars board games on Thingiverse, he decided it was a perfect excuse opportunity to not only try his hand at remixing an existing 3D design, but adding electronics to it to create something interactive.
 As the model was originally intended for a board game, it was obviously quite small. So the first order of business was scaling everything up to twice the original dimensions. As [Matthew] notes, the fact that it still looks so good when expanded by such a large degree is a credit to how detailed the original model is. Once blown up to more useful proportions, he modified the head of the turret as well as the barrel to accept the electronics he planned on grafting into the model.
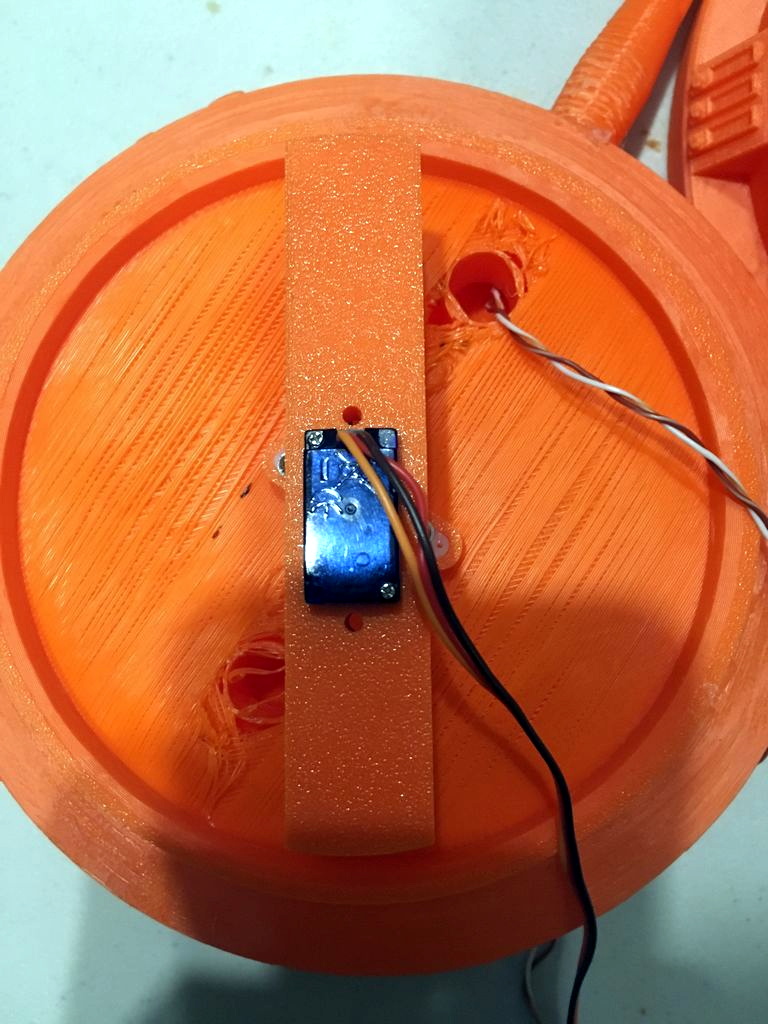
He created a mount for a standard nine gram servo inside the head of the turret which allows it to rotate, and the barrel got an LED stuck in the end. Both of which are controlled with a NodeMCU ESP8266 development board, allowing [Matthew] to control the direction and intensity of the pew-pew over WiFi. He mentions that in the future he would like to add sound effects that are synchronized to the turret rotation and LED blinking.
For the software side of the project, he used Blynk to quickly build a smartphone interface for the turret. This is the first time he had used Blynk, and reports that outside of a little trial and error, it was some of the easiest code he’s ever written for the Arduino. This is a sentiment we’ve been seeing a lot of recently towards Blynk, and it’s interesting to see how often it shows up in ESP8266 projects now.
Looking ahead [Matthew] says he wants to paint and detail the turret, as the bright orange color scheme probably wouldn’t do terribly well on Hoth. If he can manage the time, he’d also like to add it to the long list of OpenCV-powered turrets that hackers love harassing their friends and family with.
Continue reading “The Empire Strikes Back With The ESP8266” →

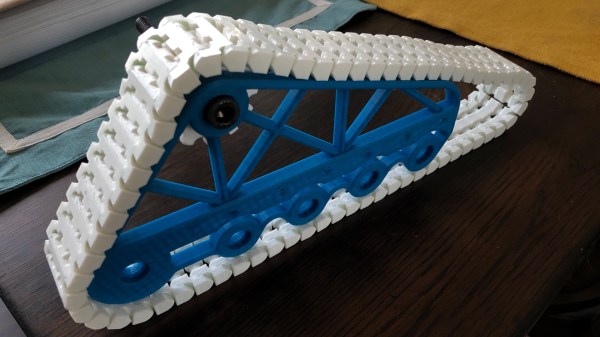
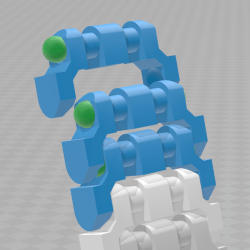 Each segment has hollows made to snugly fit 6 mm BBs (shown as green in the image here) which serve both as fasteners and bearing surfaces. Assembly requires a bit of force to snap everything together, but [AlwynxJones] judges the result worth not having to bother with bolts, wires, or other makeshift fasteners.