Wireless 4 Channel Temperature Monitor From Arduino Libraries

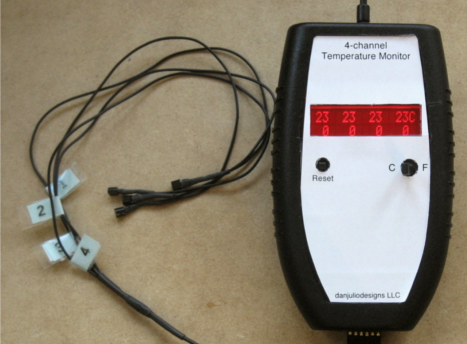
Say what you will about the Arduino platform but there certainly are a ton of libraries one can choose from. That is precisely what [Dan Julio] set out to do when building his slick looking 4 channel temperature monitor. The monitor consists of an Arduino RBBB, 2×16 character LCD and four DS18B20 1-wire digital thermometers. [Dan] also includes a bluesmirf to interface with an OS X monitoring program.  Using libraries for the Bluetooth, LCD, and temperature monitors the Arduino code is only about 200 lines, and pretty easy to follow. Check out more at [Dan]’s site.

If you’d like more temperature sensor projects check out this mug or this PIC based monitor or perhaps you’d like to keep it in the Atmel family.


Why Build A CNC Mill When You Can Have A Chess Robot Instead?

[Patrick McCabe] enjoys the challenge of playing chess against the computer but he wasn’t satisfied with the flat experience of on-screen gaming. No problem, he just built his own gantry-style chess robot that he can play against. Don’t be confused, he still doesn’t have to touch the pieces, but instead uses the dedicated control board seen on the left of the image above. The robotic arm that is mounted on a gantry takes care of moves for both players.

It’s a pretty normal CNC build, using four stepper motors to slide the moving bits along precision rod. An Arduino Mega drives the system, with a PC doing the heavy lifting using a program called My Robot Lab.

We certainly like it that [Patrick] spent a little bit of time making the cabinet and visible parts look nice. Chess is a civilized game and unfinished parts would be out-of-place. We didn’t see it in his writeup, but the one feature we’re really hoping he has implemented is the ability to have the robot automatically reset the board at the beginning of a game.

As you might have guess, you’ll find embedded video after the break.

Continue reading “Why Build A CNC Mill When You Can Have A Chess Robot Instead?”

BAMF2011: Google’s SKPR Bot, Not For Arachnophobes

Google’s Maker Faire exhibit space is swarmed with robots…er, androids. Amidst some cool bipeds and Segway-balancers, our inner sci-fi nerd was most smitten with this hexapod design, which they’ve dubbed SKPR Bot. The “Skipper” is on hand to showcase the ease of various Google technologies: SketchUp, Android OS and the Android Open Accessory Development Kit. The whole project came together in less than six weeks.

18 servos are mounted to a framework designed in SketchUp and laser-cut by Ponoko. The low-level servo PWM control is handled by the Dev Kit (essentially a rebadged Arduino Mega, as we’ve seen), while an Android OS phone provides a slick GUI and handles all the inverse kinematics calculations required as the robot takes each step. The coolest bit is that it’s all up for grabs. At this moment you’ll have to scrounge around the ’net a bit to find the plans and code, but some time post-Faire they plan to bring everything together at the SKPR Bot site.

Serial Port JTAG Programmer

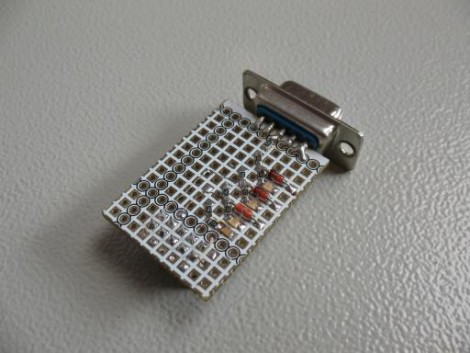
If you’re planning to do some hacking with CPLD or FPGA chips you’ll need a way to program them. JTAG is one of the options and here’s a cheap method that uses the serial port (translated).

This method requires only four signals (TDI, TMS, TCK and TDO) plus ground. But the problem is that an RS232 serial port operates with 12V logic levels and the JTAG side of the programmer needs to operate with the logic levels native to the device you’re programming. Commercial programmers use a level convert IC to take care of this for you, but that doesn’t mesh with the cheap goal of this project. Instead, [Nicholas] uses Zener diodes and voltage dividers to make the conversion. There is also an LED for each data signal to give some feedback if you’re having trouble.

You can use this along with a programming application that [Nicholas] whipped up using Visual Studio. It works well via the serial port, but he did try programming with a USB-to-Serial dongle. He found that this method slows the process down to an unbearable 5-minutes. Take a look, maybe you can help to get that sloth-like programming up to a manageable speed.

[Thanks Alex]

It’s Like… I Can Tell The Time Just By The Color, Man

[Alex] has reduced the resolution of his timepiece as a trade-off for speedy-readability. At least that’s what he claims when describing his color-changing clock. It uses a ShiftBrite to slowly alter the hue of the clock based on the current time. The concept is interesting: 12:00 starts off at white and slowly fades to green at 3:00, blue at 6:00, red at 9:00, and back to white by 12:00 to start the process over again. He has gotten to the point where he can get the time within about 15 minutes just with a quick look. But he did need to spend a few days acquiring the skill by having the color clock sit next to a traditional digital clock.

The build is pretty simple and we’d bet you already have what you need to make your own. [Alex] is really just proving a concept by using the ShiftBrite and an mBed, there’s no precision RTC involved here. So grab your microcontroller of choice, and an RGB LED of your own and see if you can’t recreate his build.

Of course you could always choose to build a color-based timepiece that’s even harder to read.

BAMF2011: Lasersaur Is One BIG Laser Cutter!

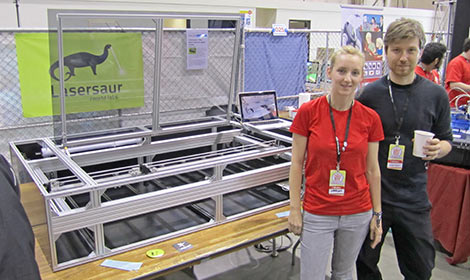
Psst…wanna buy a laser cutter, but not ready to sell your internal organs? Nortd Labs’ Lasersaur project aims to create an open source large-format laser cutter/engraver that undercuts (har har!) the cost of commercial models by an order of magnitude.

Continue reading “BAMF2011: Lasersaur Is One BIG Laser Cutter!”

Hacking For Feline Enjoyment

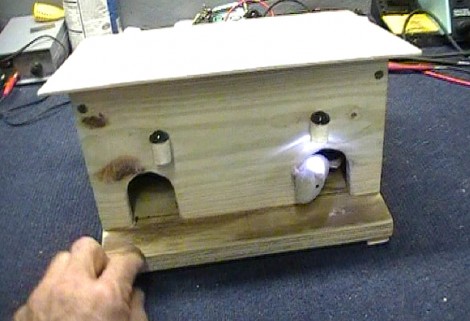
[Dino] is staying true to his goal of hacking one project every week. This time around, he’s working on a toy that will amuse and delight his cats. The project centers around a mouse house that has two holes where mice can stick their heads out. When they do, a little LED lamp illuminates their appearance in hopes to catch the eye of your lazy kitty.

The mechanism that automates this device is quite clever and reminds us of the most useless machine. That is, the armature that holds a mouse on either end actuates a limiting switch in the middle of the box when it moves to expose one of the mice. Each of those mice is attached with a rod, along side a leaf switch that makes the mouse retreat when boinked on the head by the cat.

It only takes [Dino] about six minutes to walk us through the build in the video after the break. What follows is a walk through of the wiring and some playtime with the family pets. Despite the intended purpose, it looks like the dog is much more interested than the cat. Either way, it’s a winner in our book.

Continue reading “Hacking For Feline Enjoyment”