Reaching orbit around Earth is an incredibly difficult feat. It’s a common misconception that getting into orbit just involves getting very high above the ground — the real trick is going sideways very, very fast. Thus far, the most viable way we’ve found to do this is with big, complicated multi-stage rockets that shed bits of themselves as they roar out of the atmosphere.
Single-stage-to-orbit (SSTO) launch vehicles represent a revolutionary step in space travel. They promise a simpler, more cost-effective way to reach orbit compared to traditional multi-stage rockets. Today, we’ll explore the incredible potential offered by SSTO vehicles, and why building a practical example is all but impossible with our current technology.
A Balancing Act
The SSTO concept doesn’t describe any one single spacecraft design. Instead, it refers to any spacecraft that’s capable of achieving orbit using a single, unified propulsion system and without jettisoning any part of the vehicle.
Today’s orbital rockets shed stages as they expend fuel. There’s one major reason for this, and it’s referred to as the tyranny of the rocket equation. Fundamentally, a spacecraft needs to reach a certain velocity to attain orbit. Reaching that velocity from zero — i.e. when the rocket is sitting on the launchpad — requires a change in velocity, or delta-V. The rocket equation can be used to figure out how much fuel is required for a certain delta-V, and thus a desired orbit.
The problem is that the mass of fuel required scales exponentially with delta-V. If you want to go faster, you need more fuel. But then you need even more fuel again to carry the weight of that fuel, and so on. Plus, all that fuel needs a tank and structure to hold it, which makes things more difficult again.
Work out the maths of a potential SSTO design, and the required fuel to reach orbit ends up taking up almost all of the launch vehicle’s weight. There’s precious mass left over for the vehicle’s own structure, let alone any useful payload. This all comes down to the “mass fraction” of the rocket. A SSTO powered by even our most efficient chemical rocket engines would require that the vast majority of its mass be dedicated to propellants, with its structure and payload being tiny in comparison. Much of that is due to Earth’s nature. Our planet has a strong gravitational pull, and the minimum orbital velocity is quite high at about 7.4 kilometers per second or so.
Stage Fright
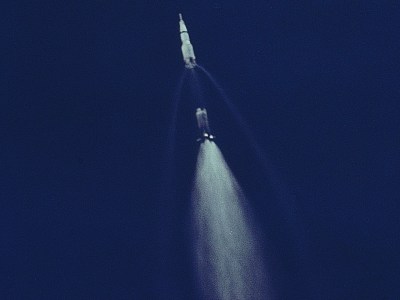
Historically, we’ve cheated the rocket equation through smart engineering. The trick with staged rockets is simple. They shed structure as the fuel burns away. There’s no need to keep hauling empty fuel tanks into orbit. By dropping empty tanks during flight, the remaining fuel on the rocket has to accelerate a smaller mass, and thus less fuel is required to get the final rocket and payload into its intended orbit.

So far, staged rockets have been the only way for humanity to reach orbit. Saturn V had five stages, more modern rockets tend to have two or three. Even the Space Shuttle was a staged design: it shed its two booster rockets when they were empty, and did the same with its external liquid fuel tank.
But while staged launch vehicles can get the job done, it’s a wasteful way to fly. Imagine if every commercial flight required you to throw away three quarters of the airplane. While we’re learning to reuse discarded parts of orbital rockets, it’s still a difficult and costly exercise.
The core benefit of a SSTO launch vehicle would be its efficiency. By eliminating the need to discard stages during ascent, SSTO vehicles would reduce launch costs, streamline operations, and potentially increase the frequency of space missions.
Pushing the Envelope
It’s currently believed that building a SSTO vehicle using conventional chemical rocket technology is marginally possible. You’d need efficient rocket engines burning the right fuel, and a light rocket with almost no payload, but theoretically it could be done.
Ideally, though, you’d want a single-stage launch vehicle that could actually reach orbit with some useful payload. Be that a satellite, human astronauts, or some kind of science package. To date there have been several projects and proposals for SSTO launch vehicles, none of which have succeeded so far.
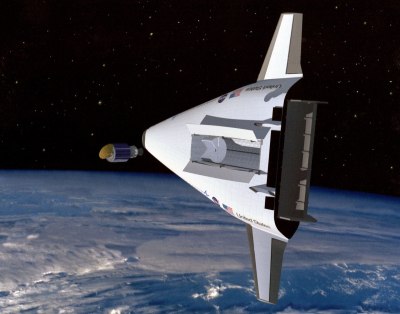
One notable design was the proposed Skylon spacecraft from British company Reaction Engines Limited. Skylon was intended to operate as a reusable spaceplane fueled by hydrogen. It would take off from a runway, using wings to generate lift to help it to ascend to 85,000 feet. This improves fuel efficiency versus just pointing the launch vehicle straight up and fighting gravity with pure thrust alone. Plus, it would burn oxygen from the atmosphere on its way to that altitude, negating the need to carry heavy supplies of oxygen onboard.
Once at the appropriate altitude, it would switch to internal liquid oxygen tanks for the final acceleration phase up to orbital velocity. The design stretches back decades, to the earlier British HOTOL spaceplane project. Work continues on the proposed SABRE engine (Syngergetic Air-Breathing Rocket Engine) that would theoretically propel Skylon, though no concrete plans to build the spaceplane itself exist.
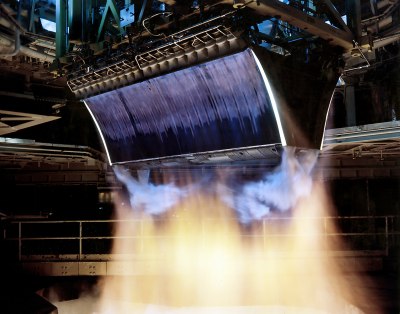
Lockheed Martin also had the VentureStar spaceplane concept, which used an innovative “aerospike” rocket engine that maintained excellent efficiency across a wide altitude range. The company even built a scaled-down test craft called the X-33 to explore the ideas behind it. However, the program saw its funding slashed in the early 2000s, and development was halted.
McDonnell Douglas also had a crack at the idea in the early 1990s. The DC-X, also known as the Delta Clipper, was a prototype vertical takeoff and landing vehicle. At just 12 meters high and 4.1 meters in diameter, it was a one-third scale prototype for exploring SSTO-related technologies
It would take off vertically like a traditional rocket, and return to Earth nose-first before landing on its tail. The hope was that the combination of single-stage operation and this mission profile would provide extremely quick turnaround times for repeat launches, which was seen as a boon for potential military applications. While its technologies showed some promise, the project was eventually discontinued when a test vehicle caught fire after NASA took over the project.

Ultimately, a viable SSTO launch vehicle that can carry a payload will likely be very different from the rockets we use today. Relying on wings to generate lift could help save fuel, and relying on air in the atmosphere would slash the weight of oxidizer that would have to be carried onboard.
However, it’s not as simple as just penning a spaceplane with an air-breathing engine and calling it done. No air breathing engine that exists can reach orbital velocity, so such a craft would need an additional rocket engine too, adding weight. Plus, it’s worth noting a reusable launch vehicle would also still require plenty of heat shielding to survive reentry. One could potentially build a non-reusable single-stage to orbit vehicle that simply stays in space, of course, but that would negate many of the tantalizing benefits of the whole concept.
Single-stage-to-orbit vehicles hold the promise of transforming how we access space by simplifying the architecture of launch vehicles and potentially reducing costs. While there are formidable technical hurdles to overcome, the ongoing advances in aerospace technology provide hope that SSTO could become a practical reality in the future. As technology marches forward in materials, rocketry, and aerospace engineering in general, the dream of a single-stage path to orbit remains a tantalizing future goal.
Featured Image: Skylon Concept Art, ESA/Reaction Engines Ltd