What are the evocative sounds and smells of your childhood? The sensations that you didn’t notice at the time but which take you back immediately? For me one of them is the slight smell of phenolic resin from an older piece of consumer electronics that has warmed up; it immediately has me sitting cross-legged on our living room carpet, circa 1975.
!["Get ready for a life that smells of hot plastic, son!" John Atherton [CC BY-SA 2.0], via Wikimedia Commons.](https://hackaday.com/wp-content/uploads/2016/12/656px-early_1950s_television_set_eugene_oregon.jpg)
There are many small technological advancements that have contributed to this change over the decades. Switch-mode power supplies, LCD displays, large-scale integration, class D audio and of course the demise of the thermionic tube, to name but a few. The result is often that the appliance itself runs from a low voltage. Where once you would have had a pile of mains plugs competing for your sockets, now you will have an equivalent pile of wall-wart power supplies. Even those appliances with a mains cord will probably still contain a switch-mode power supply inside.
Continue reading “So Where’s My Low Voltage DC Wall Socket?”

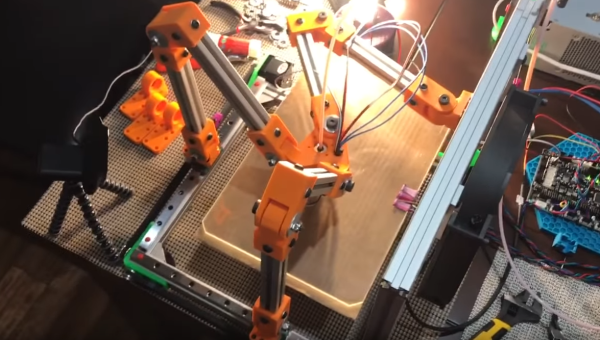
 A few people have experimented with Tripteron printers over the years, but as far as we can see, no one has ever demonstrated a working model. Enter [Apsu], who showed up about a month ago. She started a post on the RepRap forums discussing her particular design. She works fast, and has now demonstrated a working prototype making prints. Sure they’re just calibration cubes, but this is a huge step forward.
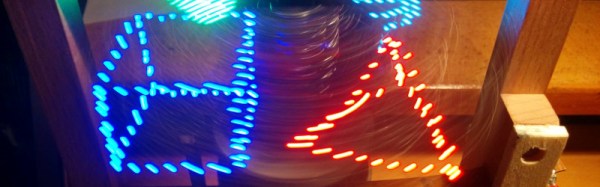
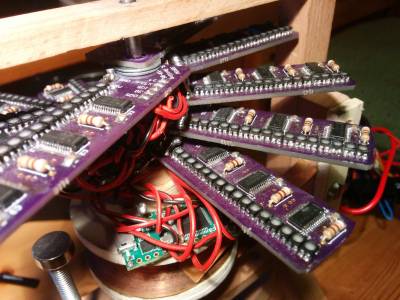 There are 480 LEDs in his display, and he addresses them through TLC5927 shift registers. Synchronisation is provided by a Hall-effect sensor and magnet to detect the start of each rotation, and the Teensy adjusts its pixel rate based on that timing. He’s provided extremely comprehensive documentation with code and construction details in the GitHub repository, including