The Fine Art Of Acid Etching Brass

If you were building a recreation of the James Watt micrometer, where would you start? If you’re [rasp], the answer would be: “Spend a year trying to find the best way to make etched brass discs.” Luckily for us, he’s ready to share that information with the rest of the world. While it’s rather unlikely anyone else is working on this specific project, the methods he details for getting museum-quality results on brass are absolutely fascinating.

The process starts with sanding down the bare brass and applying a layer of clear packing tape to the metal. [rasp] then covers the piece with LaserTape, which is a special tape designed to make laser-cut masks for sandblasting. But the masking principle works just as well for painting or chemical etching.

With the LaserTape in place, the piece is then put into the laser and the mask is cut out. Once cut, there’s the tedious task of peeling off all the cut pieces of tape, which [rasp] does with a dental pick. Once the pieces are pulled off, the brass is ready for its acid bath.

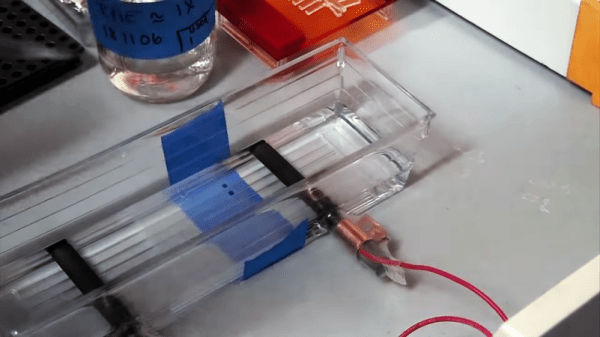
Anyone who’s etched their own PCB with ferric chloride will recognize these next steps. The piece is put into the acid bath and agitated every 10 minutes or so. It’s interesting to note that [rasp] places the piece in the bath upside-down, using little 3D printed “feet” to suspend the brass sheet off the bottom of the container. This allows the debris from the etching process to fall down and away from the piece. After about an hour out in the sun, the piece is pulled out of the bath and carefully washed off.

Once clean off, the piece is sprayed with black spray paint to darken up the etched areas. The moment of truth comes when the paint has dried and the layers of tape are carefully peeled back to reveal the etching. [rasp] then wet sands the piece with 1000 and 2000 grit paper, and a final pass with polishing compound brighten up the surface to a mirror-like shine. It’s quite a bit of manual labor, but the end result really is spectacular.

In the video after the break, [rasp] breaks down the entire process, including the additional machine work required to turn these brass plates into functional components of the final machine. As an added bonus, he even includes a lot of his failed attempts in an effort to keep others from making the same mistakes. Something we love to see here at Hackaday.

The process used here is similar to the snazzy brass name plates we showed earlier in the year, and has even been done without a laser using photoresist.

[via /r/DIY]

Continue reading “The Fine Art Of Acid Etching Brass”

Need Strength? It’s Modified Wood You Want!

Wood is surely one of the most versatile materials available. It can be found in a huge variety of colours and physical properties depending on the variety of the tree that grew it, and it has been fashioned into all conceivable devices, products, and structures over millenia. It’s not without shortcomings though, and one of the most obvious is that it can’t match the strength of some other materials. To carry large forces with a piece of wood that piece has to be made much larger than a corresponding piece of steel, something which is not a problem in a roof truss, but significantly difficult in a car body.

There have been a variety of attempts to strengthen the structure of wood in the past, and the latest has recently been published as a Nature paper. In it is described a process of first treating natural wood in a chemical bath to remove lignin and leave only the cellulose structure, followed by sustained compression at high temperature. This causes the cellulose fibres to interlock, and leaves a much denser wooden board with an equivalent strength that is described as near that of steel. They’ve posted a video which we’ve placed below the break, showing some ballistic tests on their material.

All new materials are of interest, but assuming that this one can be commercialised it makes for a particularly exciting set of possibilities. Wooden motor vehicles for example, new techniques for wooden aircraft or boats, or as an alternative in some applications where carbon fibre might currently find an application.

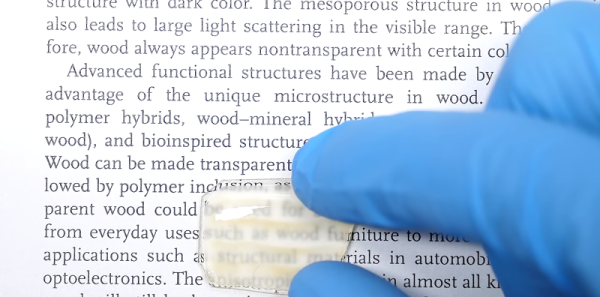
We’ve looked at a very similar process in the past for producing transparent wood. The good news for Hackaday readers that takes this from esoteric scientific paper to fascinating possibility though is that it can be done at home. Can any of you replicate the pressing step to take it to the next level?

Continue reading “Need Strength? It’s Modified Wood You Want!”

Eating A QR Code May Save Your Life Someday

QR codes are easy to produce, resistant to damage, and can hold a considerable amount of data. But generally speaking, eating them has no practical purpose. Unfortunately the human digestive tract lacks the ability to interpret barcodes, 2D or otherwise. But thanks to the University of Copenhagen, that may soon change.

A new paper featured in the International Journal of Pharmaceutics details research being done to print QR codes with ink that contains medicine. The mixture of medicines in the ink can be tailored to each individual patient, and the QR code itself can contain information about who the drugs were mixed for. With a standard QR reader application on their smartphone, nurses and care givers can scan the medicine itself and know they are giving it to the right person; cutting down the risk of giving patients the wrong medication.

The process involves using a specialized inkjet printer to deposit the medicine-infused ink on a white edible substrate. In testing, the substrate held up to rough handling and harsh conditions while still keeping the QR code legible; an important test if this technology is to make the leap from research laboratory to real-world hospitals.

In the future the researchers hope the edible substrate can be produced and sent to medical centers, and that the medicinal ink itself will be printable on standard inkjet printers. If different medicines were loaded into the printer as different colors, it should even be possible to mix customized drug “cocktails” through software. Like many research projects it seems likely the real-world application of the technology won’t be as easy as the researchers hope, but it’s a fascinating take on the traditional method of dispersing medication.

QR codes have long been a favorite of the hacker community. From recovering data from partial codes to using them to tunnel TCP/IP, we’ve seen our fair share of QR hacks over the years.

[Thanks to Qes for the tip]

Continue reading “Eating A QR Code May Save Your Life Someday”

Making Smoke That Really Performs

Smoke is a useful thing, whether you want to hide from enemy combatants or just make a big scene at a local sporting match. Smoke devices have lots of applications, many of which will likely cause a nuisance to somebody, somewhere. With that said, they can also be really cool, and [Tech Ingredients] is here to tell you how to make them.

Far from a simple tutorial, the video guide is loaded with detail. It begins with an explanation of the basic chemistry involved, using potassium nitrate and sugar. This is the basis of rocket candy, a popular method for making solid rocket motors at home. However, it’s then explained how the formula is altered to suit a smoke-making, rather than a thrust-making device. The trick is the addition of paraffin to moderate the reaction.

The tips don’t stop there. The guide explains how to use a coffee grinder to make the coarse ingredients finer, which increases the surface area and allows the powder constituents to blend with the wax more easily. Enclosures are also discussed, with a cardboard tube and bentonite clay favored for its heat resistance and stability.

Overall, it’s an excellent guide which takes the time to explain the rationale behind each step in the process. It’s great to see the underlying concepts explained with the practical execution, giving a strong understanding of not just how to do it, but why. Video after the break.

Continue reading “Making Smoke That Really Performs”

Biologic Additive May Lead To Self-Healing Concrete

If you get a cut or break a bone, your body heals itself. This everyday miracle is what inspired [Congrui Jin] to try to find a way to make concrete self-healing. The answer she and her colleagues are working on might surprise you. They are adding fungus to concrete to enable self-repair.

It isn’t just any fungus. The conditions in concrete are very harsh, and after testing twenty different kinds, they found that one kind — trichoderma reesei — could survive inside concrete as spores. This fungus is widespread in tropical soil and doesn’t pose any threat to humans or the ecology. Mixing nutrients and spores into concrete is easy enough. When cracks form in the concrete, water and oxygen get in and the spores grow. The spores act as a catalyst for calcium carbonate crystals which fill the cracks. When the water is gone, the fungi go back to spores, ready to repair future cracking.

Continue reading “Biologic Additive May Lead To Self-Healing Concrete”

Home Brew Solar Cells For The Chemically Curious

The idea of making your own semiconductors from scratch would be more attractive if it weren’t for the expensive equipment and noxious chemicals required for silicon fabrication. But simple semiconductors can be cooked up at home without anything fancy, and they can actually yield pretty good results.

Granted, [Simplifier] has been working on the method detailed in the video below for about a year, and a look at his post on copper oxide thin-film solar cells reveals a meticulous approach to optimize everything. He started with regular window glass, heated over a propane burner and sprayed with a tin oxide solution to make it conductive while remaining transparent. The N-type layer was sprayed on next in the form of zinc oxide doped with magnesium. Copper oxide, the P-type layer, was electroplated on next, followed by a quick dip in copper sulfide to act as another transparent conductor. A conductive compound of sodium silicate and graphite was layered on the back to form the electrical contacts. The cell worked pretty well — 525 mV open circuit voltage and 6.5 mA short-circuit current. Not bad for home brewed.

If you want to replicate [Simplifier]’s methods, you’ll find his ample documentation of his site. Of course, if you yearn for DIY silicon semiconductors, there’s a fab for that, too.

Continue reading “Home Brew Solar Cells For The Chemically Curious”

Three Ways To Etch Snazzy Brass Nameplates

It’s the little touches that make a project, and a nice nameplate can really tie a retro build together. Such badges are easy enough to make with a CNC machine, but if you don’t have access to machine tools you can put chemistry to work for you with these acid-etched brass nameplates.

The etching method that [Switch and Lever] uses to get down to brass plaques will be intimately familiar to anyone who has etched a PCB before. Ferric chloride works as well on brass as it does on copper, and [Switch and Lever] does a good job explaining the chemistry of the etching process and offers some tips on making up etching solution from powdered ferric chloride. But the meat of the video below is the head-to-head test of three different masking methods.

The first method uses a laser printer and glossy paper ripped from a magazine to create a mask. The toner is transferred to the brass using an office laminator, and the paper removed with gentle rubbing before etching. For the other two candidates he uses a laser engraver to remove a mask of plain black spray paint in one case, or to convert special laser marking paint to a mask in the other.

We won’t spoil the surprise as to which gave the best results, but we think you’ll be pleased with how easy making classy nameplates can be. You can also use electrolytic methods for a deeper etch, but we think acid etching is a little more approachable for occasional use.

Continue reading “Three Ways To Etch Snazzy Brass Nameplates”