Most Beautiful Mini-Galaga-Pi Ever!

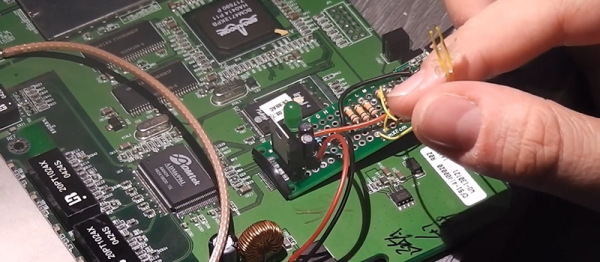
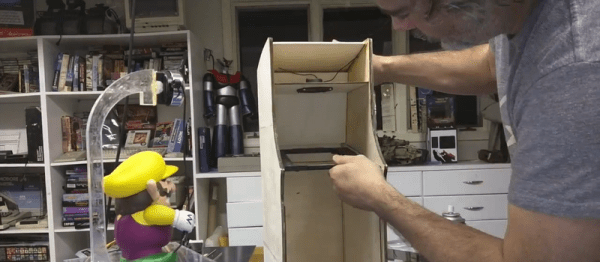
The problem with click-bait titles, besides the fact that they make the reader feel cheated and maybe a little bit dirty for reading the article, is that they leave us with nothing to say when something is truly outstanding. But the video of [Tiburcio de la Carcova] building up a mini-Galaga cabinet (complete with actual tiny CRT screen from an old portable 5″ TV) is actually the best we’ve ever seen.

Plywood is laser-cut. Custom 3D printed parts are manufactured and assembled, including the joysticks and coin door. Aluminum panels are cut on a bandsaw and bent with a hand brake. Parts are super-glued. In short, it’s a complete, sped-up video of the cutting-edge of modern DIY fab. If that’s not enough reason to spend four minutes of your time, we don’t know what is.

[Tiburcio] has also made a mini Space Invaders, and is thinking of completing the top-20 of his youth. Pacman, Asteroids, and Missile Command are next. We can’t wait.

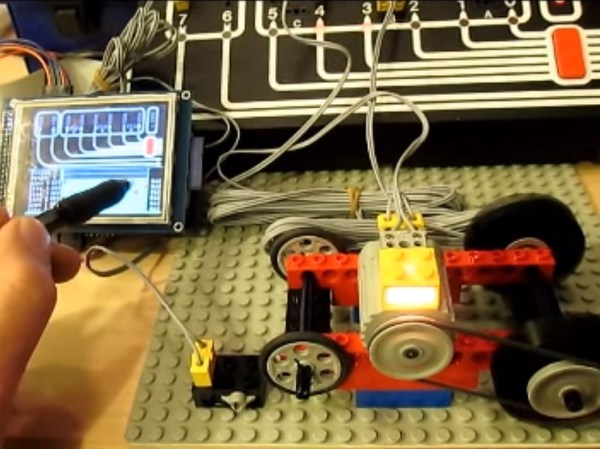
There are (ahem) a couple of Raspberry-Pi-powered video game emulators on Hackaday, so it’s a little awkward to pick one or two to link in. We’ll leave you with this build that also uses a small CRT monitor to good effect albeit in less-fancy clothing.

Continue reading “Most Beautiful Mini-Galaga-Pi Ever!”

The Michigan Mighty-Mite Rides Again

One of the best things about having your amateur radio license is that it allows you to legally build and operate transmitters. If you want to build a full-featured single-sideband rig with digital modes, have at it. But there’s a lot of fun to be had and a lot to learn from minimalist builds like this Michigan Mighty-Mite one-transistor 80-meter band transmitter.

If the MMM moniker sounds familiar, it may be because of this recent post. And in fact, [W2AEW]’s build was inspired by the same SolderSmoke blog posts that started [Paul Hodges] on the road to his breadboard and beer can build.  [W2AEW]’s build is a bit sleeker, to be sure, but where the video really shines is in the exploration and improvement of the signal quality. The basic Mighty-Mite outputs a pretty dirty signal – [W2AEW]’s scope revealed 5 major harmonic spikes, and what was supposed to be a nice sine wave was full of divots and potholes. There’s only so much one transistor, a colorburst crystal and a couple of capacitors can do, so the video treats us to an explanation of the design of the low-pass filter needed to get rid of the harmonics and clean up the output into a nice solid sine wave.

If your Morse skills aren’t where they should be to take advantage of the Might-Mite’s CW-only mode, then you’ll need to look at other modulations. Maybe a tiny FM transmitter would suit your needs better?

Continue reading “The Michigan Mighty-Mite Rides Again”

Beautiful And Bizarre Boards

weirdboard
An odd board (piezo coupler), fabbed by OSHPark.

Recently I’ve been getting curious about interesting PCB shapes. In the past I’ve always used simple Polygons, perhaps rounding out the corners to make the design a little more aesthetically pleasing. The board to the right was my introduction to the possibilities of oddly shaped boards. It’s designed to couple with a piezo buzzer (used as an actuator). I’ve been planning to have it fabricated out of FPC (Flexible Printed Circuits), but with fabrication being so cheap I sent it to OSHPark to see what they’d make of it. OSHPark doesn’t have hard specs around internal routing, but in my experience they’re up to try anything (and they’re quality is always great). The width of the prongs on the PCB shown is 5mm. I figured it was a risk, and that it was likely the FR4 could break, but it came back great!

This has led me to the realization that my boards could look much more exciting than they do currently, and that our highly optimized modern PCB fabrication process provides a lot of room for experimentation. This article will discuss some of the options available when creating non-traditional PCBs.

Continue reading “Beautiful And Bizarre Boards”

Old School Gauges Let You Know Which Way The Wind Blows

When your passion is a sport that depends on Mother Nature’s cooperation, you need to keep a close eye on weather conditions. With this in mind, and not one to let work distract him from an opportunity to play, [mechanicalsquid] decided to build a wind-monitoring gauge with an old-school look to let him know when the wind is right for kitesurfing.

old-school-meter-for-wind
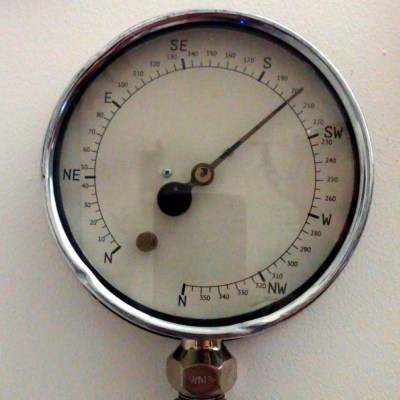
Being an aficionado of big engineering helped [mechanicalsquid] come up with a style for his gauge – big old dials and meters. We hesitate to apply the “steampunk” label to every project that retasks old technology, but it sure looks like a couple of the gauges he used could have been for steam, so the moniker probably fits here. Weather data for favorite kitesurfing and windsurfing locales is scraped from the web and applied to the gauges to indicates wind speed and direction. [mechanicalsquid] made a valiant effort to drive the voltmeter coil directly from the Raspberry Pi, but it was not to be. Servos proved inaccurate, so steppers do the job of moving the needles on both gauges. Check out the nicely detailed build log for this one, too.

For more weather station fun be sure to check out this meter-based weather station with a slightly more modern look. And for another build in the steampunk style, this vintage meter and Nixie power display is sure to impress.

I Built Myself A 16×20-Inch Camera In 10 Hours

[Giles Clement] was avoiding work in a bar, nursing a pint, and doodling a sketch for a camera. He looked at his sketch, thought, “gee, that looks better than answering emails,” and called his friend. An hour later they were at home depot buying supplies, and ten hours of furious work later, they had a camera. Nothing gets a project done like avoiding work! (See it all happen before your eyes in the video below the break.)

The camera is built around a 500mm f/4.5 Goerz Dogmar lens from around 1918 and was apparently used for aerial recon out of blimps. The frame of the camera is pine and plywood. [Giles] had heard that building the bellows for these cameras had taken other hobbyists months and thousands of dollars. Rather than elaborately folded fabric, he supported his 6 mil plastic bellows on telescoping rigid rods. To view the image while he’s focusing it, he sanded a plate of glass with 100 grit sandpaper to serve as a view screen.

Once the camera was completed, they prepared the plates and exposed photos. The first step, from what we could tell, was to disregard all chemical safety practices. The second step was pouring a substance called collodion on an unsanded glass plate and tilting the plate back and forth until the whole plate had an even coat on it. Then it was put in a bath of silver nitrate to sensitize. Once sensitized the plate was placed in the frame of the focused camera and an astonishing amount of strobe light emitted. After that it’s back to the chemical baths for more safety hazards. The whole process has to be done under fifteen minutes or the plate cures before it can be used. The photos that come out are seriously cool. It’s no wonder these old styles of photography have seen a comeback.

Continue reading “I Built Myself A 16×20-Inch Camera In 10 Hours”

Hacking A USB Port Onto An Old Router

Sometimes hacks don’t have to be innovative to be satisfying. We thought that [daffy]’s instructions and video (embedded below the break) for turning an old WRT54G router into an Internet radio were worth a look even if he’s following a well-traveled path and one that we’ve reported on way back when.

The hack itself is simple. [daffy] locates unused USB data lines, adds in a 5V voltage regulator to supply USB bus power, and then connects it all to a USB sound card. Hardware side, done! And while he doesn’t cover the software side of things in this first video, we know where he’s headed.

The WRT54G router was the first commodity Linux-based router to be extensively hacked, and have open-source firmware written for it. If you’re using OpenWRT or dd-wrt on any of your devices, you owe a debt to the early rootability of the WRT54G. Anyway, it’s a good bet that [daffy] is going to find software support for his USB sound card, but we remain in suspense to see just exactly how the details pan out.

Our favorite WRT54G hack is still an oldie: turning a WRT54G into the brains for a robot. But that was eight years ago now, so surely there’s something newer and shinier. What’s the coolest device that you’ve seen a WRT router hacked into?

Continue reading “Hacking A USB Port Onto An Old Router”

Lego Technic Of The Past Eliminates Apple ][ With Arduino And Touchscreen

[JAC_101], the Director of Legal Evil Emeritus for LVL1 Hackerspace (don’t ask me, it’s their title system), was challenged to a hacking duel. It all started years ago. The person who is now president of LVL1, visited the space for the first time and brought with her a discarded Apple II controller for Lego bricks which had previously belonged to her father. Excited to test it, the space found that, unfortunately, LVL1’s Apple II wouldn’t boot. An argument ensued, probably some trash talking, and [JAC_101] left with the challenge: Could he build an Arduino interface for the Apple II Lego controller quicker than the hackerspace could fix its Apple II?”

Other things that belonged to people's fathers.
Other things that belonged to people’s fathers.

In the end, a concentrated force by one hacker over two years overcame the collective ADHD of many. He began by opening the interface to look inside, a completely unnecessary step since he found it was already thoroughly documented. Next he forgot about the project for a year. Then he remembered it, and built an interface for an Arduino Uno to hook to the controller and wrote a library for the interface. Realizing that sending serial commands was not in line with the original friendly intention of the device, he added a graphical display to the project; which allowed the user to control the panel with touch. In the end he won the challenge and LVL1 still doesn’t have a working Apple II. We assume some gloating occurred. Some videos of it in action after the break.

Continue reading “Lego Technic Of The Past Eliminates Apple ][ With Arduino And Touchscreen”