Just A Taste Of The Talks At Supercon

The Hackaday Superconference is taking on a life of its own. Speaker selection is done and invitations are on the way out. Below is a taste of the confirmed talks in store for you this November in Pasadena.

This is the Ultimate Hardware Conference and you need to be there! We’ll continue to announce speakers and workshops as final confirmations come in. Supercon will sell out so grab your ticket now before it’s too late.

Ben Krasnow
Depositing copper circuitry and optical displays onto 3D-printed parts

Producing printed circuits on plastic mechanical parts can be accomplished with a standard laser cutter and a handful of chemicals available from online retailers.

Ruth Grace Wong
Firmware From the Firehose

Practical tips for people who don’t know anything about firmware for deciphering the code and tracking down bugs.

Amie Danielle Dansby
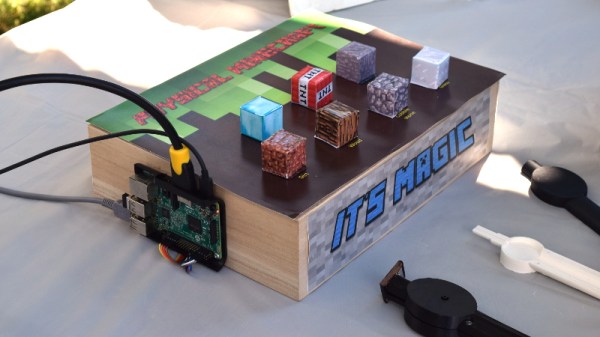
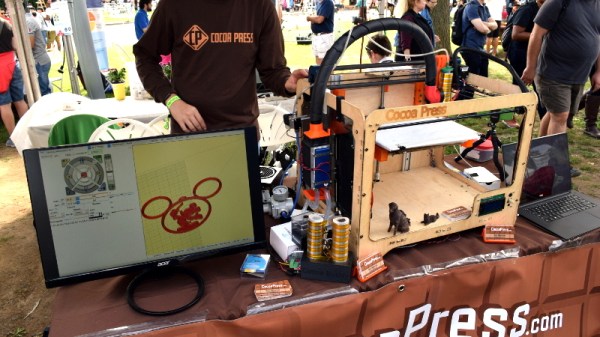
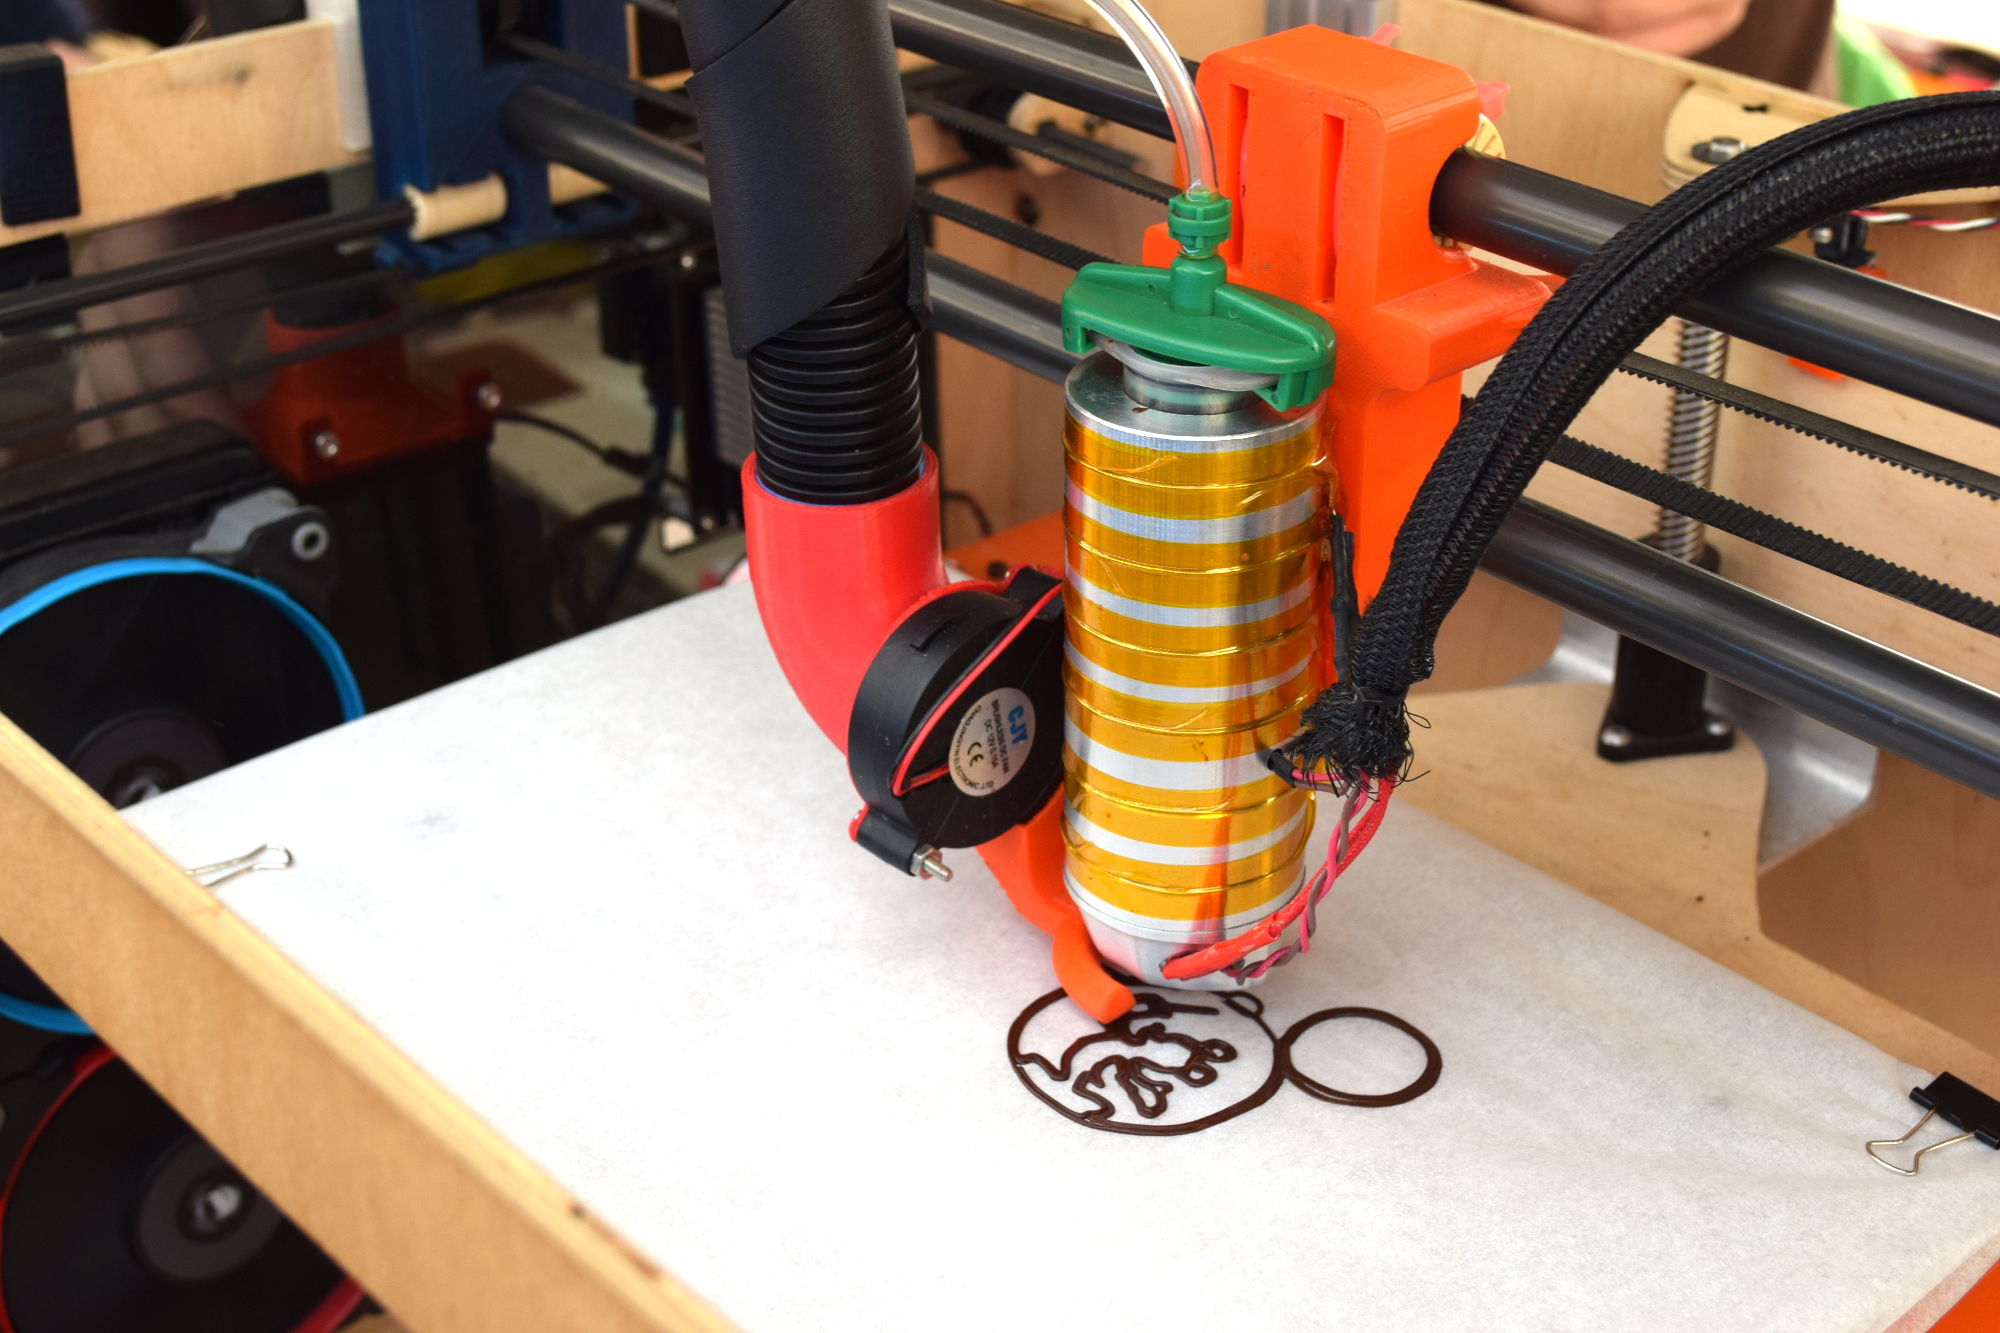
Swords and High Voltage: Creating 3D Printing Designs for Electronics Props

You can easily bring digital video game assets to the human world with 3D printing, but what about modifying files, or adding electronics?

Sam Zeloof
Home Chip Fab: Silicon IC Fabrication in the Garage

IC and semiconductor fabrication techniques, tools, and processes that allow for mid 1970’s era device fabrication on a small budget in the home workshop.

Zach Archer
Live Coding a 40-Foot LED Sign

This is the story of how the massive 500-watt LED Toorcamp sign was designed, developed, and constructed inside of 3 weeks.

Leigh Johnson
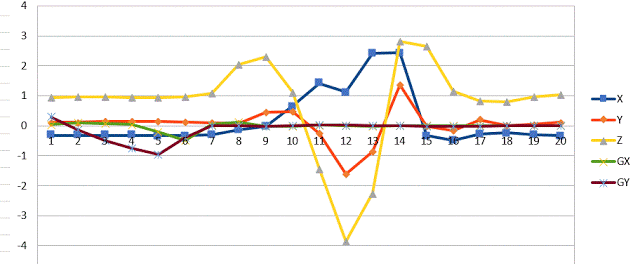
Portable Deep Object Detection

The fundamentals of deep learning modules and object detection using Tensorflow and Keras on a Raspberry Pi.

We Want You at Supercon!

The Hackaday Superconference is a can’t-miss event for hardware hackers everywhere. Join in on three amazing days of talks and workshops focusing on hardware creation. This is your community of hardware hackers who congregate to hack on the official hardware badge and on a slew of other projects that show up for the fun. Get your ticket right away!

Maker Faire NY: Getting Physical With Minecraft

If you’ve been hanging around Hackaday for a while, you’ve likely seen a few attempts to bridge the real world with the voxel paradise that is Minecraft. In the past, projects have connected physical switches to virtual devices in the game, or took chunks of the game’s blocky landscape and turned it into a 3D printable file. These were interesting enough endeavors, but fairly limited in their scope. They assumed you had an existing world or creation in Minecraft that you wanted to fiddle with in a more natural way, but didn’t do much for actually playing the game.

But “Physical Minecraft” presented at the 2018 World Maker Faire in New York, offered a unique way to bring players a bit closer to their cubic counterparts. Created by [Manav Gagvani], the physical interface has players use a motion detecting wand in combination with an array of miniature Minecraft blocks to build in the virtual world.

The wand even detects various gestures to activate an array of “Spells”, which are effectively automated build commands. For example, pushing the wand forward while making a twisting motion will automatically create a tunnel out of the selected block type. This not only makes building faster in the game, but encourages the player to experiment with different gestures and motions.

A Raspberry Pi 3 runs the game and uses its onboard Bluetooth to communicate with the 3D printed wand, which itself contains a MetaWear wearable sensor board. By capturing his own moves and graphing the resulting data with a spreadsheet, [Manav] was able to boil down complex gestures into an array of integer values which he plugged into his Python code. When the script sees a sequence of values it recognizes, the relevant commands get passed onto the running instance of Minecraft.

You might assume the wand itself is detecting which material block is attached to it, but that bit of magic is actually happening in the base the blocks sit on. Rather than trying to uniquely identify each block with RFID or something along those lines, [Manav] embedded an array of reed switches into the base which are triggered by the presence of the magnet hidden in each block.

These switches are connected directly to the GPIO pins of the Raspberry Pi, and make for a very easy way to determine which block has been removed and installed on the tip of the wand. Things can get tricky if the blocks are put into the wrong positions or more than one block are removed at a time, but for the most part it’s an effective way to tackle the problem without making everything overly complex.

We’ve often talked about how kid’s love for Minecraft has been used as a way of getting them involved in STEM projects, and “Physical Minecraft” was a perfect example. There was a line of young players waiting for their turn on the wand, even though what they were effectively “playing” was the digital equivalent of tossing rocks. [Manav] would hand them the wand and explain the general idea behind his interface, reminding them that the blocks in the game are large and heavy: it’s not enough to just lower the wand, it needs to be flicked with the speed and force appropriate for the hefty objects their digital avatar is moving around.

Getting kids excited about hardware, software, and performing physically demanding activities at the same time is an exceptionally difficult task. Projects like “Physical Minecraft” show there can be more to playing games than mindless button mashing, and represent something of a paradigm shift for how we handle STEM education in an increasingly digital world.

Maker Faire NY: Cocoa Press Chocolate Printer

If you haven’t figured it out by now, the hype over desktop filament printers is pretty much over. But that doesn’t mean there aren’t new avenues worth exploring that use the basic FDM printer technology. If anything, the low cost and high availability of 3D printer parts and kits makes it easier to branch off into new territory. For example, experimenting with other materials which lend themselves to being “printed” layer by layer like a thermoplastic. Materials such as cement, clay, or even chocolate.

[Ellie Weinstein] brought her Cocoa Press printer to the 2018 World Maker Faire in New York, and we have to say it’s a pretty impressive piece of engineering. Hackers have been known to throw a syringe-based paste extruder onto a regular 3D printer and try their luck with squirting out an edible object from time to time, but the Cocoa Press is truly a purpose built culinary machine.

Outwardly it features the plywood case and vaguely Makerbot-looking layout that we’ve seen plenty of times before in DIY 3D printers. It even uses the same RAMPS controller running Marlin that powers your average homebrew printer. But beyond these surface similarities, the Cocoa Press has a number of purpose-built components that make it uniquely qualified to handle the challenges of building with molten chocolate.

For one, beyond the nozzle and the walls of the syringe, nothing physically comes into contact with the chocolate to be printed; keeping the mess and chance of contamination to a minimum. The leadscrew actuated plunger used in common paste extruders is removed in favor of a purely air powered system: a compressor pumps up a small reservoir tank with filtered and dried air, and the Marlin commands which would normally rotate the extruder stepper motor are intercepted and used to trigger an air valve. These bursts of pressurized air fill the empty area above the chocolate and force it out of the 0.8 mm nozzle.

In a normal 3D printer, the “melt zone” is tiny, which allows for the heater itself to be relatively small. But that won’t work here; the entire chocolate load has to be liquefied. It’s a bit like having to keep a whole roll of PLA melted during the entire print. Accordingly, the heater on the Cocoa Press is huge, and [Ellie] even had a couple spare heaters loaded up with chocolate syringes next to the printer to keep them warm until they’re ready to get loaded up.

Of course, getting your working material hot in a 3D printer is only half the battle, you also need to rapidly cool it back down if you want it to hold its shape as new layers are placed on top of it. A normal 3D printer can generally get away with a little fan hanging next to the nozzle, but [Ellie] found the chocolate needed a bit of a chill to really solidify.

So she came up with a cooling system that makes use of water-cooled Peltier units. The cold side of the Peltier array is inside a box through which air is forced, which makes its way through an insulated hose up to the extruder, where a centrifugal fan and 3D printed manifold direct it towards the just-printed chocolate. She reports this system works well under normal circumstances, but unusually high ambient temperatures can overwhelm the cooler.

While “the man” prevented show goers from actually eating any of the machine’s creations (to give out food in New York, you must first register with the city), they certainly looked fantastic, and we’re interested in seeing where the project goes from here.

Maker Faire NY: Developing For The Final Frontier

The cost of getting a piece of hardware into space is now cheaper than ever, thanks in no small part to the rapid progress that’s been made by commercial launch providers such as SpaceX. In the near future, as more low-cost providers come online, it should get even cheaper. Within a few years, we could be seeing per kilogram costs to low Earth orbit that are 1/10th what they were on the Space Shuttle. To be sure, this is a very exciting time to be in the business of designing and building spacecraft.

But no matter how cheap launches to orbit get, it’ll never be cheaper than simply emailing some source code up to the International Space Station (ISS). With that in mind, there are several programs which offer students the closest thing to booking passage on a Falcon 9: the chance to develop software that can be run aboard the Station. At the 2018 World Maker Faire in New York we got a chance to get up close and personal with functional replicas of the hardware that’s already on orbit, known in space parlance as “ground units”.

On display was a replica of one of the SPHERES free-flying satellites that have been on the ISS since 2006. They are roughly the size of a soccer ball and utilize CO2 thrusters and ultrasonic sensors to move around inside of the Station. Designed by MIT as a way to study spaceflight techniques such as docking and navigation without the expense and risk of using a full scale vehicle, the SPHERES satellites are perhaps the only operational spacecraft to have never been exposed to space itself.

MIT now runs the annual “Zero Robotics” competition, which tasks middle and high school students with solving a specific challenge using the SPHERES satellites. Competitors run their programs on simulators until the finals, which are conducted using the real hardware on the ISS and live-streamed to schools.

We also saw hardware from “Quest for Space”, which is a company offering curricula for elementary through high school students which include not only the ground units, but training and technical support when and if the school decides to send the code to the matching hardware on the Station. For an additional fee, they will even work with the school to design, launch, and recover a custom hardware experiment.

Their standard hardware is based on off-the-shelf platforms such as Arduino and LEGO Mindstorms EV3, which makes for an easy transition for school’s existing STEM programs. The current hardware in orbit is setup for experiments dealing with heat absorption, humidity, and convection, but “Quest for Space” notes they change out the hardware every two years to provide different experiment opportunities.

Projects such as these, along with previous efforts such as the ArduSat, offer a unique way for the masses to connect with space in ways which would have been unthinkable before the turn of the 21st century. It’s still up for debate if anyone reading Hackaday in 2018 will personally get a chance to slip Earth’s surly bonds, but at least you can rest easy knowing your software bugs can hitch a ride off the planet.

Kipp Bradford On The Importance Of Boring Projects, Medical Tech, And Sci Fi Novels

If someone suggests you spend time working on boring projects, would you take that advice? In this case, I think Kipp Bradford is spot on. We sat down together at the Hackaday Superconference last fall and talked about medical device engineering, the infrastructure in your home, applying Sci-Fi to engineering, and yes, we spoke about boring projects.

Kipp presented a talk on Devices for Controlling Climates at Supercon last year. It could be argued that this is one of those boring topics, but very quickly you begin to grasp how vitally important it is. Think about how many buildings on your street have a heating or cooling system in them. Now zoom out in your mind several times to neighborhood, city, state, and country level. How much impact will a small leap forward have when multiplied up?

The next Hackaday Superconference is just around the corner. Before you join us below for the interview with Kipp, make sure you grab your 2018 Hackaday Superconference ticket to be there for great talks like Kipp’s!

Continue reading “Kipp Bradford On The Importance Of Boring Projects, Medical Tech, And Sci Fi Novels”

The New, Improved Open Hardware Certification Program

Today at the Open Hardware Summit at MIT, OSHWA, the Open Source Hardware Association has announced a huge revision to the Open Hardware certification process. The goal here is to design a better platform for creating Open Hardware.

While all hardware already certified as Open Hardware will remain Open Hardware, this revamp of the ‘hub’ of the certification process is greatly improved. There’s a new website. There are learning modules telling everyone what it means to be Open Source hardware. There are community examples — real-life walk-throughs of projects that have already been created. There’s a streamlined certification process, and an improved listing of Open Hardware projects.

But Why A Certification Program?

While Open Source in the world of software is easily defined, it is effectively a hack of copyright law; all software is closed by default, and an Open Source software license is merely that; a license for anyone to use it, with the various restrictions and philosophical battles. Hardware, on the other hand, is big-O Open by default. The code used to program an FPGA is covered by copyright, but the circuit itself isn’t. The firmware on your Arduino project is covered by Open Source software licenses, but the physical implementation of your Fritzing picture isn’t.

In the absence of a legal framework to truly make an Open Hardware license work, the only other option is a certification program. The current Open Source Hardware certification program launched in 2016, and has since seen hundreds of projects certified from dozens of countries. It is, by any measure, a remarkable success. The people who make hardware are certifying that their work complies with community-set standards, and all of these projects are registered.

The New, Improved Interface for the Certification Program

While the core of the Open Hardware Certification program hasn’t changed, the user interface — the ‘killer app’ of a directory of Open Hardware projects — has. According to the press release put out by OSHWA ahead of the announcement, “The revamped website consolidates a broad range of information about open source hardware onto a single site. To maximize comprehension for people pursuing certification for their own hardware, important documentation and licensing concepts are illustrated with specific existing examples from the registry. An improved directory and search function makes it easy to find hardware that matches a broad range of criteria.”

Compared to last week’s version of OSHWA’s website, this is a huge improvement. Now, you can easily find information about what it means to make Open Hardware. The complete directory of Open Hardware projects isn’t just a spreadsheet on a webpage anymore, you can actually search for projects now. This is a huge improvement to the Open Hardware certification program, and we can’t wait to see how this new platform will be used.

You can check out the rest of the Open Hardware Summit over on the livestream.

The Exquisite Badges Of Open Hardware Summit

The past few years have been all about electronic conference badges and this year is no different. Right now, we’re setting up at the Open Hardware Summit at MIT, and this year’s badge is nothing short of extraordinary. It’s a WiFi and Bluetooth-enabled e-paper badge, individually programmed for every attendee. The 2018 Open Hardware Summit badge is a work of art, and it was all created over on hackaday.io.

This board is based on the ESP trINKet designed by [Mike Rankin] with additional hardware design from [Alex Camilo]. The badge is based around the ESP32-wroom-32 module with a 2.13 inch e-paper display with a resolution of 250 x 122 pixels. To this, the badge adds an I2C accelerometer and support for add-ons. There’s also pads for an SD card holder — a soldering challenge, if you will — and few additional pads for bits and bobs.

But a badge is nothing without software, and that’s where this really gets good. The ESP32 module is a powerhouse, capable of emulating NES games or serving as a file server. Here, the stock configuration of the badge is rather simplistic: you can start a WiFi AP, log onto a web page, and change the name displayed on the badge. You can also start an FTP server, which is where things get really fun. Drop an application on that FTP server, and you can run Micro Python.

The badge is great, but the programming jig is awesome

The boards were made through OSH Park, and Screaming Circuits took care of the assembly. Anyone who has ever built a badge will tell you it isn’t the assembly that gets you — it’s the programming and provisioning. This is especially true since the Open Hardware Summit badge is distributed with the attendee’s names already preloaded. That’s a few hundred badges, all with unique firmware. This is a nightmare by any definition.

However, there’s always a good solution to a problem, and [Drew] from OSH Park showed me the best programming jig I’ve ever seen during the Summit pre-game at Artisan’s Asylum.

What you’re looking at is a 3D printed box loaded up with a touch-screen display, a Raspberry Pi Zero W, and a few pogo pins. This Raspberry Pi does all the heavy lifting by connecting to the Internet, pulling down the current version of the firmware, and loading that firmware onto the badge. There are a few more options thanks to the touch-screen interface, including provisioning all the badges with the names of the attendees — this can be done by reading a list of attendees and uploading the next one to the badge in the jig. All of this is wrapped up with a nice laser-cut cover that securely holds each badge exactly where it needs to be for the pogo pins to make contact.

This is, without question, the best programming jig I’ve seen. Any badge makers out there should take note: this is how you program a few hundred badges. The badge, itself, is great and just as this post is published there will be hundreds of eager hackers futzing about with this remarkable piece of hardware. If you want to check out the current progress of the badge hacking, check out the updates on Twitter