From the “why didn’t we think of that” department comes [dupontgu’s] pong mouse project. The mouse appears and acts like a normal computer mouse until you click the scroll wheel. When you do, the mouse rapidly moves the cursor on the connected computer to play pong. Obviously, though, the paddles and the ball all look like your cursor, whatever that happens to be. So, how do you tell the score? Well, when a score happens, the cursor shows between the two paddles. In the middle means the game is tied. Otherwise, the player closest to the score indicator is winning. Continue reading “Mouse Doesn’t Play Pong… It IS Pong!”→
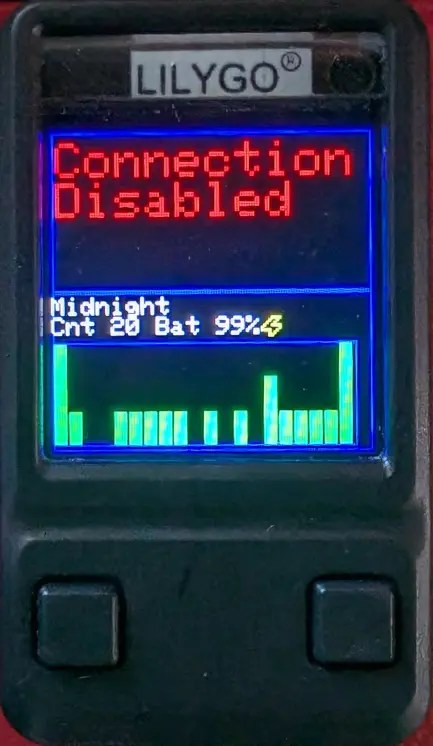
Expect dice roll stat tracking to become a big thing in the D&D community.
The build is based around Pixels Dice. They’re a smart type of IoT dice that contains Bluetooth connectivity and internal LEDs. The dice are literally capable of detecting their own rolls and reporting them wirelessly. Thus, the dice connects to the dice box, and the dice box can literally log the rolls and even graph them over time.
The project was built in a nice octagonal box [Jonathan] picked up from a thrift store. It was fitted with a hidden battery and ESP32 to communicate with the dice and run the show. The box also contains integrated wireless chargers to recharge the dice as needed, and a screen for displaying status information.
The dice and dice box can do all kinds of neat things, like responding with mood lighting and animations to your rolls—for better or worse. There are some fun modes you can play with—you can even set the lights to sparkle if you pass a given skill check in your tabletop RPG of choice!
If you play a lot of tabletop games, and you love dice and statistics, this is a project well worth looking into. Imagine logging every roll so you can see how hot you are on a given night. Or, heck—whether it was the dice’s fault you lost your favorite player character in that foreboding dungeon.
Asteroids, the late-70s arcade hit, was an immensely popular game. Often those with the simplest premise, while maintaining a fun, lighthearted gameplay have the most cultural impact and longest legacy. But, although it was popular, it doesn’t really meet the high bar of scientific fidelity that some gamers are looking for. That’s why [Attoparsec] built the Kessler Syndrome Edition of this classic arcade game.
The Kessler Syndrome is a condition where so much man-made debris piles up in low-Earth orbit that nothing can occupy this orbit without getting damaged or destroyed by the debris, and thus turning into more debris itself in a terrible positive feedback loop. [Attoparsec] brings this idea to Asteroids by reprogramming the game so that asteroids can be shot into smaller and smaller pieces but which never disappear, quickly turning the game into a runaway Kessler Syndrome where the chance of survival is extremely limited, and even a destroyed player’s ship turns into space junk as well.
To further the scientific accuracy and improve playability, though, he’s added a repulsor beam mechanism which can push the debris a bit and prolong the player’s life, and also added mass effect reactions so that even shooting bullets repels the player’s ship a bit. The build doesn’t stop with software, either. He also built a custom 70s-style arcade cabinet from the ground to host the game.
The ‘CRT Effect’ myth says that the reason why pixel art of old games looked so much better is due to the smoothing and blending effects of cathode-ray tube (CRT) displays, which were everywhere until the early 2000s. In fits of mistaken nostalgia this has led both to modern-day extreme cubism pixel art and video game ‘CRT’ filters that respectively fail to approach what pixel art was about, or why old games looked the way they did back with our NES and SNES game consoles. This is a point which [Carl Svensson] vehemently argues from a position of experience, and one which is likely shared by quite a few of our readers.
Although there is some possible color bleed and other artefacts with CRTs due to the shadow mask (or Sony’s Trinitron aperture grille), there was no extreme separation between pixels or massive bleed-over into nearby pixels to create some built-in anti-aliasing as is often claimed unless you were using a very old/cheap or dying CRT TV. Where such effects did happen was mostly in the signal being fed into the CRT, which ranged from the horrid (RF, composite) to the not-so-terrible (S-Video, component) to the sublime (SCART RGB), with RGB video (SCART or VGA) especially busting the CRT effect myth.
Where the pixel art of yester-year shines is in its careful use of dithering and anti-aliasing to work around limited color palettes and other hardware limitations. Although back in the Atari 2600 days this led to the extreme cubism which we’re seeing again in modern ‘retro pixel art’ games, yesterday’s artists worked with the hardware limitations to create stunning works of arts, which looked great on high-end CRTs connected via RGB and decent via composite on the kids’ second-hand 14″ color set with misaligned electron guns.
Despite being effectively sold as a toy in the 1990s, the Super Nintendo Entertainment System (SNES) was pretty bleeding-edge as far its computing chops were concerned. This was especially apparent with its cartridges, such as in this excellent summary article by [Fabien Sanglard].
In addition to the mask ROM that stored the game data and (optionally) battery-backed SRAM to store save data, a wide range of enhancement processors existed that upgraded the base SNES system with additional processors for more CPU performance, enhanced graphics and so on. Imagine sticking a game cartridge in a PlayStation 4 today that boosted CPU speed by 5x and gave it a much better GPU, this was the world of SNES games.
On the other side of the video game cartridges was the video output system, which seems easy enough in today’s world of digital HDMI and DisplayPort output. In the 90s video output did however mean NTSC and SECAM/PAL, which means playing nice with frequencies, different resolutions (lines) and squeezing as much as possible into a single frame in a way that works with the game console’s rendering pipeline. As a result of this the PAL version of Super Mario World has a larger vertical resolution than the NTSC version (240 vs 224 lines), even if it’s still squashed into the same 4:3 format. For the physical video output side, European gamers were spoiled with an AV connector to (RGB) SCART output, while the rest of the world dealt with some variety of RF composite or S-video.
Although the SNES’s successor in the form of the N64 would not take cartridges to the same extremes, it was this flexible architecture that gave the SNES such an amazing game library.
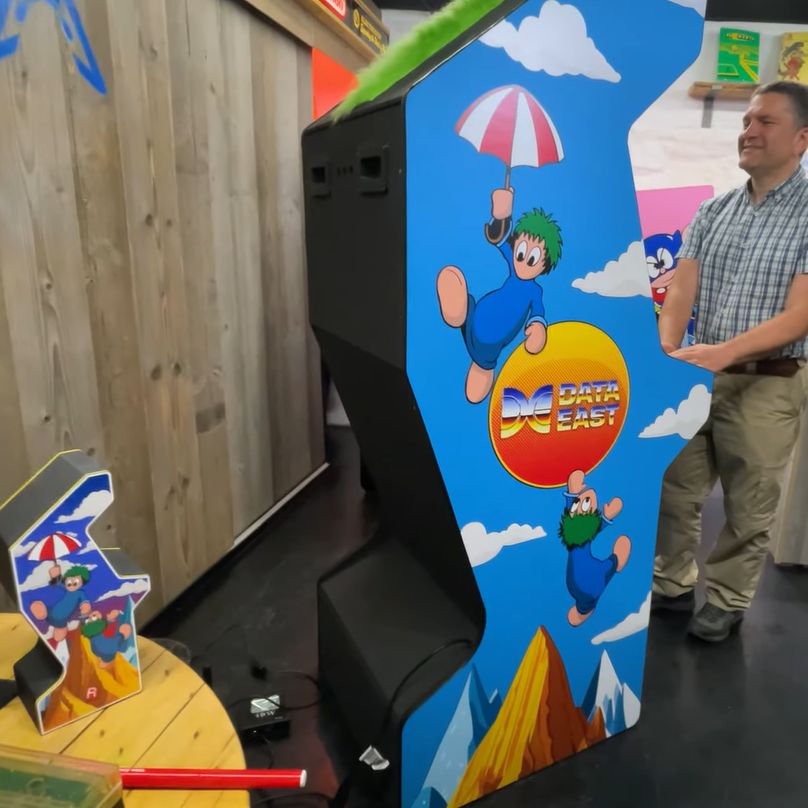
Back in the early 90s the world was almost graced with an arcade version of Lemmings, but after a few board revisions it was abandoned in 1991. Now the folk over at UK-based [RMC – The Cave] on YouTube have managed to not only get their mitts on a nearly finished prototype board, but have also designed and built a period-appropriate cabinet to go with it. This involved looking at a range of arcade cabinets created by Data East and picking a design that would allow both for the two-player mode of the game, and fit the overall style.
The finished Lemmings arcade cabinet. (Credit: RMC – The Cave, YouTube)
Arcade cabinets came in a wide range of cabinet styles and control layouts, largely defined by the game’s requirements, but sometimes with flourishes to distinguish the cabinet from the hundred others in the same arcade.
In this particular case the typical zig-zag (Z-back) style was found to be a good fit as on the Data East Night Slashers 1993-era cabinet, which then mostly left the controls (with two trackballs) and cabinet art to figure out. Fortunately there is plenty of inspiration when it comes to Lemmings art, leading to the finished cabinet with the original mainboard, the JAMMA wiring harness with MultiPi JAMMA controller, a 19″ CRT monitor and other components including the 3D printed controls panel.
With more and more new arcades popping up in the US and elsewhere, perhaps we’ll see these Lemmings arcade cabinets appear there too, especially since the ROMs on the prototype board were dumped for convenient MAME-ing.
There’s no reason why a visually impaired person can’t enjoy putting together a jigsaw puzzle. It just needs to look a little different. Or, in this case, feel different.
16-year-old [feazellecw] has come up with just the solution — a puzzle with pieces that have both a defining texture and a slant in the z-height to them. While there is no picture on the puzzle face to speak of, instead there is a satisfying end result. You could change it up and add a relief image if you wanted, as long as you still observed the diagonal lines, the z-slant, and the little hole in the bottom that helps differentiate it from the top.
As [feazellecw] says, it’s important to find a box to help keep the pieces together during assembly; a 3D-printed box would be a nice touch. Files for this 15-piece puzzle are available if you’d like to make one for yourself or someone else, but just the idea might inspire you to make your own variant.