Birthday Celebrations The Pi Way

The William Gates Building concourse packed with Pi enthusiasts

On a damp and cold Saturday in early March the Cambridge University Computer Laboratory threw open its doors to the Raspberry Pi community. The previous Monday had been the fourth (or first, if you are a leap year pedant!) birthday of the little single-board computer, and last weekend saw its official birthday celebration.

The festivities took the form of an exhibition floor with both traders and community show-and-tell exhibits, plus a packed schedule of workshops and talks. With the Raspberry Pi 3 launch only a few days before there were no surprise announcements of exciting new hardware, but it did provide a good networking opportunity for the Pi community and a chance to test the state of the Raspberry Pi nation.

The most obvious first impression at the event was that it was one that catered for a diverse range of ages and ability groups. Side-by-side with parents and their children were educators, and the maker community. The range of exhibits was therefore slanted somewhat towards a younger age range with games and interactive exhibits, and there was more than a slight educational flavour to the event. This was entirely in keeping with the Foundation’s objectives, and since it is events like these that are inspiring the Hackaday readers of the next decade, a very welcome sight. Join us after the break for a look at all that was happening at the event.

Continue reading “Birthday Celebrations The Pi Way”

Hacklet 99 – Soldering Tools

If there is one tool every hardware hacker needs, it’s a good soldering setup. Soldering irons, heat guns, reflow ovens and the like make up the tools of the trade for building electronic circuits. Spend enough time working with a tool, and you’ll find a way to improve it. It’s no surprise that hackers, makers, and engineers have been hacking their soldering tools for decades. This week’s Hacklet features some of the best soldering tool projects on Hackaday.io!

hakkoWe start with  [Kuro] a Hakko 907 based Soldering Station. Hakko 907 and 936 soldering station clones from the Far East are available all over the internet. While the heaters work, none of them have very good temperature controllers. [Kuro] turned a problem into a project by building his own soldering station. These irons are rated for 24 V. 24 volt power supplies are not very common, but it’s easy to find old 19 volt supplies from discarded laptops. [Kuro] found that the lower voltage works just fine. An Arduino nano controls the show, with user output displayed on a 2 line LCD. The finished controller works better than the original, and probably would give a real Hakko model a run for its money.

reflowNext up is [Sukasa] with Reflow Oven. When MakerSpace Nanaimo needed a reflow oven, [Sukasa] jumped in with this design. The idea was to create an oven that looked unmodified – just think of it as the toaster oven of the future, or the reflow oven of today. A Netduino plus 2 is the main controller. User information is displayed on a color TFT LCD. This oven is even internet connected, with an internally hosted web page and JSON data feed. The Netduino controls two beefy Solid State Relays (SSRs). The SSRs handle the dirty work of switching the oven’s heating elements. Two fans keep air moving to avoid hot spots. Precision temperature sensing is achieved through a pair of Adafruit MAX31855 breakout boards reading thermocouples.

plateNext we have [Jaromir Sukuba] with Soldering preheat plate. When soldering surface mount components, like QFN or BGA parts, it helps to pre-heat the whole board. There are commercial products to do this using hot air and other techniques, but it really comes down to making a hotplate. [Jaromir] figured he could do a pretty good job at this, so he built his own with a 3mm aluminum plate. Heat comes from 6 resistors in TO-220 cases. A Microchip PIC18 monitors a thermocouple and keeps things from getting too hot. For power, [Jaromir] had the same idea as [Kuro] did, and used a 19V power brick from an old laptop.

gooseFinally we have [Alex Rich] with Locking ball and socket gooseneck system. [Alex] came up with the Stickvise, so it’s fitting that he comes up with an awesome upgrade for it. We’ve all fought with “helping hands” while soldering. You never get them at quite the right angle. This system fixes that with a simple ball and gooseneck setup. [Alex] saw a similar design and printed it out. While it worked, the pieces popped apart too easily. [Alex] redesigned the system, adding a threaded locking ring. These new goosenecks stay put, holding your work exactly where you want it.

If you want to see more soldering tool projects, check out our brand new soldering tools list! If I missed your project, don’t be shy! Just drop me a message on Hackaday.io. That’s it for this week’s Hacklet. As always, see you next week. Same hack time, same hack channel, bringing you the best of Hackaday.io!

Embed With Elliot: March Makefile Madness

The make tool turns the big 4-0 next month, and we thought we’d start up the festivities early. In a two-part series, I’ll cover some of the make background that I think is particularly useful, and then focus on microcontroller-specific applications. If you’re still cut-and-pasting a general purpose makefile to run your toolchain, hopefully you’ll get enough insight here to start rolling your own. It can be a lot simpler than it appears!

Just as soon as the C programming language was invented, and projects started to get a little bit bigger than a “hello world”, it became obvious that some tool was needed to organize and automate compilation. After all, if you’ve got a program that’s spread over a number of files, modules, or libraries, it’s a hassle to have to re-compile them all any time you make a change to just a single section of code. If some parts haven’t changed, you’re just wasting time by re-compiling them. But who can keep track of all of this? Make can!

Continue reading “Embed With Elliot: March Makefile Madness”

Tools Of The Trade – Solder Paste Dispensing

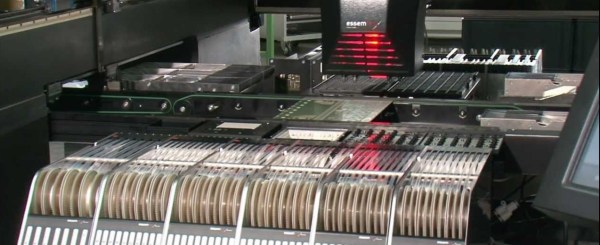
The general process of circuit board assembly goes like this: You order your PCBs. You also order your components. For surface mount components, you apply solder paste to the pads, put the components on top, and then heat the board up so the solder paste flows and makes a bond. Then for through hole components you put the leads through the holes, and solder them with an iron or a solder wave or dip. Then you do an inspection for defects, program any microcontrollers, and finally test the completed board to make sure everything runs.

The tricky part is in volumes. If you’re only doing a few boards, it’s usually easiest to assemble them by hand. In the thousands you usually outsource. But new tools, and cheap hacked tools, have made it easier to automate small batches, and scale up into the thousands before outsourcing assembly.

In this new series which we’re calling Tools of the Trade we’ll be covering a variety of tools used for building products, and we’re starting with circuit board assembly. Let’s investigate our tools of the trade: solder paste dispensing. Continue reading “Tools Of The Trade – Solder Paste Dispensing”

Ask Hackaday: Google Beat Go; Bellwether Or Hype?

We wake up this morning to the news that Google’s deep-search neural network project called AlphaGo has beaten the second ranked world Go master (who happens to be a human being). This is the first of five matches between the two adversaries that will play out this week.

On one hand, this is a sign of maturing technology. It has been almost twenty years since Deep Blue beat Gary Kasparov, the reigning chess world champion at the time. Although there are still four games to play against Lee Sedol, it was recently reported that AlphaGo beat European Go champion Fan Hui in five games straight. Go is generally considered a more difficult game for machine minds to play than chess. This is because Go has a much larger pool of possible moves at any given time.

Does This Matter?

Okay, the news part of this event has been covered: machine beats man. Does it matter? Will this affect your life and how? We want to hear what you think in the comments below. But I’m going to keep going with some of my thoughts on the topic.

You're still better at Ms. Pacman [Source: DeepMind paper in Nature]
You’re still better at Ms. Pacman [Source: DeepMind paper in Nature]
Let’s look first at what AlphaGo did to win. At its core, the game of Go is won by figuring out where your opponent will likely make a low-percentage move and then capitalizing on that choice. Know Your Enemy has been a tenet of strategy for a few millennia now and it holds true in the digital age. In addition to the rules of the game, AlphaGo was fed a healthy diet of 30 million positions from expert games. This builds behavior recognition into the system. Not just what moves can be made, but what moves are most likely to be made.

DeepMind, the company behind AlphaGo which was acquired by Google in 2014, has published a paper in Nature about their approach. They were even nice enough to let us read without dealing with a paywall. The secret sauce is the learning process which at its core tries to mimic how living entities learn: observe repetitively while assigning values to outcomes. This is key as it leads past “intellect”, to “intelligence” (the “I” in AI that everyone seems to be waiting for). But this is a bastardized version of “intelligence”. AlphaGo is able to recognize and predict behavior, then make choices that lead to a desired outcome. This is more than intellect as it does value the purpose of an opponent’s decisions. But it falls short of intelligence as AlphaGo doesn’t consciously understand the purpose it has detected. In my mind this is exactly what we need. Truly successful machine learning will be able to make sense out of sometimes irrational input.

The paper from Nature doesn’t go into details about Go, but it explains the approach of the learning system applied to Atari 2600. The algorithm was given 210×160 color video at 60Hz as an input and then told it could use a joystick with one button. From there it taught itself to play 49 games. It was not told the purpose or the rules of the games, but it was given examples of scores from human performance and rewarded for its own quality performances. The chart above shows that it learned to play 29 of them at or above human skill levels.

Continue reading “Ask Hackaday: Google Beat Go; Bellwether Or Hype?”

Materials To Know: Tooling And Modeling Board

I was in a fit of nerd glee the first time I used tooling board. I’d used MDF for similar purposes before, and I doubt I ever will again. Called Renshape, Precision Board Plus, or that green stuff people on another continent buy; it’s all the same extremely useful, unfortunately expensive, stuff. It’s hard to pin down exactly what tooling board is. Most of the blends are proprietary. It is usually a very dense polyurethane foam, sometimes by itself, sometimes with a fine fiber filler.

What makes tooling board so good is its absolute dimensional stability and its general apathy to normal temperature swings. (It even comes in versions that can go through curing ovens.) It is impervious to humidity. It has good surface finish, and it machines perfectly without wearing down tools.

The CNC set-up I coaxed precision molds out of.

This stuff is really tops as far as machining goes. I got super precise molds out of a very basic CNC machine at the LVL1 hackerspace. Renshape cut easily at a high spindle speed, and put practically no load on the machine. Climb and conventional milling were equal load wise with no immediately perceivable difference in finish. In the end I hit the precision range of my cheap digital calipers: +-.005mm, when the temperature is right, the battery is a charged, and the planets align.

I like to do resin casting when I get serious about a part. If you are making a master mold, there’s nothing better than tooling board. I’ve used both Renshape 460 and Precision Board Plus. Both impart a very light matte pattern, equivalent to a light bead blast on an injection mold. There’s no finishing required, though I mistakenly bought Renshape 440 at first and had to sand it a little to get the finish I wanted.

Tooling board is great for masters in metal casting, and is often used in the industry for just that, especially if quick and accurate prototypes are needed. It’s also tough enough to last through a few rounds of metal stamping in the home shop.

If you are doing lay-up for carbon fiber, fiberglass, or leather, this is also a very good choice. It will be unaffected by the chemicals, heat, and vacuum you may use in the process. It is tough enough hold alignment pins for proper set-up without premature ovaling. It is also a very good choice for vacuum forming.

Tooling board is, unsurprisingly, really good for tooling. It’s a great material for soft-jaws, alignment fixtures, and assembly fixtures, especially if you are doing delicate precision assemblies.

If you’re made of money, tooling board can be used for models, signs and props. It sands, shapes, and files extremely well. It bonds well to a lot of substances. It also takes paint very well with none of the absorption properties of wood or MDF. Most professional model shops will use it.
2015-11-05-10.34.01The one big flaw of tooling board is its price — this stuff is expensive. There’s no good DIY version that I’ve scrounged up so far. If you’re making a mold master, a fixture, or anything where you need tooling board’s properties and you are likely to get a few uses out of the board, then it’s probably worth it. Also, be careful of sellers selling plain “Renshape” it is probably going to be the lower grade Renshape 440 and not the more expensive Renshape 460 (or equivalent), where you start to really see the surface finish advantage of the material.

Tooling board is an industrial material. Typically you can call up a supplier and tell them what you’d like to do with it and they will be able to help. If you are making tools for carbon fiber quadcopter frame lay-up, let them know and they’ll have a formulation for that. If you are resin casting, there’s a formulation that gives superior surface finish.

It’s a pretty common material in the industrial scene, but I don’t see it a lot on the hobby scene. This is almost certainly due to its cost, as well as a shortage of small quantity re-sellers. (If someone starts selling assorted sizes on eBay for a reasonable price you have at least one buyer in me.) However, after using it in the niches it is designed for, I really don’t use anything else. I used to hack MDF to fit, but MDF is awful to paint, has no dimensional stability, and dulls tools really fast.

Are you a fan of tooling board? Have a good source? If you have anything to add, let us know in the comments.

Retrotechtacular: 100 Watts 120 Volts

If you read our recent feature about the Tal-y-Llyn Railway, the world’s first preserved line, you may have taken a while to watch the short film about the railway in the early 1950s. It was the work of an American film maker, [Carson “Kit” Davidson].

His other work includes some films that might be of interest to Hackaday readers, including one filmed in 1977: “100 Watts 120 Volts”. In it, he follows the manufacture of Duro-Test 100-watt light bulbs through all the stages of their assembly as neck, filament and envelope are brought together in strangely beautiful twentieth century production machinery.

Continue reading “Retrotechtacular: 100 Watts 120 Volts”