Elegant And Portable DIY Nightlight Becomes A Fixture For Hacker’s Kids

When [itzikdiy]’s kids asked for a night light for their room, he got the bright idea to build something that straddles the line between portable and permanent. This fixture-less fixture plugs directly into a wall socket and is turned on and off with a handsome rocker switch on the bottom.

This lovely little lamp is mostly made from scrap — the oak on the front appears to have come from an old cabinet door, and the other two ring-shaped pieces are made from pine. [itzikdiy] even took the acrylic from broken panel lamps. Everything was cut with a Dremel and a circle-cutter attachment except the oak, which required a jigsaw. We think it looks great, especially with the different grain directions — call it art deco woodworking.

When it was all said and done, [itzikdiy] found it was too heavy to hang by the plug alone, so he added an L-shaped support beneath the power supply that holds it more evenly against the wall. [itzikdiy] also made a pair of hooks that snap into a pair of slots on the sides of the outlet itself. The solution is simple, sturdy, and effective without disrupting the lines of the lamp at all. Carve out a little bit of time to watch the build video after the break.

We know that someone of your hulking intelligence has no fear of the dark. But if you think you could use a nightlight in the bathroom for those 2 AM trips, look no further.

Continue reading “Elegant And Portable DIY Nightlight Becomes A Fixture For Hacker’s Kids”

The 70s Are Calling To Shed Some Light

Remember when phones didn’t all look the same? We had a good thing going in the early cell phone days, which seemed like a brief holdover from the Western Electric (et. al) era where you could get a phone that suited your inner minimalist or princess, and choose the color to boot.

[Dubchinsky] found a beautiful phone from this bygone era and saved it from one of two likely fates — the landfill, or else a life languishing as a piece of vintage technology that’s just sitting around for looks. Instead, this phone found a second calling as a lovely desk lamp with secret goose neck flexibility. The lamp itself is an inexpensive LED module from ebay that’s wired up to mains power through a push button switch in the phone’s base.

We absolutely love that [Dubchinsky] wrapped the curly cord around the goose neck, but were a bit disappointed that he didn’t use the hook switch to turn the lamp on and off. In the comments, he says that the plastic felt like it was too brittle to stand up to repeated actuation of such a heavy switch. That’s understandable. [Dubchinsky] also thought about using the rotary dial as a dimmer, and we think that’s a bright idea.

Between the guide, the pictures, and the build process video after the break, this is pretty much a complete how-to. We think that is commendable given that [Dubchinsky] is selling these lamps on etsy.

Do ya miss spinning the rotary dial and long for somewhat simpler days? Hook your finger into this rotary cell phone.

Continue reading “The 70s Are Calling To Shed Some Light”

Wireless, Low Power E-Ink Weather Gadget

Not that long ago, making a low-power and wireless weather display complete with an e-ink screen would have required a lot of work and almost certainly would have been larger than the device [Dmitry] created.

(1) Weather alert indicator, (2) Current temperature, (3) Humidity and wind, (4) 24-hour temperature graph, (5) 24-hour precipitation probably graph

His low power e-ink weather gadget takes advantage of one of the niftier developer boards out there to create a useful and slim device that does exactly what he needs and not a lick more. It’s fast to look up weather online, but not as fast as glancing at a display in a convenient location.

The board [Dmitry] selected is a LilyGO TTGO T5s, an ESP32-based board that integrates an e-ink display, which requires no power unless being updated. It has been loaded with just enough smarts to fetch weather information using the OpenWeather API, and update the display accordingly.

Powering up the WiFi to fetch an easily-parsed JSON file and update the display only once per hour means that a battery can provide months of runtime. As a bonus, the LilyGO board even includes the ability to charge the battery, making things awfully convenient.

The bill of materials is here and code for the device, including setup directions, is on the project’s GitHub repository. And if your tastes happen to run more towards the artistic than utilitarian, we have just the weather display for you.

Micro:bit Makes Cardboard Pinball More Legit

What have you been doing to ward off the winter blues? [TechnoChic] decided to lean in to winter and make a really fun-looking game out of it by combining the awesome PinBox 3000 cardboard pinball sandbox with a couple of Micro:bits to handle and display the player’s score. Check it out the build and gameplay in the video after the break.

The story of Planet Winter is a bittersweet tale: basically, a bunch of penguins got tired of climate change and left Earth en masse for a penguin paradise where it’s a winter wonderland all year round. There’s a party igloo with disco lights and everything.

[TechnoChic] used a Micro:bit plugged into a Brown Dog Gadgets board to keep track of scoring, control the servo that kicks the ball back out of the igloo, and run the blinkenlights. It sends score updates over Bluetooth to a second Micro:bit and a Pimoroni Scrollbit display that sit opposite the pinball launcher. She went through a few switch iterations before settling on conductive maker tape and isolating the ball so it only contacts the tape tracks.

There are two ways to score on Planet Winter — the blizzard at the end of the ball launcher path nets you ten points, and getting the ball in the party igloo is good for thirty. Be careful on the icy lake in the middle of the playfield, because if the ball falls through the ice, it’s gone for good, along with your points. It’s okay, though, because both the party igloo and the ice hole trigger an avalanche which releases another ball.

Seriously, these PinBox 3000 kits are probably the most fun you can have with cardboard, even fresh out of the box. They are super fun even if you only build the kit and make a bunch of temporary targets to test gameplay, but never settle on a theme (ask us how we know). Not convinced? Hackaday Editor-in-Chief [Mike Szczys] explored them in depth at Maker Faire in 2018.

Continue reading “Micro:bit Makes Cardboard Pinball More Legit”

Useful Build Tips For Making LED Panel Frames

[NotLikeALeafOnTheWind] has created many LED-based display projects, and shares his method for making attractive LED panel frames and mounts. At first glance it may look as though slapping a rectangle of aluminum extrusion around a display is all it takes, there is also the mounting and management of wiring, power supply, and possibly a Raspberry Pi to deal with. The process of building an attractive frame also has a few hidden gotchas that can be avoided with a bit of careful planning.

Magnetic feet on the LED panels makes mounting much easier and more flexible.

Here is one tip that will resonate with some readers: don’t rely on specified dimensions of parts; measure the actual parts yourself. There can be small differences between what a data sheet says to expect, and the dimensions of the actual part in one’s hands. It may not be much, but it can be the difference between an ideal fit, and something that looks like a bit of a hack job.

[NotLikeALeafOnTheWind] provides some basic frame layouts, and suggests using two- or three-channel extrusions to provide a flat bezel around the display edge if desired. Mounting the LED panel itself is done with magnetic feet and providing a length of steel bar to which the display can attach. This can provide a flush mount while avoiding the whole issue of screw-mounting the display panels themselves, or sliding them into channels. For mounting all the other hardware, a piece of DIN rail and some 3D-printed parts takes care of that.

The result looks slick and sturdy, and some of the tips are sure to be useful even if the whole process isn’t applied. We like the way the basic design scales and is flexible about the thickness and size of the LED panels themselves, making it a promising way to accommodate perfectly functional oddball panels that end up in the trash.

DIY Bread Slice Paper Goes Against The Grain

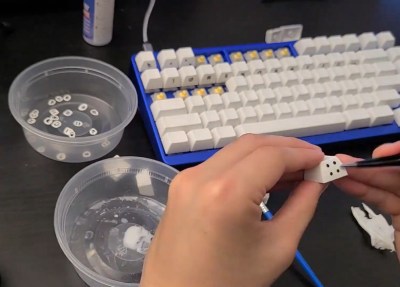
It’s the dead of winter here in the northern hemisphere, and between the pandemic and the polar vortex, we’re getting pretty tired of staring at the same four walls and eating incessantly. It’s the perfect recipe for trying something new and low-calorie, like baking a loaf of bread-shaped note paper from the stuff in the recycling bin.

[SusanLand] likes to make paper out of whatever discarded things she has on hand, including old jeans. When she tried making paper out of nothing but toilet paper tubes, it didn’t work so well, but it gave her an idea for cooking up some offbeat stationery.  She beefed up the pulp with shredded office paper and corn starch, and dialed in the whole wheat hue with a pinch of yellow and orange paper. Once the pulp was ready, she poured it into bread-shaped molds made from a plastic milk jug.

This tidy introduction to making your own paper covers everything from pulping techniques to drying methods. Once the slices are dry, [SusanLand] embellishes them with a scoring tool, colored pencils, and a handful of seeds to complete the look. Check out that process in the videos after the break.

Don’t want to make paper out of your paper? Use it to weigh your car, or fold up a fleet of airplanes.

Continue reading “DIY Bread Slice Paper Goes Against The Grain”

Minimal MQTT With Micropython

I have been meaning to play around with MQTT for some time now, and finally decided to take the plunge one evening last week. I had three cheap home temperature and humidity sensors, and was bothered that they often didn’t agree. Surprisingly, while the analog one had a calibration adjustment in the back, I have no idea how to calibrate the two digital ones. I took this as a sign that it was time to learn MQTT and be able to install my own, accurate sensors. Of course, I began by ordering the cheapest sensors I could find, but I can always upgrade later on.

Three Cheap Sensors

While we have written quite a bit about MQTT in Hackaday, I had to go all the way back to 2016 to find this introductory four-part series by Elliot Williams. Five years is a long time in the tech world, but I decided to give it a try anyway. Continue reading “Minimal MQTT With Micropython”