Once upon a time, small Linux-capable single board computers were novelties, but not anymore. Today we have a wide selection of them, many built around modules we could buy for our own projects. Some of the chipset suppliers behind these boards compete on cost, others find a niche to differentiate their product. Octavo Systems is one of the latter offering system-in-package (SiP) modules that are specifically designed for easy integration. They described how simple it would be to build a minimal computer using their SC335x C-SiP, and to drive the point home they brought a deadbug implementation to Embedded World 2019. [Short video after the break.]
Most of us encounter Octavo modules as the heart of a BeagleBoard. Their increasing integration made tiny wonders like PocketBeagle possible. But bringing out all those pins for use still required a four-layer circuit board. Octavo’s pitch for hardware professionals center around how easy integration saves time for faster time to market, and fortunately for us easy integration also translates to a more accessible device for our projects. It’s one thing to publish a document describing a hypothetical single-layer PCB for an Octavo module, it’s quite something else to show that concept in action with no PCB at all.
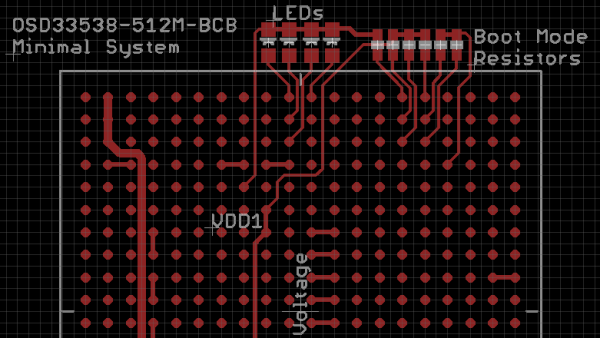
Of course, this little machine only has access to a fraction of the module’s functionality, and it is certainly overkill if the objective is just to blink a few LEDs. If so, we’d just use 555 timers! But it does show how simple a bare bones “Hello World” machine can be built, removing intimidation factor and invite more people to come play.
One of the three top winners in our circuit sculpture contest was a wireframe Z80 computer. There’s quite a jump from a Z80 to an Octavo SC335x, but we’ve already seen one effort by [Zach] over Supercon 2018 weekend to build a deadbug computer with an Octavo module. It won’t be long before someone one-ups this minimalist LED blinker with something more sophisticated and we can’t wait to see it. Continue reading “Octavo Systems Shows Off With Deadbug Linux Computer”