There’s no shortage of Geiger counter projects based on the old Soviet SBM-20 tube, it’s a classic circuit that’s easy enough even for a beginner to implement — so long as they don’t get bitten by the 400 volts going into the tube, that is. Toss in a microcontroller, and not only does that circuit get even easier to put together and tweak, but now the features and capabilities of the device are only limited by how much code you want to write.
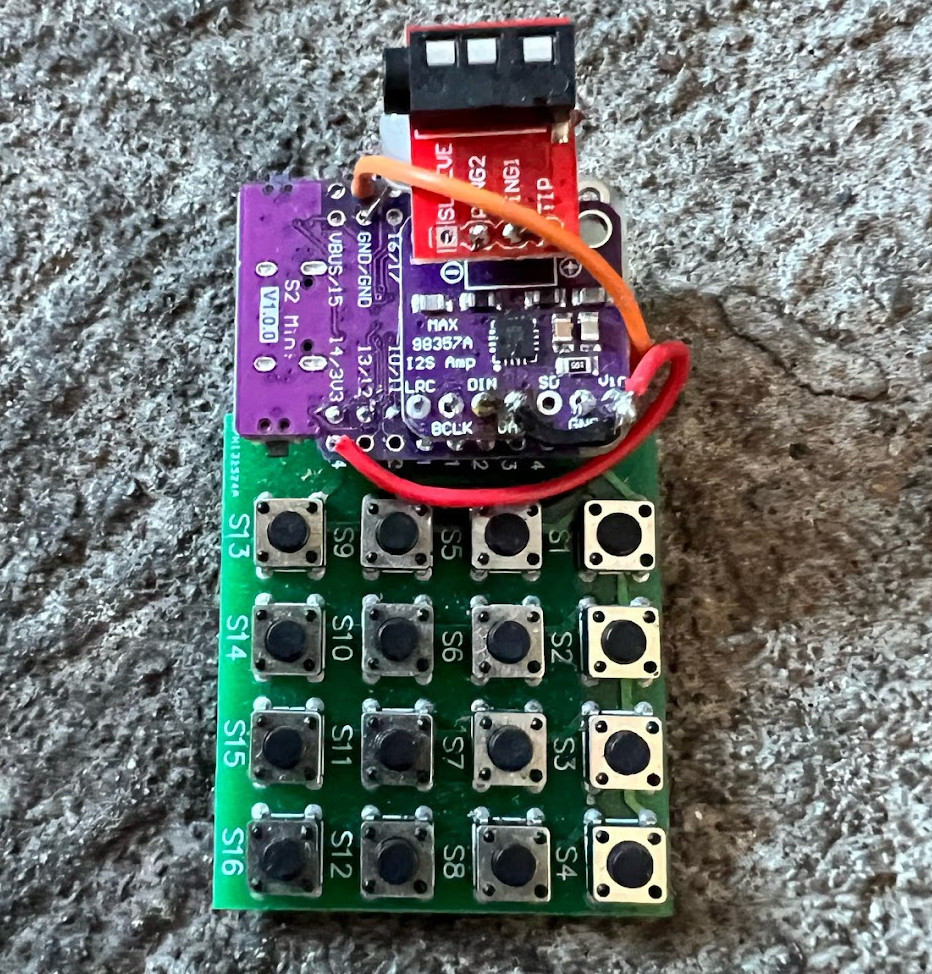
 Luckily for us, [Omar Khorshid] isn’t afraid of wrangling some 0s and 1s, and the result is the OpenRad project. In terms of hardware, it’s the standard SBM-20 circuit augmented with a LILYGO ESP32 development board that includes a TFT display. But where this one really shines is the firmware.
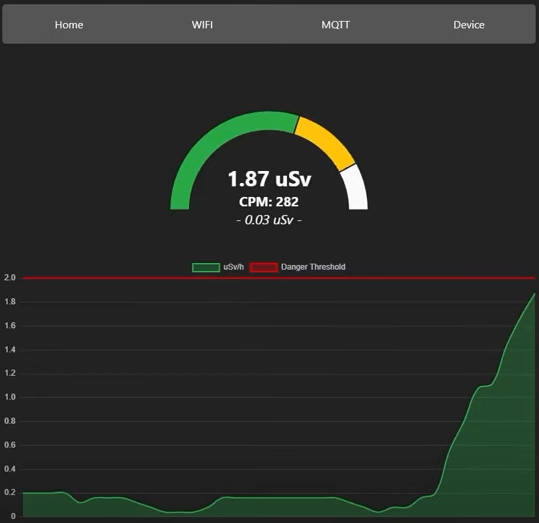
With the addition of a few hardware buttons, [Omar] was able to put together a very capable interface that runs locally on the device itself. In addition, the ESP32 serves up a web page that provides some impressive real-time data visualizations. It will even publish its data via MQTT if you want to plug it into your home automation system or other platform.
Between the project’s Hackaday.io page and GitHub repository, [Omar] has done a fantastic job of documenting the project so that others can recreate it. That includes providing the schematics, KiCad files, and Gerbers necessary to not only get the boards produced and assembled, but modified should you want to adapt the base OpenRad design.
This project reminds us of the uRADMonitor, which [Radu Motisan] first introduced in 2014 to bring radiation measuring to the masses. This sort of hardware has become far more accessible over the last decade, bringing the dream of a globally distributed citizen-operated network of radiation and environmental monitors much closer to reality.
Continue reading “ESP32 Brings New Features To Classic Geiger Circuit”