LoRa is often talked about as a potentially useful solution for emergency communication. The problem is, few of us are running around with LoRa hardware on a day-to-day basis. Student [William Barkoff] designed the Radiochat device as a simple tool that could pair with virtually anything over WiFi, and allow it to send and receive LoRa messages.
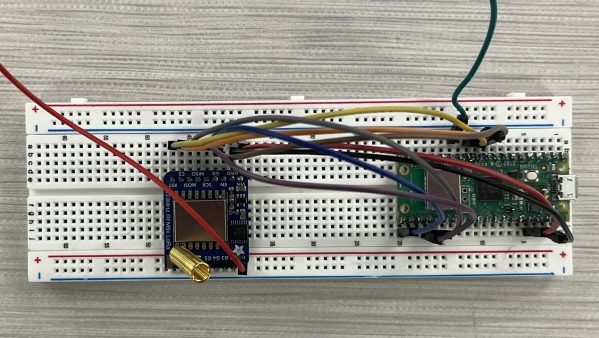
Radiochat is based on the Raspberry Pi Pico W, and uses the microcontroller’s wireless hardware to communicate with other devices. It provides a WiFi network that devices like laptops or smartphones can connect to. The Pico serves up a simple web page which accepts text input. Type in a message and hitting enter and the Pico will command a LoRa radio module over SPI to send that message out over the airwaves. It can then be picked up by another Radiochat module which displays the message on its own webpage.
It’s in an early state of development, and the demo video shows there are still some bugs to work out. Ultimately, though, it could be a cheap battery-powered device that lets smartphones and laptops chat over LoRa in remote areas. Indeed, [William’s] trips to New Mexico on model rocketry expeditions were a big inspiration for the project.
Continue reading “Radiochat Is A Simple LoRa Interface Over WiFi”