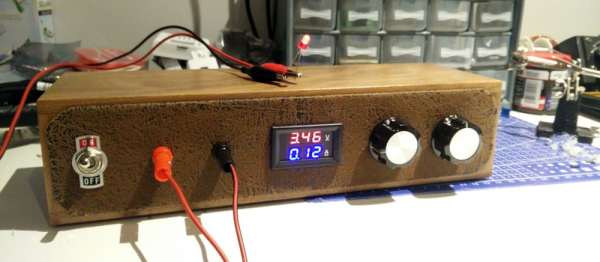
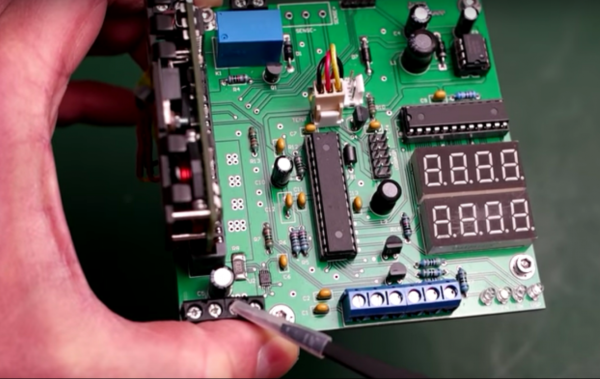
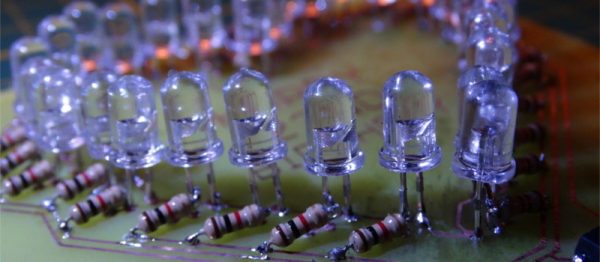
Old Motor Donates Rotor For Coaxial Wind Vane And Anemometer

Problem: build a combined anemometer and wind vane where the pivots for both sensors are coaxial. Solution: turn an old universal motor into a step-wise potentiometer for the wind vane, and then pull a few tricks to get the whole thing assembled.

commutatior-with-series-resistorsWe have to admit that when we first saw [Ajoy Raman]’s Instructables post, we figured that he used a universal motor to generate a voltage from the anemometer. But [Ajoy]’s solution to the coaxial shafts problem is far more interesting than that. A discarded universal motor donated its rotor and bearings. The windings were stripped off the assembly leaving nothing but the commutator. 1kΩ SMD resistors were soldered across adjacent commutator sections to form a series resistance of 22kΩ with taps every 1k, allowing 0 to 2.2V to be read to the ADC of a microcontroller depending on the angle of the vane.

As clever as that is, [Ajoy] still had to pull off the coaxial part, which he did by drilling out the old motor shaft from one end to the other using just a drill press. The anemometer shaft passes through the hole in the shaft and turns a small DC motor to sense wind speed.

There might have been other ways to accomplish this, but given the constraints and the low cost of this solution, our hats are off to [Ajoy]. We’re a little concerned with that motor used for the anemometer, though. It could result in drag when used as a generator. Maybe a better solution would be a Hall-effect sensor to count rotations of a hard drive rotor.

Continue reading “Old Motor Donates Rotor For Coaxial Wind Vane And Anemometer”

Friday Hack Chat: Eagle PCB Design With Matt Berggren

Eagle is a household name for all Hackaday regulars. Here’s your chance to learn about upcoming features, get your ‘how do I do this in Eagle?’ questions answered, and get your wishlist items heard. Join us on Friday at 12:00 PST for a live Hack Chat about the Eagle PCB Design software.

Hosting this week’s discussion is [Matt Berggren], also known on Hackaday.io as technolomaniac. Matt is the Director of Autodesk Circuits and with Autodesk’s acquisition of Eagle last summer, the popular schematic design and PCB layout software falls under his purview. He has an extensive background in designing printed circuit boards — if you can do it in EDA software he knows how — this is an excellent opportunity to get answered the questions that have been stumping you.

Don’t miss this Hack Chat! Here’s a handy web tool to help convert 1/13/17 at 12:00 PST to your local time.

Here’s How to Take Part:

join-project-team-message-buttons
Buttons to join the Hacker Channel and enter Hack Chat

Hack Chat are live community events that take place in the Hackaday.io Hacker Channel. Visit that page (make sure you are logged in) and look for the “Join this Project Button” in the upper right. Once you are part of the Hacker Channel, that button will change to “Team Messaging” which takes you to the Hack Chat.

You don’t have to wait for Friday, join Hack Chat whenever you like and see what the community is currently talking about.

Join Us Next Week Too for KiCad!

Are you more of a KiCad person than an Eagle person? You should still drop by this week to see if Matt changes your mind. But block out your calendar next week when [Wayne Stambaugh], one of the lead developers of KiCad will join us for a Hack Chat on Friday, 1/20/17.

Pulsed Power And Its Applications

Pulsed power is a technology that consists in accumulating energy over some period of time, then releasing it very quickly. Since power equals energy (or work) divided by time, the idea is to emit a constant amount of energy in as short a time as possible. It will only last for a fraction of a second though, but that instantaneous power has very interesting applications. With this technology, power levels of more than 300 terawatts have been obtained. Is this technology for unlimited budgets, or is this in reach of the common hacker?

Consider for example discharging a capacitor. A large 450 V, 3300 uF electrolytic capacitor discharges in about 0.1 seconds (varies a lot depending on capacitor design). Since the energy stored in it is given by 1/2 CV², which gives 334 Joules of energy, the power delivered will be 3340 watts. In fact a popular hacker project is to build large capacitor banks. Once you have the bank, and a way to charge it, you can use it to power very interesting devices such as:

untitled1
A portable, 1.25 kJ coilgun by [Jason Murray]

Railguns in particular are subject to serious research. You may have read about the navy railgun, capable of reaching a muzzle speed of more than 4,600 mph (around Mach 6), more than any other explosive-powered gun. Power is provided by a 9-megajoule capacitor bank. The capacitors discharge on two conducting rails, generating an electromagnetic field that fires the projectile along the rails. The rail wear due to the tremendous pressures and currents, in the millions of amperes range, is still a problem to be solved.

Continue reading “Pulsed Power And Its Applications”

Paper Airplane Machine Gun V2.0

A little over two years ago we posted an amazing contraption that holds a stack of paper sheets, folds them into paper planes, and launches them. There’s now a newer version — the PFM A5 v2.0. It is over a meter long, weighs about 10 kilograms, and features a mind-boggling number of gears and moving parts. Video is embedded below.

In one end travels one sheet of paper after the next. At each stage in the process the paper is folded (symmetrically) and creased by a vertical wheel to make up the keel of the finished plane before launching out the other end. Amazing, and not a jam or “PC Load Letter” error message in sight!

This, of course, has a purpose… junk ads from the sky!

Continue reading “Paper Airplane Machine Gun V2.0”

Say Hello To Our New Robot Overlords

Well, that’s it. If SkyNet goes live once this 4-meter tall Avatar-style mech suit is in production, we’re all doomed.

Named [Method-2], the bipedal giant towers over the engineers testing it at Korea’s Hankook Mirae Technology, where they appear to have done everything possible to make this thing look terrifyingly awesome. The first video below shows the mech with a pilot on board, putting the arms through their paces. We count at least six degrees of freedom on each arm, not including the five digits on each hand that look like they could punch through a brick wall. Later in the video we see a tethered walking test with no pilot, but we also found a webcam video that purports to be the first walk with a pilot. Either way, the 1.5-ton machine shakes the floor with every step.

This is still a development phase project, as evidenced by the fact that the mech seems to be getting its power from an umbilical. But this company has dumped a lot of money into this thing, and we’d bet they intend to capitalize on it. Once it can run untethered, though, watch out. Until then, we’ll settle for this mecha-baby costume.

Continue reading “Say Hello To Our New Robot Overlords”

Machinist Magic: Gauge Block Wringing

In this age of patent trolls and multi-billion dollar companies that make intellectual property claims on plant genes and photographing objects against a white background, you’d be forgiven for thinking that a patent on a plain steel block would be yet another recent absurdity. But no – [Carl Edvard Johansson] got a patent for his “Gauge Block Sets for Precision Measurement” in 1901. As [AvE] shows us with a video on how gauge blocks can be “wrung” together, there’s more to these little blocks than meets the eye.

Gauge block wringing is probably nothing new to experienced machinists, but for the rest of us, it’s a pretty neat trick. To start the show, [AvE] gives us a little rundown on “Jo blocks” and what they’re good for. Basically, each block is a piece of tool steel or ceramic that’s ground and lapped to a specific length. Available in sets of various lengths, the blocks can be stacked end to end to make up a very precise measuring stick. But blocks aren’t merely placed adjacent to each other – they physically adhere to each other via their lapped surfaces after being wrung together. [AvE] demonstrates the wringing technique and offers a few ideas on how this somewhat mysterious adhesion occurs. It’s pretty fascinating stuff and puts us in the mood to get a gauge block set to try it ourselves.

It’s been a while since we’ve seen [AvE] around Hackaday – last time out he was making carbon foam from a slice of bread. Rest assured his channel has been going strong since then, with his unique blend of laughs and insight into the secret lives of tools. Definitely worth checking out, and still skookum as frig.

Continue reading “Machinist Magic: Gauge Block Wringing”

Light Dimmer Shows How To Steal Power From AC Line

We see a lot of traffic on the tips line with projects that cover old ground but do so in an instructive way, giving us insight into the basics of electronics. Sure, commercial versions of this IR-controlled light dimmer have been available for decades. But seeing how one works might just help you design your Next Big Thing.

Like many electronic controls, the previous version of this hack required a connection to a neutral in addition to the hot. This version of the circuit relies on passing a small current through the light bulb the dimmer controls to avoid that extra connection. This design limits application to resistive loads like incandescent bulbs. But it’s still a cool circuit, and [Muris] goes into great detail explaining how it works.

We think the neatest bit is the power supply that actually shorts itself out to turn on the load. A PIC controls a triac connected across the supply by monitoring power line zero-crossing. The PIC controls dimming by delaying the time the triac fires, which trims the peaks off of the AC waveform. The PIC is powered by a large capacitor while the triac is conducting, preventing it from resetting until the circuit can start stealing power again. Pretty clever stuff, and a nice PCB design to boot.

Given the pace of technological and cultural change, it might be that [Muris]’ dimmer is already largely obsolete since it won’t work with CFLs or LEDs. But we can see other applications for non-switched mode transformerless power supplies. And then again, we reported on [Muris]’s original dimmer back in 2009, so the basic design has staying power.