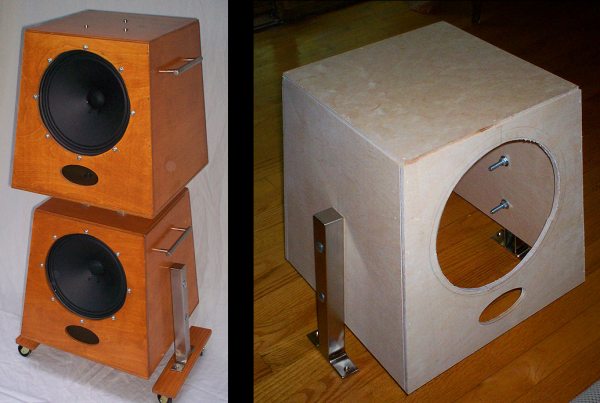
[Dano] builds a lot of guitar pedals and amps. He needed a speaker cabinet dedicated to this task in order to be a consistent reference when checking out his electronic creations. He ordered a couple of 10″ guitar speakers…. and they sat around for a while.
Then one day at the craft store, he stumbled on an inexpensive wooden trash can. It had a tapered design and came with a lid. As would any normal person, [Dano] immediately thought these would make a perfect speaker cabinet so he bought two of them.
The trash cans would be used in an upside-down orientation. The intended lid makes for a well fitting bottom of the cabinet. Holes were cut for the speaker and two terminal blocks. Since these cabinets would be used for testing a bunch of different amps, two different terminal blocks were used to permanently have multiple connector types available.
A pair of modern kitchen cabinet handles were used as carrying handles for each of the two cabinets. If a speaker cabinet one speaker tall is cool, a cabinet two speakers tall must be twice as cool. To get there, the two cabinets were bolted together using electrical conduit as an industrial looking spacer. Those brackets bolted to the sides of the bottom cabinet are actually Ikea shelf brackets that [Dano] had bought and never used. The Ikea brackets support casters making for easy moving around the studio.
Overall, [Dano] is happy with how his cabinets sound. They are very unique and interesting at the least. We’d be happy to play some riffs through them!

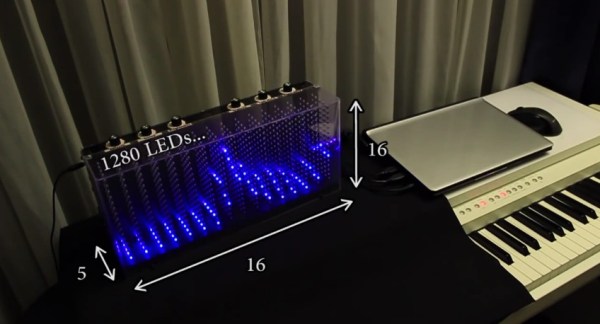
 When [Dooievriend] set out to design the audio analyzing portion of the firmware, his mind jumped to the discrete Fourier transform. This transform calculates the amplitude in a series of frequency bins in the audio—seemingly perfect for a VU. However, after some more research, [Dooievriend] decided to implement a