Whether it was as an impulsive youth or an impatient adult, there’s probably few among us who haven’t broken a telescopic antenna or two over the years. It doesn’t take much to put a bend in the thin walled tubing, and after that, all bets are off. So [The Amateur Engineer] couldn’t really be too upset when his son snapped the antenna off the transmitter of an old RC truck. Instead, he decided to take it apart and see how it could be repaired.
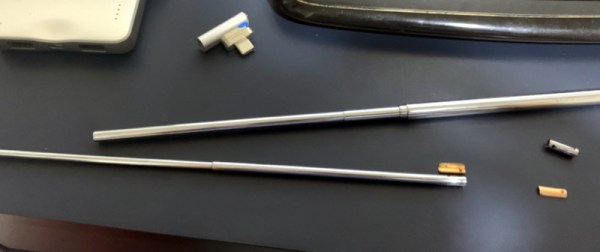
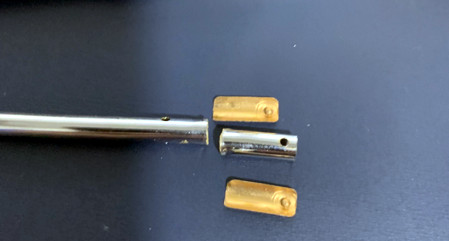 Taking a thin screwdriver to the antenna’s bottom most segment, he was able to widen up the opening enough to remove the upper sections as well as recover the broken piece and copper locking plates. He cut out the damaged area and drilled new holes for the pins on the copper plates to fit into. Inserting the repaired section back into the lowest segment was no problem, but he says it took a little trial and error before he was able to roll the edge over enough to keep the antenna from falling apart.
Buying a replacement would certainly have been easier, but as the radios in our devices have moved into the higher frequencies, these collapsible antennas have become a bit harder to come by. Modern RC vehicles operate on 2.4 GHz, so they don’t need the long antennas that the older 27 MHz systems utilized. [The Amateur Engineer] did find a few direct replacements online, but none for a price he was willing to pay.
We might have used the broken transmitter as an excuse to switch the RC vehicle over to WiFi control, but we appreciate [The Amateur Engineer] showing how this type of antenna can be disassembled and repaired if necessary.