Extracting A Vector Font From A Vintage Plotter

There is a huge variety of hardware out there with a font of some form or other baked into the ROM. If it’s got a display it needs a font, and invariably that font is stored as a raster. Finding these fonts is trivial – dump the ROM, render it as a bitmap, and voilà – there’s your font. However, what if you’re trying to dump the font from a vintage Apple 410 Color Plotter? It’s stored in a vector format, and your job just got a whole lot harder.

The problem with a vector font is that the letters aren’t stored as individual images, but as a series of instructions that, when parsed correctly, draw the character. This has many benefits for generating characters in all manner of different sizes, but makes the font itself much harder to find in a ROM dump. You’re looking for both the instructions that generate the characters, as well as the code used to draw them, if you want a full representation of the font.

The project begins by looking at what’s known about the plotter. The first part of any such job is always knowing where to look, of course. It’s quickly determined that the font is definitely stored in the main ROM, and that there is no other special vector drawing chip or ROMs on board. The article then steps through the search process, beginning with plaintext searches of the binary dump, before progressing to a full disassembly of the plotter firmware. After testing out various assumptions and working methodically, the vector data is found and eventually converted into a modern TrueType font.

In the end, the project is successful, and it’s a great guide on how to approach similar projects. The key is to lay out everything you know at the start, and use that to guide your search step by step, testing and discarding assumptions until you hit paydirt. We’ve seen similar works before, like this project to dump the voice from an ancient Chrysler Electronic Voice Alert.

Cherry MX to LEGO keypads

Connecting Cherry MX Key Switches To LEGO Just Got Easier

The Cherry MX Blue keyswitch

Here on Hackaday, we like keyboard hacks. Given how much time we all spend pounding away on them, they’re natural hacks to come up with. If you’re pulling the circuitry from an existing keyboard then chances are the keys are pressed either by pushing down on rubber domes (AKA the membrane type), or on mechanical switches. [Jason Allemann] has just made it easier to do keyboard hacks using LEGO by building one for a circuit board with mechanical Cherry MX key switches. That involved designing parts to connect LEGO bricks to the switches.

For those custom parts, he recruited his brother [Roman], who’s a mechanical engineer. [Roman] designed keycaps with a Cherry MX stem on one side for snapping onto the key switches, and LEGO studs on the other side for attaching the LEGO bricks. The pieces also have a hole in them for any keys which have LEDs. Of the 100 which [Jason] ordered from Shapeways, around ten were a bit of a loose fit for the LEGO bricks, but only if you were doing extreme button mashing would they come off.

The easy part was the keyboard circuit board itself, which he simply removed from an old Cooler Master Quick Fire Rapid keyboard and inserted into his own LEGO keyboard base.

LEGO mechanical keyboard

We do like his creative use of bricks for the keys. For one thing, the letter keys have no letters on them and so is for toufh-typosts touch-typists only. The Caps Lock is a baseball cap, which would be awkward to press except that no one ever does anyway. ESC is a picture of a person running from a dinosaur and F1, which is often the help-key, is the Star of Life symbol for medical emergency services such as ambulances. Scroll Lock is, of course, a scroll. And to make himself type faster, he incorporated blue racing stripes into the frame, but you can judge for yourself whether or not that trick actually works by watching his detailed build-video below.

Continue reading “Connecting Cherry MX Key Switches To LEGO Just Got Easier”

Gesture Keyboard For Universal Input

Keyboards are currently the most universally accepted computer input devices. They may be wired, wireless, or virtual, but the chances are that you’re within a few centimeters of a keyboard right now. [Federico Terzi] built a prototype from an Arduino and an accelerometer which conceptually resembles writing in Palm’s old Graffiti, though this version is performed in mid-air with a handheld instead of a little square at the bottom of an LCD screen.  He can also operate wirelessly with a Bluetooth module and battery.

The task of the Arduino is to take data from the accelerometer and feed it to the computer whenever a 12mm switch is pressed. Each letter is individually learned by his Python code and scikit-learn’s Support Vector Machine. There’s nothing holding a user back from giving single-letter commands to your favorite programs. For example, it would be possible to give a thumbs-up in meatspace when you want to upvote or covering your ears could mute the audio.

We love keyboard hacks like this mechanical macro keyboard, a minimal and elegant USB Morse key(board), and Brian Benchoff’s open love-letter to mechanical keyboards.

Continue reading “Gesture Keyboard For Universal Input”

An Awesome Open Mechanical Keyboard

Who doesn’t want a little added functionality to their  lives? Feeling a few shortcut keys would make working in Eagle a bit smoother, [dekuNukem] built his own programmable mechanical keypad: kbord.

It sports vibrant RGB LED backlight effects with different animations, 15 keys that execute scripts — anything from ctrl+c to backdoors — or simple keystrokes, up to 32 profiles, and a small OLED screen to keep track of which key does what!

kbord is using a STM32F072C8T6 microcontroller for its cost, speed, pins, and peripherals, Gateron RGB mechanical keys — but any clear key and keycaps with an opening for the kbord’s LEDs will do — on a light-diffusing switch plate, and SK6812 LEDs for a slick aesthetic.

Check out the timelapse video tour of his build process after the break! (Slightly NSFW, adolescent humor for a few seconds of the otherwise very cool video. Such is life.)

Continue reading “An Awesome Open Mechanical Keyboard”

Sawed Off Keyboard

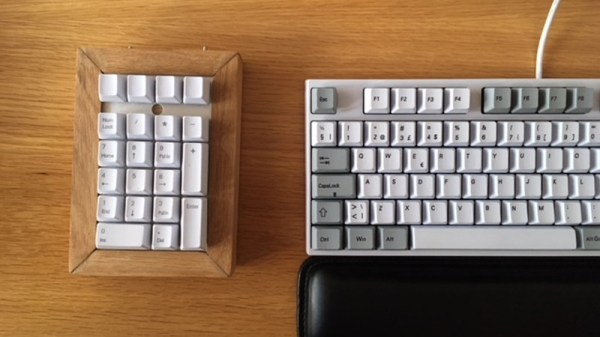
Have you ever had to cut a piece of furniture in two to get it into a new place? Yours truly has, having had to cut the longer part of a sectional sofa in two to get it into a high-rise apartment. That’s what [Charles]’ sawed off keyboard immediately reminded us of. It sounds just as crazy, but brilliant at the same time.

In [Charles]’ case he wanted a keypad whose keys were customizable, and that would make a single keypress do common things like cut, copy and paste, which are normally ctrl-X, ctrl-C and ctrl-V in Windows. To do that he literally sawed off the numeric keypad from a full-sized keyboard. He also sawed off the end to the left of the QWERTY keyboard, and glued it onto the open end of his keypad.

The circuit board was too wide to fit in his new keypad, but he couldn’t stretch out the connections from the keypad’s keys to the board. So he did what any self-respecting hacker would do, he cut the circuit board where there were a manageable number of traces, leaving one part that would fit inside the keypad and another part that he could connect the traces to using a few wires. Lastly, he’d started with a PS/2 keyboard but he wanted USB output and programmability. So he redirected the PS/2 wires to an Arduino compatible Pro Micro and wrote some conversion code which you can find on his GitHub.

What other transformations can we do to keyboards? [Shrodingers_Cat] combined his with some DVD case covers to come up with a pedal board for use with his feet. And given that the keys on the numeric keypad are redundant, [Kipkay] put it to use as a hiding place for valuables instead.

Mini-Banners For Small Occasions

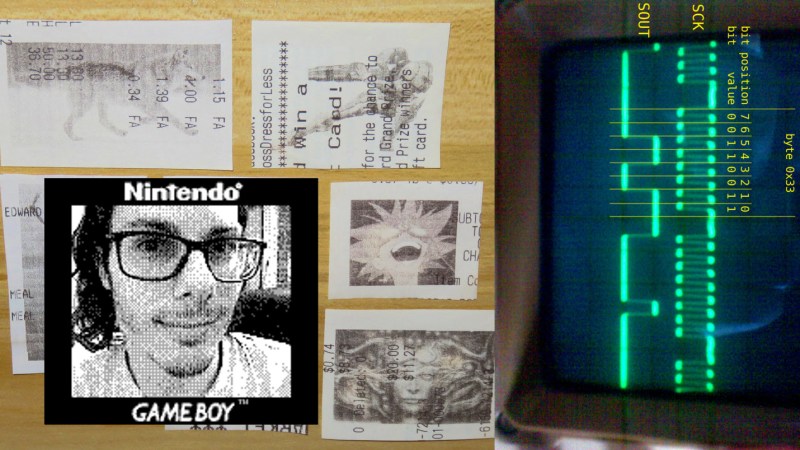
Do you often find yourself needing to make small signs? Perhaps you’re trying to put a notice on the office fridge, but you’re just not in the mood for the usual Comic Sans-on-A4 staple today. A banner of some sort would do the trick, but… a small one, right? [Mike Ingle] has the answer – making mini-banners on old receipt printers.

[Mike] was a fan of Paint Shop in the 1980s, which among other things, enabled the printing of long banners on the popular dot matrix printers of the era. Realising that receipt printers have a similar ability to print on a long continuous strip of paper, he decided to see if it was possible to create small banners using the hardware.

The hack is simple – ImageMagick is used to generate a one-bit black & white bitmap that is then processed with some custom C code to generate something the printer can understand. It’s then a simple matter of hacking up the original RS-232 cable to fit a DB-9 (aka DE-9) connector, and spitting out the instructions over serial.

The mini-banners are cool, and we could imagine having some fun with such a project, using it to print out tweets or putting it into service as a stock ticker. It’s a great example of cleanly interfacing with existing hardware to create something outside of the original design intentions. Such printers are fertile ground for hacks – like this printer that can spit out the US Constitution in 6 seconds flat.

Jenkins Given An Industrial Stack Light For Build Reporting

When working on software development in a team environment, it’s important to know the status of your build at all times. Jenkins can display build automation info on a screen but where’s the fun in that? A popular office project is to build some kind of visual display of a project’s status, and [dkt01] has done just that with this stack light build monitor.

In this day and age of online shopping, random bits of industrial hardware are just an eBay away, so it’s easy to find some cool lamps or indicators for any project. [dkt01] sourced a standard 24V stack light off the shelf. With its green, red, and yellow indicators, its perfect for showing the current status of their build server.

The project uses an Arduino Pro Micro combined with an ENC28J60 Ethernet adapter. We used to see that chip all the time but in 2017 it’s somewhat of a classic setup with the great unwashed masses largely migrating to the ESP8266. However, for the purposes of this project, it was perfect for connecting to the wired office network (after all, you want to know the status of your build and not of your WiFi). [dkt01] even managed to get a web configuration to work despite the relatively meager resources of the ATmega32u4.

The build is cleanly executed, with the microcontroller and Ethernet hardware tucked into a 3D printed base for the stack light’s enclosure. It’s far more likely to become a permanent office fixture if it’s a tidy build without wires hanging out everywhere so a custom PCB ties everything together neatly. In another nice touch, the stack lights flash on initialization to indicate if the DHCP lease was successful, which makes troubleshooting easier. There’s an overview of all different light combinations and meanings in the video after the break.

Overall it’s a solid build with some off-the-shelf components that serves a genuine purpose. For a similar project built on a smaller scale, check out the Indictron. For something bigger, show us how you’ve learned to output your server status on the city’s traffic lights. Ask first, though.
Continue reading “Jenkins Given An Industrial Stack Light For Build Reporting”