Blink A Pi, Win A Prize

You can plug in a Raspberry Pi, and you can blink a LED. You can visualize data, and now there’s a contest on Hackaday.io to show off your skills. Right now, we’re opening up the Visualize It With Pi contest on Hackaday.io. The challenge? Visualize data with LED strips and panels. Is that ‘data’ actually just a video of Never Gonna Give You Up? We’ll find out soon enough.

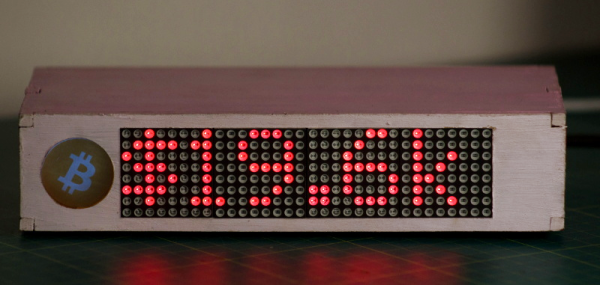
The goal of this contest is to combine a Raspberry Pi and its immense processing power and the blinky goodness of LED strips and panels to visualize and interpret data in novel and artistic ways. We’re looking for animation. clarity, and flamboyant flickering. Want some ideas? Check out the World of Light or the American Constitution Candle. We’re looking for the most blinky you can do with a Pi, and yes, there will be prizes.

Prizes

BlinkyTile Explorers Kit

Prizes for the best blinky include, of course, more blinky. The best visualizations from a directly connected sensor, data from an Internet Source, and data from an esoteric data source will each receive some Blinkytape. This is a strip of WS2812b LEDs with an ATMega32u4 embedded on the end. Plug a USB power supply into the Blinkytape, and you get a strip of LEDs in whatever color you want with the ability to push animation frames to the chip on the strip. The Grand Prize winner for this contest will also receive Blinkytile Explorers Kit, a Serpentine LED strip, a LED ring, and two meters of ultra thin LED strip.

Let’s Do This!

The requirements for the contest are simple: just use a Raspberry Pi to drive LED strips or panels, post it as a new project on Hackaday.io, and submit the project to the contest. We’re looking for a full description, source, schematics, and photos and videos of the finished version of the project — do everything you can to show off your work! The contest is open right now, and ends at 08:00 Pacific on October 1st. We know you like to blink those LEDs, so get crackin’.

An Upcycled Speaker Box With Hidden Features

At first glance, this fire engine red speaker box built by [NoshBar] looks straightforward enough. Just an MDF case and couple of drivers recovered from a trashed stereo. But the array of controls and connectors on the front, and a peek on the inside, shows there’s more to this particular project than meets the eye.

Built almost entirely from parts [NoshBar] found in the trash, construction started with some salvaged MDF IKEA shelves and their corresponding twist lock cam fittings. We don’t usually see those style cam fittings used to build DIY enclosures, but if it works for all those furniture manufacturers why not?

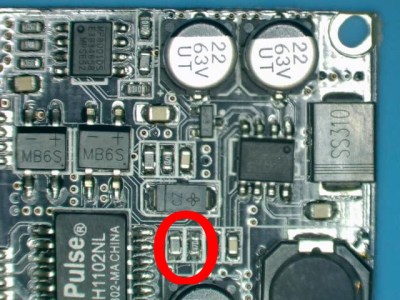
A pair of Sony stereo speakers he found gave up their internals, and a TPA3116 amplifier board off of eBay drives them. He’s wired up an audio pass-through mode for using headphones when the amplifier is powered off, and dual inputs so he can switch between PC and PS4.

But the audio components are only half of what’s inside that shiny red exterior. [NoshBar] packed in an ATX PSU and broke out the 3.3 V, 5 V, and 12 V lines to the front panel so he can use it as a bench power supply for his Arduino projects. It’s also home to a gigabit Ethernet switch and a Raspberry Pi acting as a file server.

We’re always amazed at what hackers are able to accomplish with parts they’ve literally pulled out of the trash, from a waterwheel to charge your phone to a functional CNC router. It seems there’s plenty of treasure in your local dumpster if you’re willing to get a little dirty.

Hanging, Sliding Raspi Camera Adds Dimension To Octoprint

Are you using Octoprint yet? It’s so much more than just a way to control your printer over the internet, or to keep tabs on it over webcam when you’re off at work or fetching a beer. The 3D printing community has rallied around Octoprint, creating all sorts of handy plug-ins like Octolapse, which lets you watch the print blossom from the bed via time-lapse video.

Hackaday alum [Jeremy S Cook] wanted to devise a 3D-printable mount for a Raspi camera after finding himself inspired by [Tom Nardi]’s excellent coverage of Octoprint and Octolapse. He recently bought a wire shelving unit to store his printer and printer accessories, and set to work. We love the design he came up with, which uses the flexibility of the coolant hose to provide an endlessly configurable camera arm. But wait, there’s more! Since [Jeremy] mounted it to the rack with zip ties, the whole rig shimmies back and forth, providing a bonus axis for even more camera views. Slide past the break to see [Jeremy]’s build/demo video.

It’s great to be able to monitor a print from anywhere with internet access, but the camera is almost always set up for a tight shot on the print bed. How would you ever know if you’re about to run out of filament? For that, you need a fila-meter.

Continue reading “Hanging, Sliding Raspi Camera Adds Dimension To Octoprint”

Rover V2 Handles Stairs As Easily As The Outdoors

Rover V2 is an open-source, 3D-printable robotic rover platform that has seen a lot of evolution and development from its creator, [tlalexander]. There are a number of interesting things about Rover V2’s design, such as the way the wheel hubs themselves contain motors and custom planetary gearboxes. This system is compact and keeps weight down low to the ground, which helps keep a rover stable. The platform is all wheel drive, and moving parts like the suspension are kept high up, as far away from the ground as possible. Software is a custom Python stack running on a Raspberry Pi that provides basic control.

The Rover V2 is a full mechanical redesign of the previous version, which caught our attention with its intricate planetary gearing inside the wheel hubs. [tlalexander]’s goal is to create a robust, reliable rover platform for development that, thanks to its design, can be mostly 3D printed and requires a minimum of specialized hardware.

Reinforce Happy Faces With Marshmallows And Computer Vision

Bing Crosby famously sang “Just let a smile be your umbrella.” George Carlin, though, said, “Let a smile be your umbrella, and you’ll end up with a face full of rain.” [BebBrabyn] probably agrees more with the former and used a Raspberry Pi with Open CV to detect a smile, a feature some digital cameras have had for a long time. This project however doesn’t take a snapshot. It launches a marshmallow using a motor-driven catapult. We wondered if he originally tried lemon drops until too many people failed to catch them properly.

This wouldn’t be a bad project for a young person — as seen in the video below — although you might have to work a bit to duplicate it. The catapult was upcycled from a broken kid’s toy. You might have to run to the toy store or rig something up yourself. Perhaps you could 3D print it or replace it with a trebuchet or compressed air.

Continue reading “Reinforce Happy Faces With Marshmallows And Computer Vision”

Run A Linux Terminal On Cheap E-Ink Displays

If you haven’t kept up with the world of e-ink displays, here’s some good news: they are pretty cheap now. For as little as $15 you can get a small e-ink display that has good enough performance and contrast to actually do something useful. There’s only one problem: figuring out how to drive them in your project.

Tired of seeing nothing but wiring diagrams and sample code when it came to actually putting these e-ink modules to use, [Jouko Strömmer] decided to try his hand at creating a turn-key application for these gorgeous little displays. The result is PaperTTY, a Python program that allows the user to open up a fully functional Linux virtual terminal on an e-ink display.

Of course, there are some caveats. For one, this all assumes you’re using a Waveshare display (specifically their 2.13 inch HAT) connected to a Raspberry Pi over SPI. Not to say that’s the only hardware combination that will work, but it’s the only one that [Jouko] has done any testing on at this point. If you want to try to shake things up in terms of hardware, you might need to get your hands dirty.

The advantage of being able to open a Linux VT on one of these e-ink displays is pretty simple: you can run basically any piece of software you want on it. Rather than having to come up with software that specifically features support for the display, you can just use (or write) standard Linux console programs. [Jouko] mentions a number of popular programs such as vim and irssi, but you could just as easily write a Bash script to dump whatever data you like to the screen.

In the video after the break [Jouko] shows PaperTTY in action for the doubters who think these sorts of displays are no good for interactive use. The display is very crisp and readable, with no signs of flickering. Overall he says the experience is not unlike using a slow SSH connection. It might not be how we’d like to use a computer full time, but we can definitely see the potential.

With the recent progress with Kindle hacking, it seems that interest in e-ink is as high as ever. Despite what the haters might claim, it’s a useful niche tech that still holds plenty of promise.

Continue reading “Run A Linux Terminal On Cheap E-Ink Displays”

Raspberry Pi Foosball Scoreboard

Foosball, also known as table football, is a classic game from the 1920s that is completely devoid of the bells and whistles of modern gaming. Players control stoic little figures with the most simplistic of input devices in order to move a tiny ball to and fro on the playing field. So naturally, somebody thought they should add a Raspberry Pi to it and drag the whole thing kicking and screaming into the 21st century.

The team at [Matmi] spend a good portion of their down time huddled over a foosball table, but they found the experience was significantly less exciting for the spectators than the players. To add a little more pomp to their sessions they added a flashy display that not only shows the current score, but makes individual scores a bit more exciting by showing some celebratory confetti.

Micro switches mounted in the ball return tubes of the table allow the Raspberry Pi to know who scored and when. This information is picked up by the web-based scoreboard written in Vue.js and served out by nginx. The actual scoreboard is being displayed by a laptop that’s connected to the Pi over Wi-Fi.

If the software setup seems a bit convoluted, it’s because the project itself was something of a learning experience for HTML5 and web programming in general. Further updates are planned to streamline the system a bit to make it more self-contained, as well as adding more features to the scoreboard such as tournaments and randomized matches.

Interestingly, we’ve seen quite a few foosball hacks over the years. It seems these tables are somewhat ubiquitous in offices and hackerspaces. From turning it into an online-enabled experience to building an AI table you can play against, there’s plenty of ways to inject some new life into this nearly 100-year-old game.

Continue reading “Raspberry Pi Foosball Scoreboard”