PiMiniMint — Altoids RPi Zero Computer

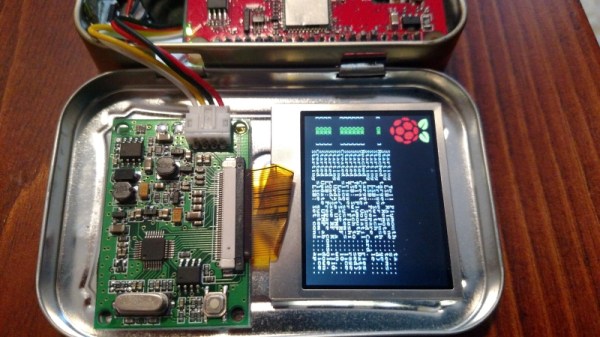
We’ve seen our fair share of Altoids mint tin projects and it seems the tin… can always house another interesting project. This time [MWAGNER] managed to make his long time idea of having a computer inside an Altoids tin. He had the idea in 2012, after the original raspberry pi came out, but the size constraints kept the project from going forward. The RPi Zero is much smaller and its launch made the project possible.

[MWAGNER] made two versions, the first version of the PiMiniMint includes a screen, WiFi, Bluetooth, 32GB of storage, an infrared camera, and a full size USB port. All of this fit inside the Altoids tin. The second version has a battery — 2000mAh reportedly lasting for 6-8hrs. But there is only so much space to perform small miracles so in this version the camera had to go. This makes it a wireless standalone computer as you can control it with Bluetooth keyboard and mouse while connecting to the outside world over WiFi.

Back in 2015, in Hacklet 29, we covered a bunch of Altoids based projects, from AM/FM transmitters to OTP generators and now we have a fully working laptop PC on a tin, screen and all. The project blog has all the instructions you need to try it yourself. If you do, let us know how it went and how long did that battery lasted.

That is, if you can get your hands on a Zero…


[thanks Itay]

How Energy Gets Where Its Needed

Even if you’re reading this on a piece of paper that was hand-delivered to you in the Siberian wilderness, somewhere someone had to use energy to run a printer and also had to somehow get all of this information from the energy-consuming information superhighway. While we rely on the electric grid for a lot of our daily energy needs like these, it’s often unclear exactly how the energy from nuclear fuel rods, fossil fuels, or wind and solar gets turned into electrons that somehow get into the things that need those electrons. We covered a little bit about the history of the electric grid and how it came to be in the first of this series of posts, but how exactly does energy get delivered to us over the grid? Continue reading “How Energy Gets Where Its Needed”

Building A Replica Of An Ultraluxury Watch

In the world of late-stage capitalism, unchecked redistribution of wealth to the upper classes has led to the development of so-called ultraluxury watches. Free from any reasonable constraints on material or R&D cost, manufacturers are free to explore the outer limits of the horological art. [Karel] is an aspiring engineer and watch enthusiast, and has a taste for the creations of Urwerk. They decided to see if they could create a replica of the UR202 watch with nothing more than the marketing materials as a guide.

[Karel]’s first job was to create a model of the watch in CAD. For a regular watch this might be simple enough, but the UR202 is no run-of-the-mill timepiece. It features a highly irregular mechanism, full of things like a turbine regulated winding mechanism, telescoping rods instead of minute hands, and tumbling rotors to indicate the hours. The official product sheet bears some of these features out. Through careful analysis of photos and watching videos frame-by-frame, they managed to recreate what they believe to be a functioning mechanical model within their CAD software.

It was then time to try and build the timepiece for real. It was then that [Karel] started hitting some serious stumbling blocks. As a humble engineering student, it’s not often possible to purchase an entire machine shop capable of turning out the tiny, precision parts necessary to make even a basic watch mechanism. Your basic 3D printer squirting hot plastic isn’t going to cut it here. Farming out machining wasn’t an option as the cost would be astronomical. [Karel] instead decided on combining a Miyota movement with a machined aluminum base plate and parts 3D printed using a process known as “Multijet Modelling” which essentially is an inkjet printhead spitting out UV curable polymer.

In the end, [Karel] was able to get just the tumbling hour indicator working. The telescoping minute hand, compressed air turbine winding system, and other features didn’t make it into the build. However, the process of simulating these features within a CAD package, as well as manufacturing a semi-functional replica of the watch, was clearly a powerful learning experience. [Karel] used their passion to pursue a project that ended up giving them a strong grasp of some valuable skills, and that is something that is incredibly rewarding.

We’ve seen others trying to fabricate parts of a wristwatch at home. Keep your horological tips coming in!

[Thanks to Str Alorman for the tip!]

Hacking On The Weirdest ESP Module

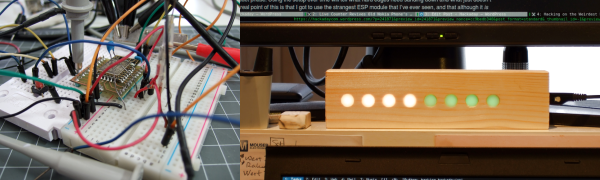
Sometimes I see a component that’s bizarre enough that I buy it just to see if I can actually do something with it. That’s the case with today’s example, the ESP-14. At first glance, you’d ask yourself what AI Thinker, the maker of many of the more popular ESP8266 modules, was thinking.

The ESP-14 takes the phenomenally powerful ESP8266 chip and buries it underneath one of the cheapest microcontrollers around: the 8-bit STM8S003 “value line” chip. Almost all of the pins of the ESP chip are locked inside the RF cage’s metal tomb — only the power, bootloader, and serial TX/RX pins see the light of day, and the TX/RX pins are shared with the STM8S. The rest of the module’s pins are dedicated to the STM8S. Slaving the ESP8266 to an STM8S is like taking a Ferrari and wrapping it inside a VW Beetle.

I had never touched an STM8 chip before, and just wanted to see what I could do with this strange beast. In the end, ironically, I ended up doing something that wouldn’t be too far out of place on Alibaba, but with a few very Hackaday twists: a monitor for our washer and dryer that reports power usage over MQTT, programmed in Forth with a transparent WiFi serial bridge into the chip for interactive debugging without schlepping down into the basement. Everything’s open, tweakable, and the Forth implementation for the STM8S was even developed here on Hackaday.io.

It’s a weird project for the weirdest of ESP modules. I thought I’d walk you through it and see if it sparks you to come up with any alternative uses for the ESP8266-and-STM8S odd couple that is the ESP-14.

Continue reading “Hacking On The Weirdest ESP Module”

The Future Of Artificial Intelligence

Last week we covered the past and current state of artificial intelligence — what modern AI looks like, the differences between weak and strong AI, AGI, and some of the philosophical ideas about what constitutes consciousness. Weak AI is already all around us, in the form of software dedicated to performing specific tasks intelligently. Strong AI is the ultimate goal, and a true strong AI would resemble what most of us have grown familiar with through popular fiction.

Artificial General Intelligence (AGI) is a modern goal many AI researchers are currently devoting their careers to in an effort to bridge that gap. While AGI wouldn’t necessarily possess any kind of consciousness, it would be able to handle any data-related task put before it. Of course, as humans, it’s in our nature to try to forecast the future, and that’s what we’ll be talking about in this article. What are some of our best guesses about what we can expect from AI in the future (near and far)? What possible ethical and practical concerns are there if a conscious AI were to be created? In this speculative future, should an AI have rights, or should it be feared?

Continue reading “The Future Of Artificial Intelligence”

Tying Knots With Industrial Robots

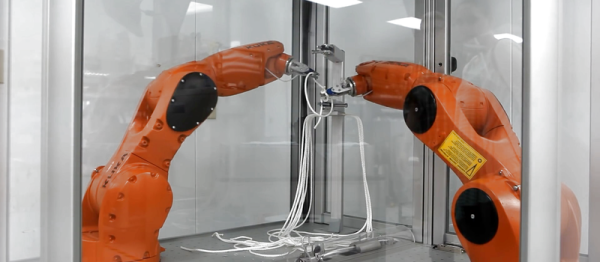
We’re not ashamed to admit that we desperately want a pair of high-end industrial robot arms to play around with. We don’t know where we’d put them — maybe the living room? — but we know that we’d figure something out.
This demo aims to get Boy Scouts interested in robotics by applying the beastly arms to something that all kids love, learning to tie knots. (If you ask us, they’ve got it backwards.) Anyway, there are two videos embedded below for you to peek at.

Continue reading “Tying Knots With Industrial Robots”

Raspberry Pi Laptop Uses The Official Touchscreen

We’ve seen a variety of home-made laptops using the Raspberry Pi and other single board computers over the years. Usually, they combine off-the-shelf USB keyboards and trackpads with HDMI monitor panels, and cases made from layered laser cut sheet, or 3D printed plastic.

[Surferboy]’s Raspberry Pi laptop is the latest effort to come before us, and its claim to fame is the use of the official Raspberry Pi 7″ touchscreen as a display. Full instructions and 3D printer files are available on Thingiverse so you can have a go at replicating it if a portable Pi is your thing.

He’s taken the bold step of not attempting to place all the Pi’s interfaces next to the outside of the case. Instead, he’s desoldered the Ethernet and USB ports. The USB connections were wired directly to the keyboard, display, and a couple of external ports on the right-hand side of his case. This leaves the finished laptop with no Ethernet. However, losing ethernet is a worthy tradeoff for the thinner package.

[Surferboy] also brought the GPIO header to a female socket on the rear of the unit. It’s unclear exactly what battery he uses except for a reference to the battery from his keyboard. Since a keyboard battery will be too small for Pi and display we are guessing a larger pack will be necessary.

Though the Ethernet port and battery issue would probably be a dealbreaker here this has the makings of a useful and compact laptop, it will be interesting to see if it is picked up and refined by the community.

Quite a few early Pi laptops used the Motorola Lapdock, a mobile-phone-into-netbook peripheral. Some others we’ve featured have been a bit chunky, but sometimes they can be objects of beauty.

Via Recantha.co.uk.