The Future Of Eagle CAD

Last week, Autodesk announced their purchase of CadSoft Eagle, one of the most popular software packages for electronic design automation and PCB layout.

Eagle has been around for nearly thirty years, and has evolved to become the standard PCB design package for electronic hobbyists, students, and engineering firms lead by someone who learned PCB design with Eagle. The reason for this is simple: it’s good enough for most simple designs, and there is a free version of Eagle. The only comparable Open Source alternative is KiCad, which doesn’t have nearly as many dedicated followers as Eagle.  Eagle, for better or worse, is a standard, and Open Source companies from  Sparkfun to Adafruit use it religiously and have created high-quality libraries of parts and multiple tutorials

I had the chance to talk with [Matt Berggren], former Hackaday overlord who is currently serving as the Director of Autodesk Circuits. He is the person ultimately responsible for all of Autodesk’s electronic design products, from Tinkercad, 123D, Ecad.io, and project Wire, the engine behind Voxel8, Autodesk’s 3D printer that also prints electronics. [Matt] is now the master of Eagle, and ultimately will decide what will change, what stays the same, and the development path for Eagle.
Continue reading “The Future Of Eagle CAD”

Don Eyles Walks Us Through The Lunar Module Source Code

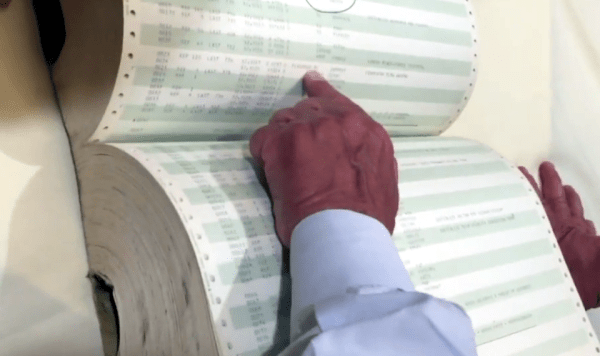
A couple weeks ago I was at a party where out of the corner of my eye I noticed what looked like a giant phone book sitting open on a table. It was printed with perforated green and white paper bound in a binder who’s cover looked a little worse for the wear. I had closer look with my friend James Kinsey. What we read was astonishing; Program 63, 64, 65, lunar descent and landing. Error codes 1201, 1202. Comments printed in the code, code segments hastily circled with pen. Was this what we thought we were looking at? And who brings this to a party?

Continue reading “Don Eyles Walks Us Through The Lunar Module Source Code”

Refurbishing Armored Tablets

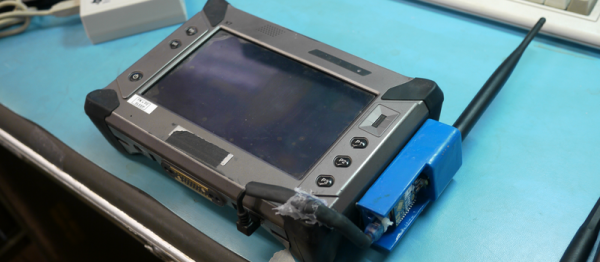
Who can resist the insane deals on bizarre hardware that pop up on auction websites? Not [Dane Kouttron], for sure. He stumbled on Armor X7 ruggedized tablets, and had to buy a few. They’d be just perfect for datalogging in remote and/or hostile locations, if only they had better batteries and were outfitted with a GSM data modem… So [Dane] hauled out his screwdrivers and took stuff apart. What follows is a very detailed writeup of the battery management system (BMS), and a complete teardown of this interesting tablet almost as an afterthought.

First, [Dane] tried to just put a bunch more batteries into the thing, but the battery-management chip wouldn’t recognize them. For some inexplicable reason, [Dane] had the programmer for the BMS on-hand, as well as a Windows XP machine to run the antiquated software on. With the BMS firmware updated (and the manufacturer’s name changed to Dan-ger 300!) everything was good again.

Now you may not happen to have a bunch of surplus X7 ruggedized tablets lying around. Neither do we. But we can totally imagine needing to overhaul a battery system, and so it’s nice to have a peek behind the scenes in the BMS. File that away in your memory banks for when you need it. And if you need even more power, check out this writeup of reverse-engineering a Leaf battery pack. Power to the people!

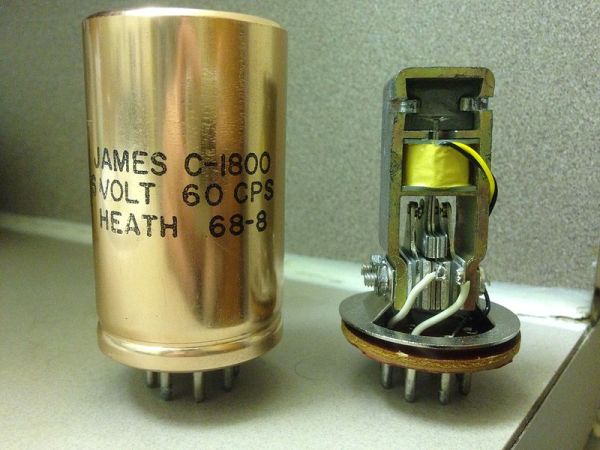
Retrotechtacular: DC To DC Conversion By Vibrator

Electricity comes in two basic forms: Alternating Current (AC) and Direct Current (DC). DC is handy to use and is easy to analyze. However, AC has some useful properties too. In particular, AC current can operate a transformer which can step it up or down easily. Power is conserved, of course (well, actually, you get less power because of losses in the transformer).

You can’t do that trick with pure DC. You can reduce a voltage, although that typically wastes power in heat (for example, a voltage divider or linear regulator). You can’t readily increase a DC voltage unless you convert it into some sort of AC first.

This was a particularly bad problem in the era of tubes–especially tubes in car radios. The car’s voltage was probably 12V but the tube’s plates might take hundreds of volts. What do you do? Some old car radios used what is called a dynamotor. This is just a motor and a generator in one box. You could spin the motor with 12V and have the generator produce a different voltage (even a DC voltage).

Continue reading “Retrotechtacular: DC To DC Conversion By Vibrator”

Raspberry Pi Zero Becomes Mighty Miniature Minecraft Machine

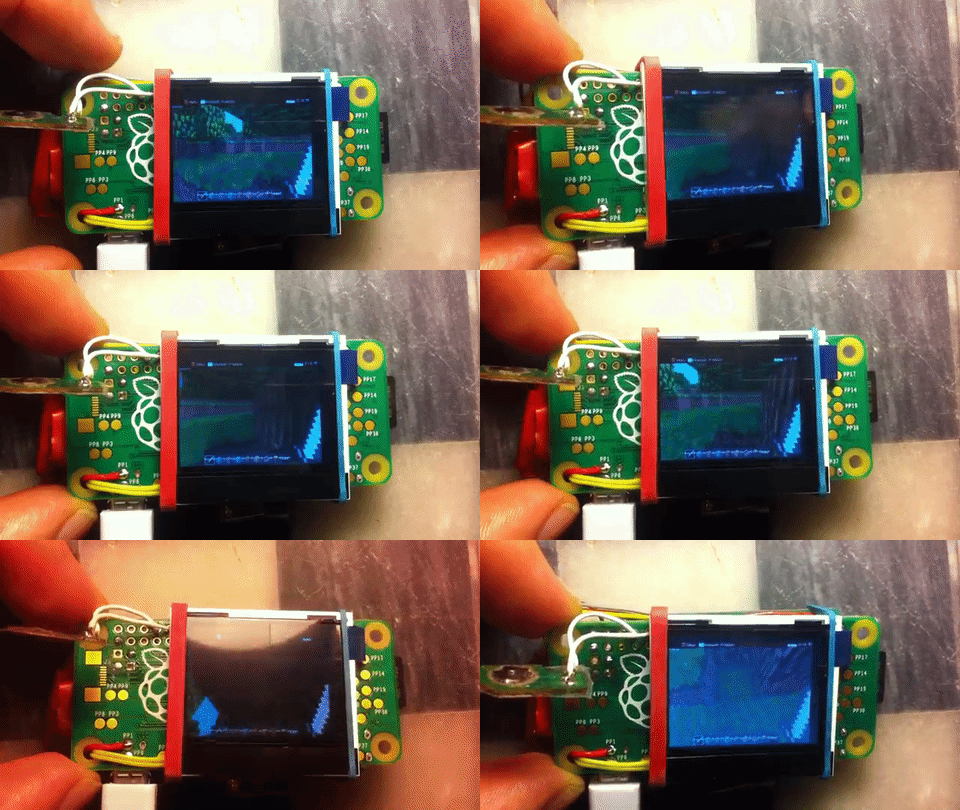
In a clever bit of  miniaturization, [JediJeremy] has nearly completed a gyro-mouse controller for a Raspberry Pi Zero! Ultimately this will be a wearable Linux-watch but along the way he had some fun with the interface.

Using the MPU6040 gyroscope/accelerometer card from a quadcopter, [JediJeremy] spent a week writing the driver to allow it to function as a mouse. Strapping an Adafruit 1.5″ PAL/NTSC LCD screen and its driver board to the Zero with rubber bands makes this one of the smallest functional computer and screen combos we’ve seen. Simply tilt the whole thing about to direct the cursor.

It presently lacks any keyboard input, and [JediJeremy] has only added a single button for clicking, but look at this thing! It’s so tiny! In his own words: “I think this is the first computer that I can accidentally spill into my coffee, rather than vice versa.”

Continue reading “Raspberry Pi Zero Becomes Mighty Miniature Minecraft Machine”

The Dual-Core, ARM-Powered Commodore 64

There is no CPU that is better understood than the 6502 and its cousins the 6510, 6507, 6509, and whatever we’re calling the CPU in the NES. With this vast amount of documentation, just about anything can be done. Want a discrete and un-discreet 6502? Sure thing. It’s the NMOS version, though. Want an emulated version. Sure. With libraries porting the 6502 to every platform ever, there’s only one place left to go: putting a 6502 in a Commodore 64. Make it dual-core, too, so we can run CP/M.

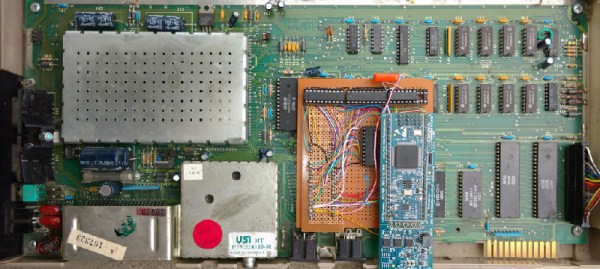
This build is based on one of [telmomoya]’s earlier builds – a soft-core 6510 running on an ARM Cortex M3. The inspiration for this build came from a 6502 emulator running on an Arduino, which got [telmomoya] wondering what would happen if he attached some external RAM, CIA or a SID. Doing this on an Arduino is hard, but there are a few 5 Volt tolerant ARM chips out there, and with a few banks of SRAM, [tel] quickly had an emulated 6502 running EhBasic.

Running an emulated 6502 on an ARM chip is nothing new. What makes this build spectacular is the adaptation to the C64 motherboard. Since [telmomoya] was already breaking out the data and address lines to go to the SRAMs, it didn’t take much extra work to simply build an adapter for the DIP40 CPU socket on a C64. A few 74-series logic chips made the interface easy, and after a bit of soldering, [telmomoya] had a Commodore 64 powered by an ARM chip.

If you’re emulating one chip, you can emulate two, and with the Commodore 64, this leads to a few interesting possibilities. The C64 had a CP/M cartridge — a cartridge that contained a Z80 CPU, sharing the data and address bus with the 6510. This cartridge allowed the ‘toy computer’ C64 to run the ‘business’ CP/M operating system (and the Z80 made the Commodore 128 much cooler).  Since [telmomoya] was already emulating a CPU, emulating a second CPU wasn’t really that hard.

It’s a phenomenal build, and great if you’ve ever wanted to speed up VisiCalc.

Removing A Broken Tap From Something Really Really Expensive

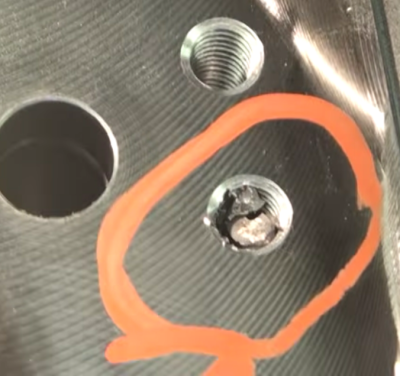
What happens when you break a tap or a bolt in a component whose price tag sits in the tens of thousands. Just drilling it out and throwing in a nut insert stops being acceptable. Is there a way to remove the tap without damaging the master part at all?

Broken tap stuck in the hole it was threading

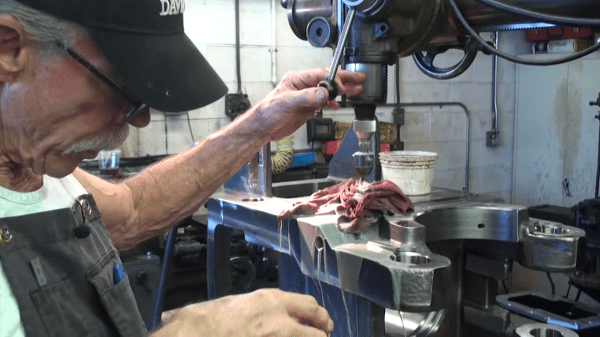
Well, that’s where [Tom Grafton] of Jerry’s Broken Drill and Tap comes in. He’s here to remove taps and chew bubblegum, and he’s definitely chewing bubble gum loudly the whole time. His primary work horse is a Metal Disintegration Machine.

A MDM is basically half of a typical wire EDM set-up. In EDM you used an electrode to punch a hole through the material. Then you thread a wire through the hole, thread it through a sometimes startling array of pulleys, and get going.

[Tom] used the MDM with an appropriately sized electrode to precisely disintegrate the middle of the tap out. After that it’s some careful work with a specially machined magnetic chisel. A quick chase of the threads with a tap and it’s back to the customer.

As you can see in the video after the break, the end result is a threaded hole that’s so indistinguishable from the rest he has to mark which one it was; presumably so the customer doesn’t forget why they’re paying him.

Continue reading “Removing A Broken Tap From Something Really Really Expensive”