An Expanding Wooden Table

A few years ago, the world of fine woodworking was presented with the Fletcher Capstan table. It’s a round table, able to expand its diameter merely by rotating the top. A gloriously engineered bit of mechanics move the leaves of the tables out while simultaneously raising the inner part of the table. It’s a seriously cool table, very expensive, and something that will probably be found in museums 100 years from now.

[Scott Rumschlag] thought his woodworking skills were up to the task of creating one of these expanding tables and managed to build one in his workshop. Like the Fletcher Capstan table, it’s a table that increases its diameter simply by rotating the table top. Unlike the commercial offering, this one doesn’t cost as much as a car, and you can actually see the internal mechanism inside this table.

The top of [Scott]’s table is made of three pieces. The quarter-circle pieces are the only thing showing when the table is in its minimum position, and are arranged on the top of the ‘leaf stack’. When the table expands, four additional leaves move up from beneath with the help of a linear bearing made of wood and a roller that slides along the base of this mechanical contraption.

The center of the table – the star – is a bit more difficult to design. While the leaves move up the stack of table tops with the help of a ramp, this is an impractical solution for something so close to the center of the table. Instead of a ramp, [Scott] is using a lifting lever and metal hinge that brings the star of the table up to the right level. Even though it’s a crazy amount of woodworking and fine tuning to get everything right, it’s not too terribly difficult to get your head around.

Videos, including one of the assembly of the table, below.
Continue reading “An Expanding Wooden Table”

MicroDMA And LEDs

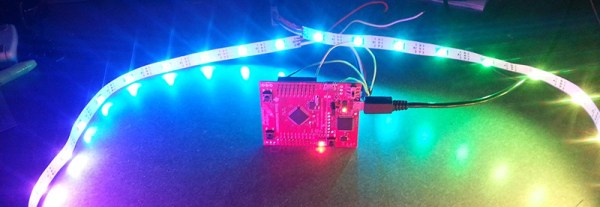
[Jordan] has been playing around with WS2812b RGB LED strips with TI’s Tiva and Stellaris Launchpads. He’s been using the SPI lines to drive data to the LED strip, but this method means the processor is spending a lot of time grabbing data from a memory location and shuffling it out the SPI output register. It’s a great opportunity to learn about the μDMA available on these chips, and to write a library that uses DMA to control larger numbers of LEDs than a SPI peripheral could handle with a naive bit of code.

DMA is a powerful tool – instead of wasting processor cycles on moving bits back and forth between memory and a peripheral, the DMA controller does the same thing all by its lonesome, freeing up the CPU to do real work. TI’s Tiva C series and Stellaris LaunchPads have a μDMA controller with 32 channels, each of which has four unique hardware peripherals it can interact with or used for DMA transfer.

[Jordan] wrote a simple library that can be used to control a chain of WS2812b LEDs using the SPI peripheral. It’s much faster than transferring bits to the SPI peripheral with the CPU, and updating the frames for the LED strip are easier; new frames of a LED animation can be called from the main loop, or the DMA can just start again, without wasting precious CPU cycles updating some LEDs.

Scope Noob: Bridge Rectifier

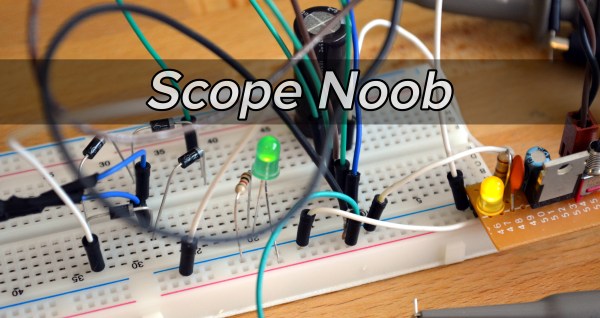
Welcome back to this week’s installment of Scope Noob where I’m sharing my experiences learning to use my first oscilloscope. Last week I started out measuring mains frequency using an AC-AC wall wart adapter. Homework, for those following along, was to build a bridge rectifier and probe the signals from it. Let’s take a look.

Continue reading “Scope Noob: Bridge Rectifier”

Astrophotography And Data-Analysis Sense Exoplanets

[David Schneider] was reading about recent discoveries of exoplanets. Simply put these are planets orbiting stars other than the sun. The rigs used by the research scientists include massive telescopes, but the fact that they’re using CCD sensors led [David] to wonder if a version of this could be done on the cheap in the backyard. The answer is yes. By capturing and processing data from a barn door tracker he was able to verify a known exoplanet.

Barn Door trackers are devices used to move a camera to compensate for the turning of the earth. This is necessary when taking images throughout the night, as the stars will not remain “stationary” to the camera’s frame without it. The good news is that they’re simple to build, we’ve seen a few over the years.

Other than having to wait until his part of the earth was pointed in the correct direction (on a clear night) at the same time as an exoplanet transit, [David] was ready to harvest all the data he needed. This part gets interesting really quickly. The camera needed to catch the planet passing in between the earth and the star it revolves around (called a transit). The data to prove this happened is really subtle. To uncover it [David] needed to control the data set for atmospheric changes by referencing several other stars. From there he focused on the data for the transit target and compared points across the entire set of captured images. The result is a dip in brightness that matches the specifications of the original discovery.

[David] explains the entire process in the clip after the break.

Continue reading “Astrophotography And Data-Analysis Sense Exoplanets”

Improving The T-962 Reflow Oven

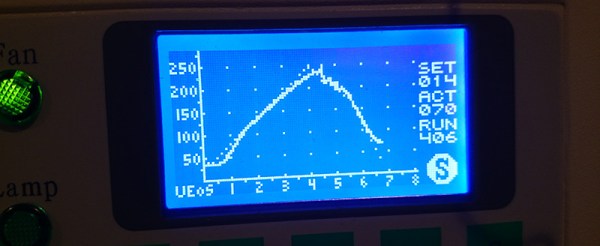
The T-962A is a very popular reflow oven available through the usual kinda-shady retail channels. It’s pretty cheap, and therefore popular, and the construction actually isn’t abysmal. The controller for this oven is downright terrible, and [wj] has been working on a replacement firmware for the horribly broken one provided with this oven. It’s open source, and the only thing you need to update your oven is a TTL/UART interface.

[WJ] bought his T-962A even after seeing some of the negative reviews that suggested replacing the existing controller and display. This is not in true hacker fashion – there’s already a microcontroller and display on the board.

The new firmware uses the existing hardware and adds a very necessary modification: stock, the oven makes the assumption that the cold-junction of the thermocouples is at 20°C. The controller sits on top of an oven with two TRIACs nearby, so this isn’t the case, making the temperature calibration of the oven slightly terrible.

After poking around the board, [WJ] found an LPC2000-series microcontroller and a spare GPIO pin for a 1-wire temperature sensor. The temperature sensor is placed right next to the terminal block for the thermocouples for proper temperature sensing.

All the details of updating the firmware appear on a wiki, and the only thing required to update the firmware is a serial/USB/UART converter. A much better solution than ripping out the controller and replacing it with a custom one.

Announcing The Trinket Everyday Carry Contest

Now that we’ve recovered from our Munich party and the awarding of The Hackaday Prize, we’re ready to announce our latest contest. We’ve been having a lot of fun with our Trinket Pro boards, both the 10th anniversary edition and the new Hackaday.io branded models.  While we were soldering, compiling, and downloading, a contest idea took root. Trinket Pro really excels when used in small projects, the kind which would fit in a pocket. To that end we’re holding the Trinket Everyday Carry Contest, a showcase for small, pocketable projects which are useful everyday. ‘Useful everyday’ is a bit of a broad term, and we intended it that way. Tools are useful of course , but so are jewelry pieces. It’s all in the eye of the builder and users. We’re sure our readers will take this and run with it, as they have with our previous contests.

There are some great prizes in store for the entrants, including a brand new Rigol DS1054Z  oscilloscope! The top 50 entrants will get custom Trinket Everyday Carry Contest T-shirts. Check out the contest page for a full list. 

submit-project-to-trinket-edcWe know you all love to procrastinate with your entries, so we’re going to be offering a few perks to those who enter early and update often. Each week, we’ll throw all the entrants who have published at least one project log full of details into a drawing for a special prize from The Hackaday Store. To be considered you must officially submit your project which is accomplished through a drop-down list on the left side of your project page.


Remember, the contest isn’t just about winning a scope, a meter, or any of the other prizes. It’s about creating new Open Hardware designs that nearly anyone can build. So grab those soldering irons, load up those copies of the Arduino IDE, AVR-GCC, or WinAVR, and get hacking!

You can view the all of the contest entries in this list.

Direct Digital Synthesis (DDS)

Direct Digital Synthesis (DDS) Explained By [Bil Herd]

One of the acronyms you may hear thrown around is DDS which stands for Direct Digital Synthesis. DDS can be as simple as taking a digital value — a collection of ones and zeroes — and processing it through a Digital to Analog Converter (DAC) circuit. For example, if the digital source is the output of a counter that counts up to a maximum value and resets then the output of the DAC would be a ramp (analog signal) that increases in voltage until it resets back to its starting voltage.

This concept can be very useful for creating signals for use in a project or as a poor-man’s version of a signal or function generator. With this in mind I set out here to demonstrate some basic waveforms using programmable logic for flexibility, and a small collection of resistors to act as a cheap DAC. In the end I will also demonstrate an off-the-shelf and inexpensive DDS chip that can be used with any of the popular micro-controller boards available that support SPI serial communication.

All of the topics covered in the video are also discussed further after the break.

Continue reading “Direct Digital Synthesis (DDS) Explained By [Bil Herd]”