Real Hackers Videoconference In Terminal

At some point or another, many of us have tried to see how much of our digital lives could be accessed from the comfort of a terminal. We’ve tried Alpine for email, W3M for web browsing, and even watched Star Wars via telnet. But, in the increasingly socially-distant world we find ourselves in today, we find ourselves asking: what about video calling?

Okay, we weren’t asking that. But thankfully [Andy Kong] was, and saw fit to implement it when he and a friend created AsciiZOOM, a “secure, text-based videoconferencing app, accessible from the safety of your terminal.”

As you may have guessed, [Andy]’s solution replaces the conventional video stream we’re all used to with realtime animated ASCII art. The system works by capturing a video stream from a webcam, “compressing” each pixel by converting it into an ASCII character, and stuffing the entire frame into a TCP packet. Each client is connected to a server (meeting room?) which coordinates the packets, sending them back and forth appropriately.

As impressive as it is impractical, the only area in which the project lacks is in audio. [Andy] suggests using Discord to solve that, but here’s hoping we see subtitles in version 2! Will AsciiZOOM be replacing our favorite videoconferencing suite any time soon? No. Are we glad it exists? You betcha.

Continue reading “Real Hackers Videoconference In Terminal”

A Retro Camcorder Upgraded As A Raspberry Pi HQ Camera

In 2020 when we carry an all-purpose computer and data terminal able to store our every thought and deed on a global computer network, it’s easy to forget that once upon a time we were excited by the simpler things. Take the camcorder for example, back in the 1990s the idea of a complete video recording solution that captured moving images on tape cartridges and fit in the palm of your hand was a very big deal indeed, and camcorders as we called them in those innocent times were a prized posession. Now they’re a $0.50 find a Goodwill, which is how [Dustin] picked up the RCA camcoder he’s converting into something altogether more modern. He’s gutted it and upgraded it by removing the analogue innards and retaining only the case and lens assembly to put around a Raspberry Pi and associated HQ camera module.

Opening the camcorder up reveals a ton of miniaturised analogue circuitry, but once the original assemblies are removed it’s relatively straightforward to put the Pi camera on the rear of the lens unit. There’s plenty of space for the Pi in the box, and he’s putting a touchscreen on the outside.

Sadly the camcorder’s original tiny CRT is no longer working, else that would have been the ultimate retro viewfinder. Still we hope to see some tinkering on that part of the project since those little CRTS make for delightful hacks. The project is very much a work in progress, but should serve that these once ubiquitous devices are now in the realm of the throwaway.

This isn’t the first such conversion we’ve seen with a Raspberry Pi, the original camera module is a handy fit to an 8mm movie camera.

USB Webcams Out Of Stock? Make One With A Raspberry Pi And HQ Camera Module

More people working from home has had an impact on the cost and availability of USB webcams, so [Jeff Geerling] got around the issue with a DIY solution that rang in around $100. It consists of a Raspberry Pi and HQ camera module acting as a USB webcam, and there is no messy streaming of ffmpeg over the network masquerading as a camera device or anything. It works just as a USB camera should.

[Jeff] chose a Raspberry Pi Zero and HQ camera module for his unit, making a tidy package that might not be quite as small as commercial webcams, but is certainly perfectly respectable as a USB camera. That being said, there are a few drawbacks, namely the lack of a microphone or autofocus, latency issues at higher resolutions, and the need to shut down the Pi cleanly.

Check out the GitHub repository for everything needed to set up your own, including a complete hardware list and some options for mounting. [Jeff] also tested whether the camera would work with the new keyboard-embedded Raspberry Pi 400, and it absolutely does. Embedded below is a video walkthrough and demonstration of the whole project, so check it out.

Continue reading “USB Webcams Out Of Stock? Make One With A Raspberry Pi And HQ Camera Module”

Pushing The FPGA Video Player Further

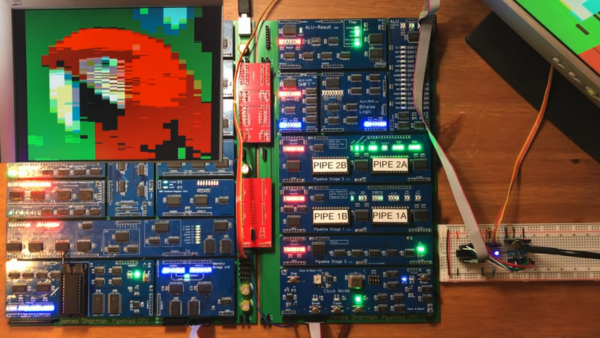
A fact universally known among the Hackaday community is that projects are never truly done. You can always spin another board release to fix a silkscreen mistake, get that extra little boost of performance, or finally spend the time to track down that weird transient bug. Or in [ultraembedded’s] case, take a custom FPGA player from 800 x 600 to 1280 x 720. The hardware used is a Digilent Arty A7 and PMOD boards for I2S2, VGA, and MicroSD. We previously covered this project back when it was first getting started.

Getting from 800 x 600 to 1280 x 720 — 31% more pixels — required implementing a higher performance JPEG decoder that can read in the MPJEG frames, pushing out a pixel every 2.1 clock cycles. The improvements also include a few convenience features such as an IR remote. The number of submodules inside the system is just incredible, with most of them being implemented or tweaked by [ultraembedded] himself.

For the FPGA Verilog, there’s the SD/MMC interface, the JPEG decoder, the audio controller, the DVI framebuffer, a peripheral core, and a custom RISC-V CPU. For the firmware loaded off the SD card, it uses a custom RTOS running an MP3 decoder, a FAT32 interface, an IR decoder, and a UI based on LVGL.

We think this project represents a wonderful culmination of all the different IP cores that [ultraembedded] has produced over the years. All the code for the FPGA media player is available on GitHub.

Continue reading “Pushing The FPGA Video Player Further”

An IMac All-In-One’s New Life

There’s a sleek form factor for desktop computers known as an “all-in-one” that enrobes a computer in a monitor. While the convenience of having all your computing in a neat package has some nice benefits, it comes with an unfortunate downside. Someday the computer inside is going to be old and outdated in comparison to newer machines. While a new OS goes a long way towards breathing life into an old machine, [Thomas] has decided to take the path less travelled and converted an old iMac all-in-one into a discrete monitor.

The iMac in question is the 20″ iMac G5 iSight (A1145) with an LG-Philips LM201W01-STB2 LCD panel. Looking back, [Thomas] would recommend just ordering an LCD driver controller kit from your favourite auction house. But for this particular modification, he decided to do things a little bit more manually and we’re quite glad he did.

Luckily for [Thomas], the panel supports TMDS (which both DVI and HDMI are compatible with). So the next step was to figure out the signalling wires and proper voltages. After some trouble caused by a mislabeled power line on the iMac PCB silk-screen (12v instead of 3.3v), he had all the wires identified and a plan starting to form. The first step was a circuit to trick the inverter into turning on with the help of a relay. The female HDMI plug with a breakout board was added and sticks out through the old firewire port. The minuscule wires in the display ribbon cable to the monitor were separated and soldered onto with the help of [Thomas’] daughter’s microscope. Resistances were checked as HDMI relies on impedance matched pairs. To finish it off, an old tactile toggle switch offers a way to turn the monitor on and off with a solid thunk.

We love seeing old hardware being repurposed for new things. This project nicely complements the iMac G4 Reborn With Intel NUC Transplant we saw earlier this year, as they both try to preserve the form factor while allowing a new computer to drive the display.

Audio Fingerprinting Skips A Show’s Intro, Reliably

Lacking a DVD drive, [jg] was watching a TV series in the form of a bunch of .avi video files. Of course, when every episode contains a full intro, it is only a matter of time before that gets too annoying to sit through.

Chapter breaks reliably inserted around the intro, even when it doesn’t always occur in the same place.

The usual method of skipping the intro on a plain video file is a simple one:

  1. Manually drag the playback forward past the intro.
  2. Oops that’s too far, bring it back.
  3. Ugh reversed it too much, nudge it forward.
  4. Okay, that’s good.

[jg] was certain there was a better way, and the solution was using audio fingerprinting to insert chapter breaks. The plain video files now have a chapter breaks around the intro, allowing for easy skipping straight to content. The reason behind selecting this method is simple: the show intro is always 52 seconds long, but it isn’t always in the same place. The intro plays somewhere within the first two to five minutes of an episode, so just skipping to a specific timestamp won’t do the trick.

The first job is to extract the audio of an intro sequence, so that it can be used for fingerprinting. Exporting the first 15 minutes of audio with ffmpeg easily creates a wav file that can be trimmed down with an audio editor of choice. That clip gets fed into the open-source SoundFingerprinting library as a signature, then each video has its audio track exported and the signature gets identified within it. SoundFingerprinting therefore detects where (down to the second) the intro exists within each video file.

Marking out chapter breaks using that information is conceptually simple, but ends up being a bit roundabout because it seems .avi files don’t have a simple way to encode chapters. However, .mkv files are another matter. To get around this, [jg] first converts each .avi to .mkv using ffmpeg then splices in the chapter breaks with mkvmerge. One important element is that the reformatting between .avi and .mkv is done without completely re-encoding the video itself, so it’s a quick process. The result is a bunch of .mkv files with chapter breaks around the intro, wherever it may be!

The script is available here for anyone to play with, and the project page is a good learning reference because [jg] kindly provides all the command-line options used for each tool. Interested in using audio fingerprinting in your own projects? Remember to also check out Olaf, the Overly Lightweight Acoustic Fingerprinting method that can be implemented in embedded systems and web browsers.

Community Rallies Behind Youtube-dl After DMCA Takedown

At this point, you’ve likely heard that the GitHub repository for youtube-dl was recently removed in response to a DMCA takedown notice filed by the Recording Industry Association of America (RIAA). As the name implies, this popular Python program allowed users to produce local copies of audio and video that had been uploaded to YouTube and other content hosting sites. It’s a critical tool for digital archivists, people with slow or unreliable Internet connections, and more than a few Hackaday writers.

It will probably come as no surprise to hear that the DMCA takedown and subsequent removal of the youtube-dl repository has utterly failed to contain the spread of the program. In fact, you could easily argue that it’s done the opposite. The developers could never have afforded the amount of publicity the project is currently enjoying, and as the code is licensed as public domain, users are free to share it however they see fit. This is one genie that absolutely won’t be going back into its bottle.

In true hacker spirit, we’ve started to see some rather inventive ways of spreading the outlawed tool. A Twitter user by the name of [GalacticFurball] came up with a way to convert the program into a pair of densely packed rainbow images that can be shared online. After downloading the PNG files, a command-line ImageMagick incantation turns the images into a compressed tarball of the source code. A similar trick was one of the ways used to distribute the DeCSS DVD decryption code back in 2000; though unfortunately, we doubt anyone is going to get the ~14,000 lines of Python code that makes up youtube-dl printed up on any t-shirts.

Screenshot of the Tweet sharing YouTube-dl repository as two images

It’s worth noting that GitHub has officially distanced themselves from the RIAA’s position. The company was forced to remove the repo when they received the DMCA takedown notice, but CEO Nat Friedman dropped into the project’s IRC channel with a promise that efforts were being made to rectify the situation as quickly as possible. In a recent interview with TorrentFreak, Friedman said the removal of youtube-dl from GitHub was at odds with the company’s own internal archival efforts and financial support for the Internet Archive.

But as it turns out, some changes will be necessary before the repository can be brought back online. While there’s certainly some debate to be had about the overall validity of the RIAA’s claim, it isn’t completely without merit. As pointed out in the DMCA notice, the project made use of several automated tests that ran the code against copyrighted works from artists such as Taylor Swift and Justin Timberlake. While these were admittedly very poor choices to use as official test cases, the RIAA’s assertion that the entire project exists solely to download copyrighted music has no basis in reality.

[Ed Note: This is only about GitHub. You can still get the code directly from the source.]