A lot of first-time guitar builders focus on making the body and skip the neck, which has lots of tricky dimensions to get right to if you want a nicely playable instrument. However, [Jón Schone] of Proper Printing wanted to start with the hard part on his guitar building journey, and set about 3D printing a guitar neck in one piece.
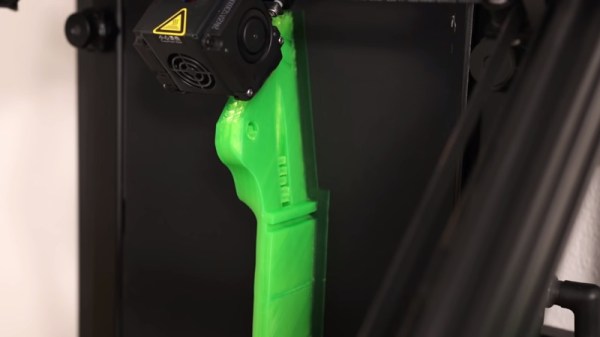
Designing a neck might sound difficult on the surface of it, but the Marz Guitar Designer plugin for FreeCAD helps make whipping one up a cinch. Once imported into Fusion 360, the geometry is tweaked for 3D printing, particularly to fit the truss rod inside. Printed on a Creality CF30 belt printer (which interestingly enough, has been mounted to the wall) in green PLA, the resulting neck can be spotted as a non-traditional design from a mile away. With a truss rod hammered in, frets installed, and hardware attached, it’s mounted up to a cheap kit guitar for testing.
The printed neck works, and it’s given a proper shakedown with some appropriate riffs to put it through its paces. It’s reportedly a bit on the flexible side, but remains playable and is surprisingly normal in its performance. [Jón] now plans to continue the project by 3D printing the rest of the guitar.
Meanwhile, if you’re sick of tuning your own guitar, consider building a robot tuner to help out. Video after the break.