It’s Never Too Early To Prepare For Halloween: With Flamethrowers

Using a legitimate flamethrower is on the bucket list for a lot of us. Even Elon Musk got into the action with his Not-A-Flamethrower flamethrower. For the rest of us non-billionaires though, we have to come up with clever reasons to build our own like “Halloween is only six months away”. [HandsomeRyan] took this approach six months ago to great effect, and recently released the files on Thingiverse for us all to enjoy.

The cover for building this project was making a Jack-o-Lantern shoot flames out of its face on-demand. The build is based around a car door locking solenoid, which has plenty of kick for applications like this. [HandsomeRyan] upgraded his old wood design with fancy 3D-printed parts which, with the help of the solenoid, deliver a blast of flammable material across a candle inside the Jack-o-Lantern via an aerosol can hidden in the pumpkin.

Part of the elegance of this project is that a car door locking solenoid is typically controlled by remote, meaning that if you want this to be remote-controlled the work has already been done for you. If you need a more timely excuse for building one of these, the Fourth of July is a little bit closer, which should work in a pinch as an excuse to build something crazy even if you’re not American.

Continue reading “It’s Never Too Early To Prepare For Halloween: With Flamethrowers”

How Much Wood Can A Woodpecker Chuck?

It’s probably clear to a Hackaday reader that we live in a golden era for hobbyist tool accessibility. Cheap single board computers can be bought at any neighborhood RadioShack or Maplin. 3D printers sell fully assembled and ready to run for less than $200. Even the humble CNC mill has come down the price curve, though as you might expect at the low end things can get pretty rough. Like a cheap 3D printer, a cheap mill tends to be missing some basic features you’d expect any reasonable machine to have. If you get your hands on one of these little wonders, [Shahada Abubakar] has a pair of great blog posts on the basic set of upgrades you’ll probably want to perform right out of the box.

Which cheap CNC mills are we talking about? They go by a few names. Last year our own [Kristina Panos] put together a review of a shockingly inexpensive “1610” type sold by Linksprite (go take a read if you’re already considering a purchase!). The “1610” class, so named for it’s 16 cm x 10 cm bed size, is pretty common under a wide variety of manufacturer names. You can find them in this size made of 8020 like [Kristina] did or as “upgraded” versions cut from 1/4″ mystery plastic (often referred to in the listings as Bakelite, but your guess is as good as ours as to the true material). 1610 is the smallest size but basically the same machine exists as an 1810, 2418, or 3018. Each has a 775 size spindle and a single PCBA that handles stepper drive and runs grbl.

So what’s the problem? Well for one none of these machines have limit switches, though the controllers support them. [Shahada]’s guide has handy instructions for what kind to buy, how to wire them, and where they can be attached. Plus an overview of the G-code instructions to send the controller in order to home and configure everything properly. The controllers also like to be driven continuously over serial (though some sellers seem to offer a separate board to drive them). This is fine if you have a computer handy, but like a 3D printer it can be nice to bolt a Pi Zero or similar onto the unit and control it over the network. [Shahada]’s second post has a link to a mounting plate you can print for exactly that setup, as well as some suggestions for configuring CNC.js to drive everything.

Do you have one of these machines? Done any upgrades? Tell us in the comments! We’re always looking for ways to upgrade our home shop.

CNC Your Own PCBs With A 3D Printed Mill

Yes, you can whip up a design for a printed circuit board, send it out to one of the many fab houses, and receive a finished, completed board in a week or two. There are quick-turn assembly houses that will manufacture a circuit board and populate it for you. But sometimes you need a board now, and that’s when we get into home PCB fabrication. You can do this with either etching or milling, but [Renzo] has a great solution. He built a 3D printed milling machine that will make a printed circuit board.

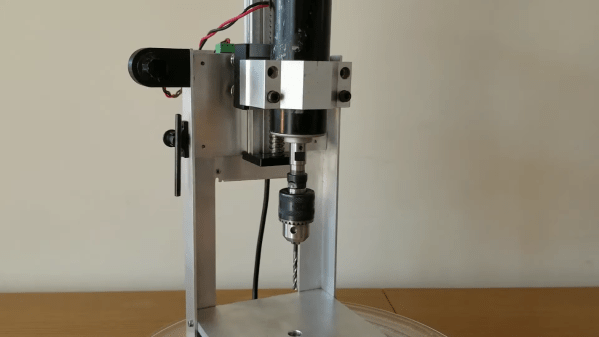
The design of this tiny micro mill is based on a handheld rotary tool, also called a Dremel, but that’s like Kleenex, so just buy a Proxxon. This mill is designed with 3D printed T-track and constructed with linear bearings on smooth rods with standard NEMA 17 stepper motors and herringbone gears for little to no backlash. There is quite a bit going on here, but lucky for us [Renzo] has a video tutorial of the entire build process available for viewing below.

We’ve previously seen some of [Renzo]’s previous efforts in homemade PCB fabrication, up to and including applying green soldermask with the help of Fritzing. This is good, very good, and the only thing that really separates this from manufactured PCBs is the lack of plated through holes. That’s just a bit of graphite and electroplating away, and we’re looking forward to [Renzo]’s further adventures in making PCBs at home.

Continue reading “CNC Your Own PCBs With A 3D Printed Mill”

PrintRite Uses TensorFlow To Avoid Printing Catastrophies

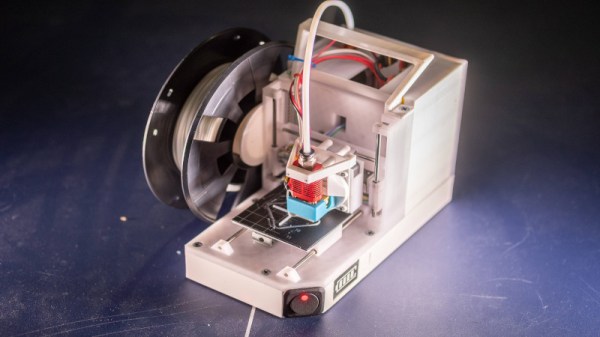
TensorFlow is a popular machine learning package, that among other things, is particularly adept at image recognition. If you want to use a webcam to monitor cats on your lawn or alert you to visitors, TensorFlow can help you achieve this with a bunch of pre-baked libraries. [Eric] took a different tack with PrintRite – using TensorFlow to monitor his 3D printer and warn him of prints gone bad – or worse.

The project relies on training TensorFlow to recognize images of 3D prints gone bad. If layers are separated, or the nozzle is covered in melted goo, it’s probably a good idea to stop the print. Worst case, your printer could begin smoking or catch fire – in that case, [Eric] has the system configured to shut the printer off using a TP-Link Wi-Fi enabled power socket.

Currently, the project exists as a plugin for OctoPrint and relies on two Raspberry Pis – a Zero to handle the camera, and a 3B+to handle OctoPrint and the TensorFlow software. It’s in an early stage of development and is likely not quite ready to replace human supervision. Still, this is a project that holds a lot of promise, and we’re eager to see further development in this area.

There’s a lot of development happening to improve the reliability of 3D printers – we’ve even seen a trick device for resuming failed prints.

Identifying A 3D Printer From A 3D Print

A TV crime show I saw recently centered on the ability of forensic scientists to identify a plastic bag as coming from a particular roll: it’s all down to the striations, apparently. This development isn’t fiction, though: researchers at the University of Buffalo have figured out how to identify the individual 3D printer that produced a particular print. The development, called PrinTracker, uses unique differences in the way a printer lays down print material to identify a printer with a claimed 94 percent accuracy.

Continue reading “Identifying A 3D Printer From A 3D Print”

The Magnetic Rubik’s Cube

Ernő Rubik has much to answer for when it comes to the legacy of his namesake cube. It has both enthralled and tormented generations, allowing some to grandstand in the playground while others are forced to admit defeat in the face of a seemingly intractable puzzle. It just so happens that [Tom Parker] has been working on a Rubik’s cube with a novel magnetic design.

Yes, that’s right – [Tom]’s cube eschews the traditional rotating and sliding mechanism of the original cube, instead replacing it all with magnets. Each segment of the cube, along with the hidden center piece, is 3D printed. Through using a fused deposition printer, and pausing the print at certain layers, it’s possible to embed the magnets inside the part during the printing process.

[Tom] provides several different versions of the parts, to suit printers of different capabilities. The final cube allows both regular Rubik’s cube movements, but also allows for the player to cheat and reassemble it without having to throw it forcefully against the wall first like the original toy.

It’s an interesting build, and a great one to get to grips with the techniques involved in embedding parts in 3D prints. It may not be capable of solving itself, but we’ve seen another build that can pull off that impressive feat. Video after the break.

Continue reading “The Magnetic Rubik’s Cube”

Kinematic Mount For 3D Printer Bed Shows Practical Design

Aluminum bed with new kinematic mount and base on printer Son of Megamax, at the Milwaukee Makerspace

[Mark Rehorst] has been busy designing and building 3D printers, and Son of Megamax — one of his earlier builds — needed a bed heater replacement. He took the opportunity to add a Kelvin-type kinematic mount as well. The kinematic mount and base efficiently constrain the bed in a controlled way while allowing for thermal expansion, providing a stable platform that also allows for removal and repeatable re-positioning.

After a short discussion regarding the heater replacement, [Mark] explains the design and manufacture of his kinematic mount. Of particular note are the practical considerations of the design; [Mark] aimed to use square aluminum tubing as much as possible, with machining requirements that were easily done with the equipment he had available. Time is a resource after all, and design decisions that help one get something working quickly have a value all their own.

If you’re still a bit foggy on kinematic mounts and how they work, you’re not alone. Check out our coverage of this 3D-printed kinematic camera mount which should make the concept a bit clearer.