Portable 3D Printer Gets Even Smaller, Faster, Better

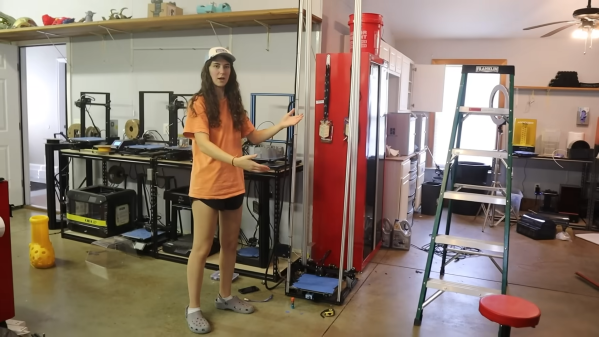
How do you improve on a fast, capable 3D printer that sports an innovative design and is portable enough to fit in a printer spool box? Judging by what went into the Positron V3 portable printer, (video, embedded below) it takes a lot of hard work and an unwillingness to settle for compromise designs. Plus a few lucky breaks and some design wizardry.

When we first reported on [Kralyn]’s innovative “Positron” printer, its chief selling points were its portability and unique layout. With a fold-down Z-axis and a CoreXY-style drive in the base, plus an interesting 90° hot end and transparent heated build plate, the Positron managed to hit most of its design goals. But there’s always room for improvement, and Positron V3, shown in the video below, has made some pretty substantial leaps over that original concept.

The V3 design keeps the basic layout of the original, but greatly improves the usability and portability, while increasing performance and build volume. The heated borosilicate build plate is now held to the Z-axis drive with a much sturdier strut, and gets its juice through a high-temperature MagSafe connector. The X- and Y-axes are now driven by pancake steppers, which along with adding idler pulleys that are coaxial to the drive pulleys, make the CoreXY drive, and hence the printer’s base, much more compact. The printer is still much, much faster than most traditional gantry design, and print quality is on par with anything available commercially. And yes, it still fits into a standard 1-kg filament spool box when folded up.

We love this design, and the story of how the V3 came about and the intermediate V2 that didn’t make the cut is a fascinating case study in design. And as a bonus, [Kralyn] will open-source the V3 design, so you can build your own as soon as he releases the files.

Continue reading “Portable 3D Printer Gets Even Smaller, Faster, Better”

Caulking Gun Becomes Useful Press Tool For Fuel Line Fittings

The simple caulking gun is really useful when you’re working on some bathroom repairs or squirting construction adhesives about the place. However, with a few simple mods, it can become a great help in the mechanic’s workshop too.

It’s a great tool for cleanly pushing fittings into nylon fuel line.

This build consists of a series of 3D-printed parts that can readily be adapted to a garden-variety caulking gun. First up are a pair of fuel line clamps which are fastened together with nuts and bolts, The nylon fuel line is inserted between these, and the bolts are tightened up to hold the line firmly in place at the end of the caulking gun. The fitting to be installed into the line is then placed on the caulking gun’s plunger. It’s then a simple matter of pulling the trigger on the caulking gun to slowly press the fitting into the nylon line.

It’s a great hack which creates a useful linear press with just a few cents of PETG filament. If you find yourself doing a one-off fuel line job on a modern car, this could be just the tool you need. Parts are available on Thingiverse for those eager to print their own. The design is made for 3/8ths inch line, but could readily be modified or recreated to suit other diameters.

3D-printed tools can be useful in all kinds of ways, even in heavy-duty applications like press tooling. It often doesn’t have the same longevity of traditional metal tooling, but for small one-off jobs, the price saving is often more important than the hardiness of the tooling itself. If you’ve whipped up some great 3D-printed tools of your own, don’t hesitate to drop us a line!

Recycling Plastic Into Filament

Plastic is a remarkable material in many ways. Cheap, durable, and versatile, it is responsible for a large percentage of the modern world we live in. As we all know, though, it’s not without its downsides. Its persistence in the environment is quite troubling, so any opportunity we can take to reduce its use is welcome. This 3D printed machine, although made out of plastic, is made out of repurposed water bottles that have been turned into the filament for the 3D printer.

While there’s not too much information available on the site, what we gather is that the machine cuts a specific type of plastic water bottle made out of PET plastic into strips, and then feeds the strips into a heated forming tool. The tool transforms the strips into the filament shape and spools them so they are ready to feed back into a 3D printer. As a proof of concept, it seems as though this machine was made from repurposed plastic, but it could also be made using whatever filament you happen to have on hand.

As far as recycling goes, this is a great effort to keep at least some of it out of landfills and oceans. Unfortunately, plastic can’t be recycled endlessly like metal, as it will eventually break down. But something like this could additionally save on some filament costs for those with access to these types of bottles. Other options for creating your own filament also include old VHS tapes, but you will likely need a separate machine for that.

5-Axis 3D Printing For The Rest Of Us

By now we’re all used to the idea of three dimensional printing, as over the last fifteen years or so it’s become an indispensable tool for anyone with an interest in making things without an industrial scale budget. There are still a few limitations to the techniques used in a common 3D printer though, in particular being tied to layers in a single orientation. It’s something that can be addressed by adding tilt and rotational axes to the printer to deliver a five-axis device, but this has not been available in an affordable form. [Freddie Hong] and colleagues have tackled the production of an affordable printer, and his solution fits neatly on the bed of a Prusa i3 to convert it to five-axis machine without breaking the bank.

The quantity and quality of the work is certainly impressive, with suitable slicing software being developed alongside the 3D printed parts to fit the two extra axes. For now all we can do is look at the pictures and the video below the break, but once the work has been presented the promise that all the necessary files will be made public. We can see versions of the hardware finding their way onto printers other  than the Prusa, and we can see this becoming yet another piece of the regular armory available to those of us who make things.

Continue reading “5-Axis 3D Printing For The Rest Of Us”

Learn To Play Guitar, Digitally

Learning to play a musical instrument takes a major time commitment. If you happened to be stuck inside your home at any point in the last two years, though, you may have had the opportunity that [Dmitriy] had to pick up a guitar and learn to play. Rather than stick with a traditional guitar, though, [Dmitriy] opted to build his own digital guitar which is packed with all kinds of features you won’t find in any Fender or Gibson.

The physical body of this unique instrument is entirely designed by [Dmitriy] out of 3D printed parts, and uses capacitive touch sensors for each of the notes on what would have been the guitar’s fretboard. The strings are also replaced with a set of six switches that can be strummed like a regular guitar, and are used to register when to play a note. After a few prototypes, everything was wired onto a custom PCB. The software side of this project is impressive as well; it involved creating custom firmware to register all of the button presses and transmit the information to a MIDI controller so that the guitar can communicate digitally with anything that supports MIDI.

To finish off the project, [Dmitriy] also added a wireless device as well as some other bonus features like an accelerometer, which can be used to augment the sound of the guitar in any way he can think of to program them. It’s one of the most innovative guitars we’ve seen since the prototype Noli smart guitar was unveiled last year, and this one is also on its way from prototype to market right now.

Continue reading “Learn To Play Guitar, Digitally”

Split Flap Display Tells Us The Word

LED and LCD displays are a technological marvel. They’ve brought the price of televisions and monitors down to unheard-of levels since the days of CRTs, but this upside arguably comes with an aesthetic cost. When everything is covered in bland computer screens, the world tends to look a lot more monotonous. Not so several decades ago when there were many sharply contrasting ways of displaying information. One example of this different time comes to us by way of this split-flap display that [Erich] has been recreating.

Split-flap displays work by printing letters or numbers on a series of flaps that are attached to a spindle with a stepper motor. Each step of the motor turns the display by one character. They can be noisy and do require a large amount of maintenance compared to modern displays, but have some advantages as well. [Erich]’s version is built out of new acrylic and MDF, and uses an Arduino as the control board. A 3D printer and CNC machine keep the tolerances tight enough for the display to work smoothly and also enable him to expand the display as needed since each character display is fairly modular.

Right now, [Erich]’s display has 20 characters on two different rows and definitely brings us back to the bygone era where displays of this style would have been prominent in airports and train stations. This display uses a lot of the basics from another split flap display that we featured a few years ago but has some improvements. And, if you’d prefer restorations of old displays rather than modern incarnations, we have you covered there as well.

Continue reading “Split Flap Display Tells Us The Word”

Autonomous Mower Hits Snag

Interfacing technology and electronics with the real world is often fairly tricky. Complexity and edge cases work their way in to every corner of a project like this; just ask anyone who has ever tried to operate a rover on Mars, make a hydroponics garden, or build almost any robotics project. Even those of us who simply own a consumer-grade printer are flummoxed by the ways in which they can fail when manipulating single sheets of paper. This robotic lawnmower is no exception, driving its creator [TK] to extremes to get it to mow his lawn.

[TK] actually had a platform for his autonomous mower ready to go thanks to a previous build using this solar-powered robot to explore the Australian outback. Adding another motor to handle the grass trimming seemed simple at first and he set about wiring it all up and interfacing it to the robot. After the first iteration he found the robot was moving too fast to effectively cut the grass, so he added a more powerful cutting motor and a gearbox to help the mower crawl more slowly over the lawn. Disaster struck when his 3D printed mount for the steel cutting blades shattered, but with [TK] uninjured he pushed on with more improvements.

As it stands right now, the mower can effectively cut the grass moving forward even with the plastic-only cutting blades that [TK] is using now for safety reasons. The mower stripped its reverse gear so there still are some improvements to make before this robot is autonomously cutting the lawn without supervision. Normally we see lawnmowers retrofitted with robotics rather than robotics retrofitted with a lawnmower, but we’re excited to see any approach that lets us worry about one less household chore.

Thanks to [Rob] for the tip!

Continue reading “Autonomous Mower Hits Snag”