The Travelling Hackerbox is going International. I wrote a post on this earlier in the week, and I’m still looking for recipients for the box that are not in the United States. The sign-up form is right here, [the sign up form is now closed] and so far we have good coverage in Canada, Australia, NZ, Northern Europe, and a few in Africa. If you ever want to be part of the Travelling Hackerbox, this is your chance. I’m going to close the sign-up sheet next week. Sign up now.
Like the idea of a travelling hackerbox, but are too impatient? Adafruit now has a box subscription service. Every quarter, an AdaBox will arrive on your doorstep packed to the gills with electronic goodies.
The very recently released NES Classic edition is the 2016 version of the C64 DTV — it’s a Linux system, not as elegant, and there’s little hacking potential. If you want to increase the amount of storage, desolder the Flash chip (part no. S34ML04G200TFI000), and replace it with a larger chip. The NES Classic edition isn’t the coolest retro system coming out — Genesis is back, baby. Brazil has had a love affair with the Genesis/Mega Drive because of their bizarre import restrictions. Now, the manufacturer of the Brazilian Sega clones is releasing a Linux-ified clone. Does anyone know how to export electronics from Brazil?
The CFP deadline for the SoCal Linux Expo is fast approaching. You have until the 15th to get your talks in for SCALE.
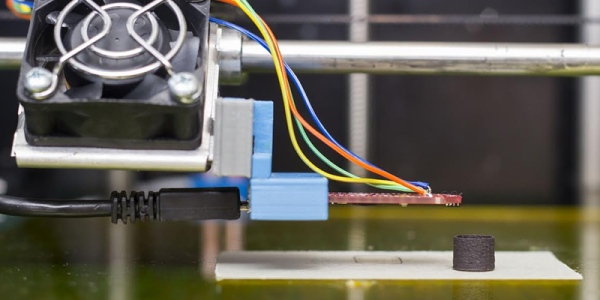
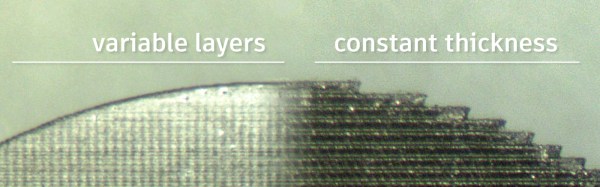
Let’s talk about dissolvable 3D printer support material. One of the first materials able to be printed and removed by dissolving in water was PVA. Makerbot sold it for use in their dual extruder machines. PVA does dissolve, but it degrades at higher temperatures and kills nozzles. HIPS can be dissolved with limonene, but it’s really only for use in conjunction with ABS. This week, E3D released their Scaffold support material. It’s a PVA/Polyvinyl alcohol filament — ‘the stuff gel caps are made out of’ was the line we got when E3D previewed Scaffold at MRRF last March. It’s a support material that’s water dissolvable, compatible with most filaments, and is able to produce some amazing prints. It’s available now, but it is a bit pricey at £45 for half a kilo. Brexit is a good thing if you’re paid in dollars.
If you’re into chiptunes, you’ve heard about Little Sound DJ. LSDJ is a cart/ROM capable of toggling all the registers on the Game Boy sound chip, sequencing bleeps and bloops, and generally being awesome. The recently released Nanoloop Mono is not Game Boy software. It’s a few op-amps and a PIC micro pasted on a board that turns the Game Boy into a synth. You get a significantly more 80s sound with the Nanoloop Mono over LSDJ, audio input, and a step sequencer.