When it comes to YouTube subscriber counters, there’s not much wiggle room for creativity. Sure, you can go with Nixies or even more exotic displays, but in the end a counter is just a bunch of numbers.
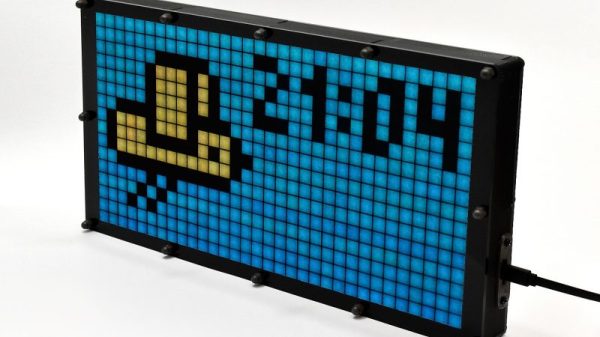
But [Brian Lough] found a way to jazz things up with this Tetris-playing YouTube sub counter. For those of you not familiar with [Brian]’s channel, it’s really worth a watch. He tends toward long live-stream videos where he works on one project for a marathon session, and there’s a lot to learn from peeking over his virtual shoulder. This project stems from an earlier video, posted after the break, which itself was a condensation of several sessions hacking with the RGB matrix that would form the display for this project. He’s become enamored of the cheap and readily-available 64×32 pixel RGB displays, and borrowing an idea from Mc Lighting author [toblum], he decided that digits being assembled from falling Tetris blocks would be a nice twist. [Brian] had to port the Tetris-ifying code to Arduino before getting the ESP8266 to do the work of getting the subs and updating the display. We think the display looks great, and the fact that the library is open and available means that you too can add Tetris animations to your projects.
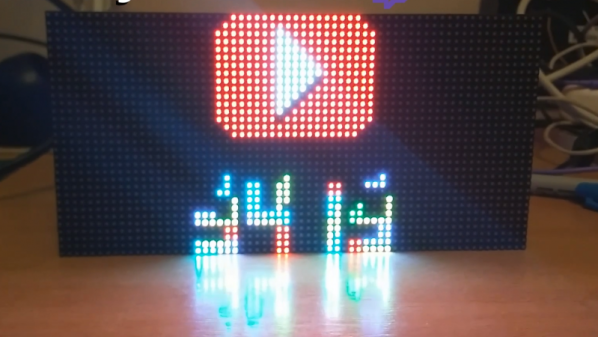
None of this is to say that more traditional sub counters can’t be cool too. From a minimalist display to keeping track of all your social media, good designs are everywhere. And adding a solid copper play button is a nice touch too.
Continue reading “A YouTube Subscriber Counter With A Tetris Twist”