Greeking Out With Arduinos

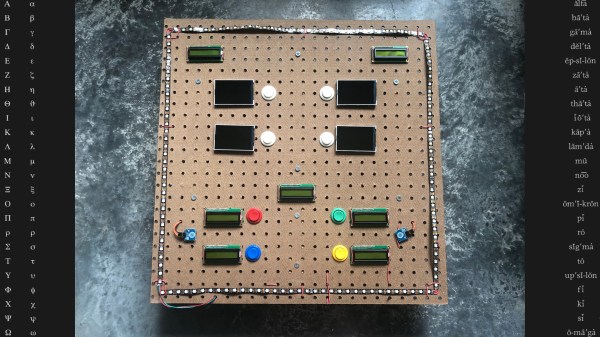
Learning a new language is hard work, but they say that the best way to learn something is to teach it. [Angeliki Beyko] is learning Greek, and what better way to teach than to build a vocabulary flash-card game from Arduinos, color screens, 1602 text screens, and arcade buttons? After the break, we have a video from the creator talking about how to play, the hardware she chose, and what to expect in the next version.

Pegboard holds most of the hardware except the color screens, which are finicky when it comes to their power source. The project is like someone raided our collective junk drawers and picked out the coolest bits to make a game. Around the perimeter are over one hundred NeoPixels to display the game progress and draw people like a midway game. Once invested, you select a category on the four colored arcade buttons by looking at the adjacent LCD screens’ titles. An onboard MP3 shield reads a pseudo-random Greek word and displays it on the top-right 1602 screen in English phonetics. After that, it is multiple choice with your options displaying in full-color on four TFT monitors. A correct choice awards you a point and moves to the next word, but any excuse to mash on arcade buttons is good enough for us.

[Angeliki] does something we see more often than before, she’s covering what she learned, struggled with, would do differently, and how she wants to improve. We think this is a vital sign that the hacker community is showcasing what we already knew; hackers love to share their knowledge and improve themselves.

Typing Greek with a modern keyboard will have you reaching for an alt-code table unless you make a shortcut keyboard, and if you learn Greek, maybe you can figure out what armor they wore to battle.

Continue reading “Greeking Out With Arduinos”

Miniature Star Wars Arcade Lets You Blow Up The Death Star On The Go

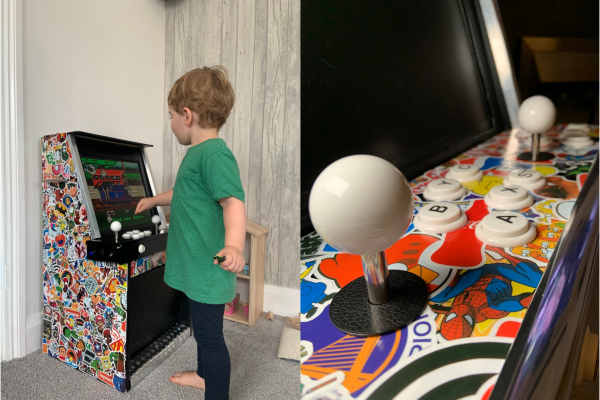
If you have fond childhood memories of afternoons spent at the local arcade, then you’ve had the occasional daydream about tracking down one of those old cabinets and putting it in the living room. But the size, cost, and rarity of these machines makes actually owning one impractical for most people.

While this fully functional 1/4th scale replica of the classic Star Wars arcade game created by [Jamie McShan] might not be a perfect replacement for the original, there’s no denying it would be easier to fit through your front door. Nearly every aspect of the iconic 1983 machine has been carefully recreated, right down to a working coin slot that accepts miniature quarters. Frankly, the build would have been impressive enough had he only put in half the detail work, but we certainly aren’t complaining that he went the extra mile.

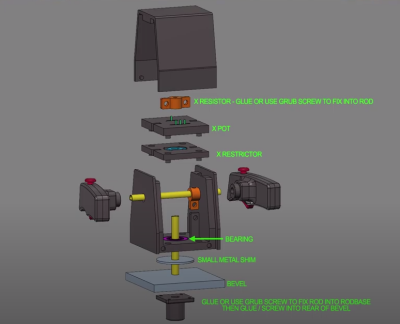
[Jamie] leaned heavily on resin 3D printed parts for this build, and for good reason. It’s hard to imagine how he could have produced some of the tiny working parts for his cabinet using traditional manufacturing techniques. The game’s signature control yoke and the coin acceptor mechanism are really incredible feats of miniaturization, and a testament to what’s possible at the DIY level with relatively affordable tools.

The cabinet itself is cut from MDF, using plans appropriately scaled down from the real thing. Inside you’ll find a Raspberry Pi 3 Model A+ running RetroPie attached directly to the back of a 4.3 inch LCD with integrated amplified speakers. [Jamie] is using an Arduino to handle interfacing with the optical coin detector and controls, which communicates with the Pi over USB HID. He’s even added in a pair of 3,000 mAh LiPo battery packs and a dedicated charge controller so you can blow up the Death Star on the go.

Still don’t think you can fit one in your apartment? Not to worry, back in 2012 we actually saw somebody recreate this same cabinet in just 1/6th scale.

Continue reading “Miniature Star Wars Arcade Lets You Blow Up The Death Star On The Go”

The Google Chrome Dinosaur Game, In Real Life

[Ryan] wanted to hack the Google Chrome Dinosaur Game so he could control the dinosaur with his own movements. The game only requires two keyboard presses (up and down arrow keys), so controlling the game with the Arduino Keyboard library only requires a few simple function calls.

He uses the Arduino MKR board in his build, but notes any number of other boards would work as well. A force sensor detects his jumps and a stretch sensor detects him ducking. Both the stretch and force sensors are resistive transducers, so two simple voltage divider circuits (one for each sensor) are needed to convert changes in force to a voltage. You may need to adjust the sensor threshold to ensure the code responds to your movements, but [Ryan] makes that pretty easy to do in software as both thresholds are stored as global variables.

It’s a pretty simple hack, but could make for some good socially-distanced fun. What other hackable Google Chrome extensions do you like?

Continue reading “The Google Chrome Dinosaur Game, In Real Life”

Jumbo LED Matrix Brings Classic Sprites To Life

Despite all the incredible advancements made in video game technology over the last few decades, the 8-bit classics never seem to go out of style. Even if you weren’t old enough to experience these games when they were new, it’s impossible not to be impressed by what the early video game pioneers were able to do with such meager hardware. They’re a reminder of what can be accomplished with dedication and technical mastery.

The grid has been split up for easier printing.

If you’d like to put a little retro inspiration on your desk, take a look at this fantastic 16 x 16 LED matrix put together by [Josh Gerdes]. While it’s obviously not the only thing you could use it for, the display certainly seems particularly adept at showing old school video game sprites in all their pixelated glory. There’s something about the internal 3D printed grid that gives the sprites a three dimensional look, while the diffused glow reminds us of nights spent hunched over a flickering CRT.

The best part might be how easy it is to put one of these together for yourself. You’ve probably got most of what you need in the parts bin; essentially it’s just a WS2812B strip long enough to liberate 256 LEDs from and a microcontroller to drive them. [Josh] used an Arduino Nano, but anything compatible with the FastLED library would be a drop-in replacement. You’ll also need a 3D printer to run off the grid, and something to put the whole thing into. The 12×12 shadowbox used here looks great, but we imagine clever folks such as yourselves could make do with whatever might be laying around if you can’t nip off to the arts and crafts store right now.

Beyond looking great, this project is a fantastic reminder of how incredibly handy WS2812 LEDs really are. Whether you’re recreating iconic game sprites or fashioning your own light-up sunglasses, it’s hard to imagine how we managed before these little wonders hit the scene.

Continue reading “Jumbo LED Matrix Brings Classic Sprites To Life”

Putting An Arcade Cabinet Inside Of An NES Controller

The arcade game shoehorned into an original Nintendo Entertainment System controller from [Taylor Burley] is certainly made slightly easier by its starting with one of those miniature cabinets that are all the rage now, but since he’s still achieved the feat of an entire arcade game in a controller we still stand by the assessment in our title.

In fact, he’s put not one but four arcade games into the controller. The board that [Taylor] liberated from the miniature game system can actually be switched between the onboard games by shorting out different pads on the PCB. Normally this would be done during manufacture with a zero-ohm resistor, but in this case, he’s wired the pads out to a strip of membrane keypad liberated from an LED remote control. By holding a different button while powering on the system, the user can select which of the games they want to boot into.

The original buttons and directional pad have been preserved, and in the video after the break, [Taylor] shows how he wires them into the arcade PCB. The Start and Select buttons had to go since that’s where the tiny color LCD goes now, but they wouldn’t have been used in any of these games anyway. With the addition of a small battery pack and charge controller, this build is a clever way to take several classic arcade titles with you on the go.

With the growing popularity of these tiny arcade cabinets, we’ve seen a number of hackers tearing into them. The work that [wrongbaud] has done in modifying them to run other ROMs is not to be missed if you’re looking at building a project using one of these little bundles of nostalgia.

Continue reading “Putting An Arcade Cabinet Inside Of An NES Controller”

Brain Transplant Makes One Arcade Machine Play Games From Another

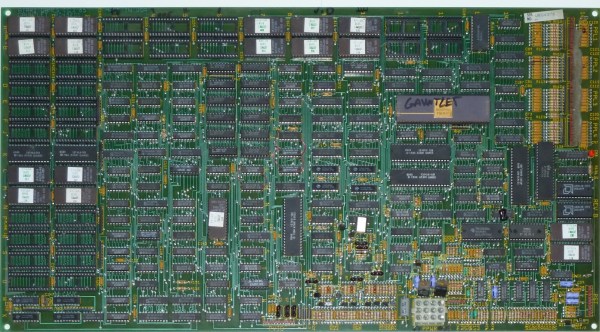
We’re used to games consoles in which the same hardware plays a variety of different games, but if we were to peer inside arcade cabinets of an older vintage we’d find custom boards unique to every game. Some boards from the same manufacturers shared common hardware traits even if they weren’t identical though, and [twistedsymphony] has taken advantage of this to make one vintage Taito game — Gun & Frontier — run on the hardware for another, Ah Eikou no Koshien. It’s a fascinating tale across a forum thread, that’s well worth a read even if you will never touch a vintage arcade board.

We might expect that the tool of choice would be a logic analyser or similar, but unexpectedly the solution to this hack was found in MAME. The arcade emulator conceals a wealth of information about these boards, from which you can discover their differences and try out possible solutions. The hardware hacks are surprisingly straightforward, a few bodge wires and an extra address line for a larger ROM. A programmable logic array required dumping and rewriting to fix a graphics corruption issue and a little bit of ROM tweaking after emulating a controller problem in MAME was required, but it seems that yes, one game can run on another. Certainly less painful than the Taito hack that required a chip to be decapped.

[via r/ReverseEngineering]

3D Print Your Way To A Bartop Arcade Cabinet

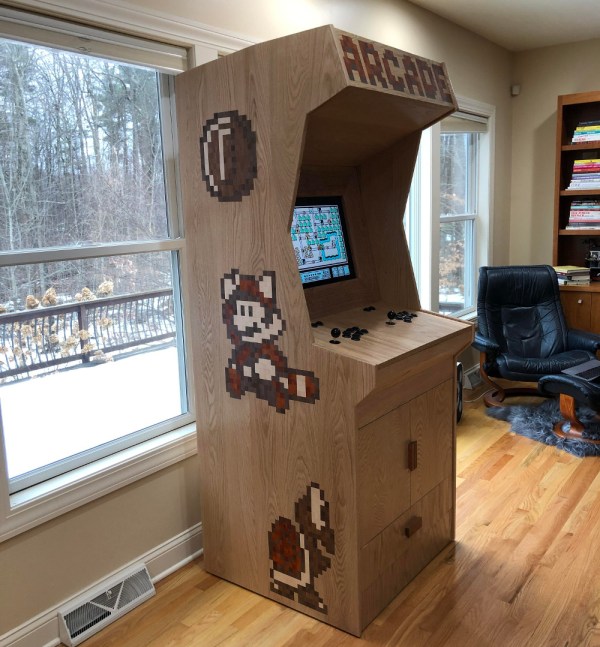
Custom arcade machines have always been a fairly common project in the hacker and maker circles, but they’ve really taken off with the advent of the Raspberry Pi and turn-key controller kits. With all the internals neatly sorted, the only thing you need to figure out is the cabinet itself. Unfortunately, that’s often the trickiest part. Without proper woodworking tools, or ideally a CNC router, it can be tough going to build a decent looking cabinet out of the traditional MDF panels.

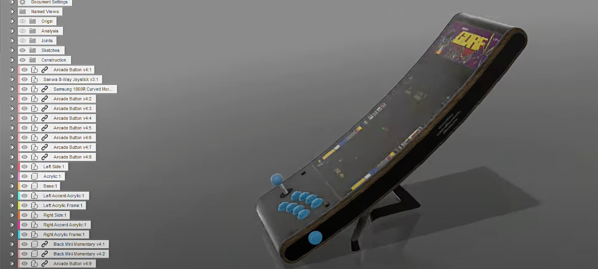
But if you’re willing to leave wood behind, [Gerrit Gazic] might have a solution for you. This bartop arcade, which he calls the simplyRetro D8, uses a fully 3D printed cabinet. He’s gone through the trouble of designing it so there are no visible screw holes, so it looks like the whole thing was hewn from a chunk of pure synthwave ore. He notes that this can make the assembly somewhat tricky in a few spots, but we think it’s a worthy compromise.

Given the squat profile of the simplyRetro, the internals are packed in a bit tighter than we’re accustomed to seeing in a arcade build. But there’s still more than enough room for the Raspberry Pi, eight inch touch screen HDMI panel, and all the controls. To keep things as neat as possible, [Gerrit] even added integrated zip tie mount points; a worthwhile CAD tip that’s certainly not limited to arcade cabinets.

[Gerrit] has included not only the STL files for this design, but also the Fusion 360 Archive should you want to make any modifications. There’s also a complete Bill of Materials, as well as detailed instructions on how to pull it all together. If you’ve ever wanted your own arcade machine but felt a bit overwhelmed about figuring out all the nuances on your own, the simplyRetro could be the project you’ve been waiting for.

Of course if you do have access to a CNC or laser cutter, then there are some designs you could produce quite a bit faster.