Battery Bot Makes Sure Cordless Tool Packs Are Always Topped Up

There was a time not that long ago when every tool was cordless. But now, cordless power tools have proliferated to the point where the mere thought of using a plain old wrist-twisting screwdriver is enough to trigger a bout of sympathetic repetitive injury. And the only thing worse than that is to discover that the batteries for your tools are all dead.

As [Lance] from the “Sparks and Code” channel freely admits, the fact that his impressive collection of batteries is always dead is entirely his fault, and that’s what inspired his automatic battery charging robot. The design is pretty clever; depleted batteries go into a hopper, under which is a 3D-printed sled. Batteries drop down into the sled, which runs the battery out from under the hopper to the charging station, which is just the guts of an old manual charger attached to a lead screw to adjust the height of the charging terminals for different size batteries. When the battery is charged, the sled pushes it a little further into an outfeed hopper before going back to get another battery from the infeed side.

Of course, that all vastly understates the amount of work [Lance] had to put into this. He suffered through a lot of “integration hell” problems, like getting the charger properly connected to the Arduino running the automation. But with a lot of tweaking, he can now just dump in a bunch of depleted packs and let the battery bot handle everything. The video after the break shows all the gory details.

Of course, there’s another completely different and much simpler solution to the dead battery problem.

Continue reading “Battery Bot Makes Sure Cordless Tool Packs Are Always Topped Up”

Pill Dispenser To Keep You On Track

When forgetting to take medication on time can lead to a bad day or night, having a helper to keep you on track can greatly improve your life. [M. Bindhammer] faces this scenario every day, so he built his own robotic pill dispenser.

The core of the project is a 3D printed dispensing drum with individual pockets for morning and evening medication. It is mounted directly to a 360° winch servo, normally used for RC sailboats, while a second conventional servo opens a small sliding door to drop the pills onto the dispensing tray. The tray integrates a sensitive touch sensor which can detect when [M] picks up the pills, without being triggered by the pills themselves.

[M. Bindhammer] also included a small but loud speaker, connected to a speech synthesis module for audio reminders. The main controller is a Arduino Due with a custom breakout shield that also integrates a DS3231 real time clock. All the electronics are enclosed in a 80’s style humanoid robot-shaped body, with dispensing drum on its chest, and an OLED screen as it’s face.

The end result is a very polished build, which should make [M. Bindhammer]’s life with bipolar disorder a little bit easier, and he hopes it might help others as well.

For more medication related gadgets, take a peek at another pill dispenser and a 3D printed dosing spoon to replace an essential but discontinued commercial version.

A Guard Bot For Your Home Assistant

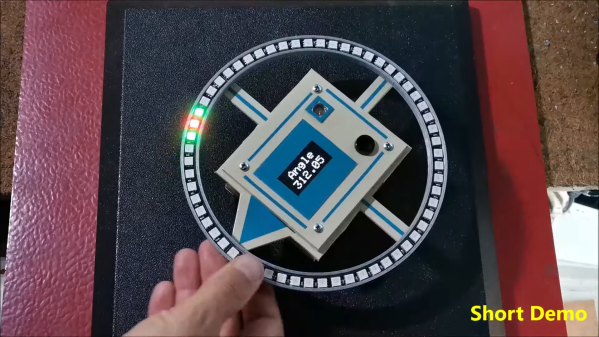
While fixed sensors, relays, and cameras can be helpful in monitoring your home, there are still common scenarios you need to physically go and check something. Unfortunately, this is often the case when you’re away from home. To address this challenge, [PriceLessToolkit] created a guardian bot that can be controlled through Home Assistant.

The robot’s body is made from 3D printed components designed to house the various modules neatly. The ESP32 camera module provides WiFi and video capabilities, while the Arduino Pro Mini serves as the bot’s controller. Other peripherals include a light and radar sensor, an LED ring for status display, and a speaker for issuing warnings to potential intruders. The motor controllers are salvaged from two 9-gram servos. The onboard LiPo battery can be charged wirelessly with an integrated charging coil and controller by driving the bot onto a 3D printed dock.

This build is impressive in its design and execution, especially considering how messy it can get when multiple discrete modules are wired together. The rotating caster wheels made from bearings add an elegant touch.

If you’re interested in building your own guard bot, you can find the software, CAD models, and schematics on GitHub. If you’re looking to add other gadgets to your Home Assistant setup, we’ve seen it connect to boilers, blinds, beds and 433 MHz sensors.

Continue reading “A Guard Bot For Your Home Assistant”

Making Music By Probing Magnetite Crystals

Well, noises anyway. [Dmitry Morozov] and [Alexandra Gavrilova] present an interesting electronics-based art installation, which probes a large chunk of crystalline magnetite, using a pair of servo-mounted probes, ‘measuring’ the surface conductivity and generating some sound and visuals.

It appears to have only one degree of freedom per probe, so we’re not so sure all that much of the surface gets probed per run, but however it works it produces some interesting, almost random results. The premise is that the point-to-point surface resistivity is unpredictable due to the chaotically formed crystals all jumbled up, but somehow uses these measured data to generate some waveshapes vaguely reminiscent of the resistivity profile of the sample, the output of which is then fed into a sound synthesis application and pumped out of a speaker. It certainly looks fun.

From a constructional perspective, hardware is based around a LattePanda fed samples by an ADS1115 ADC, which presumably is also responsible for driving the LCD monitor and the sound system. An Arduino is also wedged in there perhaps for servo-driving duty, maybe also as part of the signal chain from the probes, but that is just a guess on our part. The software uses the VVVV (Visual Live-programming suite) and the Pure Data environment.

We haven’t seen magnetite used for this type of application before, we tend to see it as a source of Iron for DIY knifemaking, as a medium to help separate DNA or just to make nanoparticles, for erm, reasons.

Hackaday Prize 2023: Bolt Bot Micro Servo Droids

This Hackaday prize entry from [saul] is the beginning of a reconfigurable kit of 3D printed parts and servo motors for robotics learning. With just access to a printer, a few cheap-as-chips servo motors, an Arduino, and some nuts and bolts, you could be hacking together robot walkers within a few hours of starting!

Bolt Bots is very simple to understand, with all the mechanics and wiring out there in the breeze, but strictly for indoor use we reckon. If you want to add remote control to your application, then drop in one of the ubiquitous nRF24L01 boards and build yourself a copy of the remote control [saul] handily provides in this other project.

There really isn’t a great deal we can say about this, as it’s essentially a build kit with quite a few configuration options, and you just have to build with it and see what’s possible. We expect the number of parts to proliferate over time giving even more options. So far [saul] demonstrates a few flavors of ‘walkers’, a rudimentary ‘robot arm’, and even a hanging drawbot.

The bolt hardware can be found in this GitHub repo, and the remote control code in this second one.

Servo-based designs are sometimes sneered at due to their dubious accuracy and repeatability, but with a little of effort, this can be vastly improved upon. Also, multi-legged walkers need multiple servos and controllers to drive ’em. Or do they?

Continue reading “Hackaday Prize 2023: Bolt Bot Micro Servo Droids”

Smooth Animations, Slick Bar Graphs, But No Custom Characters On This 16×2 OLED

Sometimes, finding new ways to use old hardware requires awesome feats of reverse engineering, software sleight of hand, and a healthy dose of good fortune. Other times, though, it’s just as simple as reading the data sheet and paying attention to details.

Not that we’re knocking [upir]’s accomplishment with these tricked-out 16×2 OLED displays. Far from it, in fact — the smoothly animated bar graph displays alphanumerics look fantastic. What’s cool about this is that he accomplished all this without resorting to custom characters. We’ve seen him use this approach before; this time around, the hack involves carefully shopping for a 16×2 OLED display with the right driver chip — a US2066 chip. You’ll still need a few tricks to get things working, like extra pull-up resistors to get the I2C display talking to an Arduino, plus a little luck that you got a display with the right character ROM.

Once all that is taken care of, getting the display to do what you want is mainly a matter of coding. In the video below, [upir] does a great job of walking through the finer points, and the results look great. The bar graphs in particular look fantastic, with silky-smooth animations.

Continue reading “Smooth Animations, Slick Bar Graphs, But No Custom Characters On This 16×2 OLED”

Retired Welding Robot Picks Up Side Hustle As CNC Router

Who says you can’t teach an old robot new tricks? Nobody, actually. That saying is about dogs. But it applies to robots too, at least judging by the way this late-90s industrial beast was put to use in a way it was never intended: as a giant CNC router.

The machine in question is an ABB IRB6400, a six-axis, floor-mounted industrial machine that had a long career welding at a Eurorail factory in Austria before [Brian Brocken] made its acquaintance. He procured the non-working machine — no word on what he paid for it — and moved the 2-ton paperweight into his shop, itself a non-trivial endeavor. After a good scrubbing, [Brian] tried to get the machine started up. An error prevented the robot controller from booting; luckily, there’s a large community of ABB users, and [Brian] learned that one of the modules in the controller needed replacement.

After fixing that — and swapping out the controller’s long-dead backup batteries, plus replacing the original 1.44 MB floppy drive with a USB drive — he was able to bring the machine back to life. Unfortunately, the limited amount of internal memory made it difficult to use for anything complicated, so [Brian] came up with an application to stream coordinates to the controller over a serial port, allowing for unlimited operation. With that in place, plus a simple spindle mounted to the robot’s wrist with a 3D printed adapter, [Brian] was able to carve foam blocks into complex shapes. The video below shows everything from delivery to first chips — well, dust at least.

This build seems to be a significant escalation from [Brian]’s previous large-format CNC machine. He must have something interesting in mind, so stay tuned for details.

Continue reading “Retired Welding Robot Picks Up Side Hustle As CNC Router”