Vacuum Gauge Display; Arduino Replaces Industrial

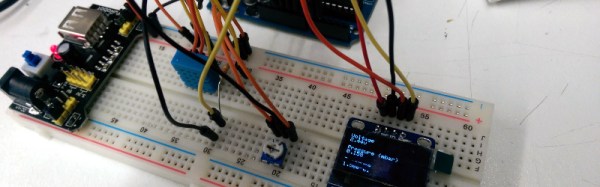
Arduinos! They’re a great tool that make the world of microcontrollers pretty easy, and in [cptlolalot]’s case, they also give us an alternative to buying expensive, proprietary parts. [cptlolalot] needed a gauge for an expensive vacuum pump, and rather than buying an expensive part, built a circuit around an Arduino to monitor the vacuum.

pressure-gauge-thumb
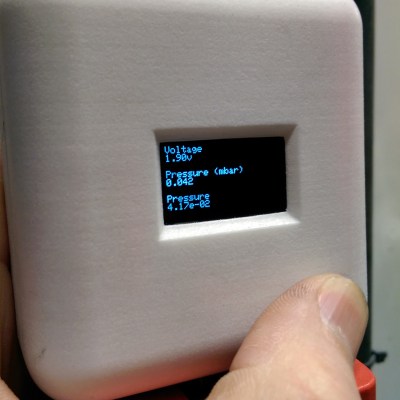
This project goes a little beyond simple Arduino programming though. A 12V to 5V power supply drives the device, which is laid out on a blank PCB. The display fits snugly over the circuit which reduces the footprint of the project, and the entire thing is housed in a custom-printed case with a custom-printed pushbutton. The device gets power and data over the RJ45 connection so no external power is needed. If you want to take a look at the code, it’s linked on [cptlolalot]’s reddit thread.

This project shows how much easier it can be to grab an Arduino off the shelf to solve a problem that would otherwise be very expensive. We’ve been seeing Arduinos in industrial applications at an increasing rate as well, which is promising not just because it’s cheap but because it’s a familiar platform that will make repairs and hacks in the future much easier for everyone.

Arduino IDE Becomes More Open, Less Snarky

Version 1.6.4 of the Arduino IDE has been out for a little while now, and it has a couple of notable changes. To our eyes, the most interesting change makes adding support for non-standard boards and their configurations within the Arduino IDE a lot simpler. We’ll get into details below.

unnamed
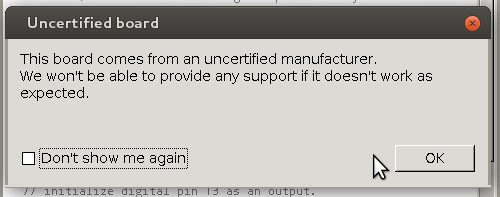
But before that, it’s time to bid farewell to the cheeky little popup window that would deliver a warning message when using a board bearing the USB IDs of their former-partner-turned-competitor. We absolutely agree with [Massimo] that the issues between Arduino SRL / Smart Projects and Arduino LLC are well-enough known in the community, and that it’s time for the popup to fade away.

Now on to the meat of this post. The new “Board Manager” functionality makes it significantly easier for other non-Arduino products to be programmed within the Arduino IDE. Adafruit has a tutorial on using the Board Manager functionality with their products, and it basically boils down to “enter the right URL, click on the boards you want, download, restart Arduino, bam!”

The list of unofficially supported third-party boards is still a bit short, but it includes some stellar entries. For instance, Adafruit has provided the files needed for the ESP8266, which recently received the Arduino treatment. This means that you can simply point your IDE at Adafruit’s URL, and it’ll set you up with everything needed to develop for the ESP8266 from within the comfy Arduino IDE.

Continue reading “Arduino IDE Becomes More Open, Less Snarky”

Nyan Cat

Embroidered Nyan Cat Brings A Meme To The Real World

Have you ever come across an Internet meme and just thought to yourself, “I have to bring this into the physical world!” Well [0xb3nn] and [Knit Knit] did. They decided to take the classic nyan cat meme and bring it to life.

The frame is 24″ x 36″. Many hours went into the knitting process, but the result obviously turned out very well. The stars include 24 LED sequins to add a sparkling animation effect. These were sewn onto the back of the work using conductive thread. They are bright enough to shine through to the front where needed. These connect back to an Arduino Pro Mini 5V board.

The Arduino is also connected to a capacitive touch sensor. This allows the user to simply place their hand over the nyan cat image to start the animation. No need for physical buttons or switches to take away from the visual design. An Adafruit AudioFX sound board was used to play back a saved nyan cat theme song over a couple of speakers. The source code for this project is available on github. Be sure to watch the demo video below. Continue reading “Embroidered Nyan Cat Brings A Meme To The Real World”

The Simplest Quadrupedal Robot Ever

Wheeled and tracked robots are easy mode, and thanks to some helpful online tutorials for inverse kinematics, building quadruped, hexapod, and octopod robots is getting easier and easier. [deshipu] came up with what is probably the simplest quadruped robot ever. It’s designed to be a walking robot that’s as cheap and as simple to build as possible.

The biggest problem with walking robots is simply the frame. Where a wheeled robot is basically a model car, a walking robot needs legs, joints, and a sturdy frame to attach everything to. While there are laser cut hexapod frames out there, [deshipu]’s Tote robot uses servos for most of the skeleton. The servos are connected to each other by servo horns and screws.

The electronics are based on an Arduino Pro Mini, with a PCB for turning the Arduino’s pins into servo headers. Other than that, a 1000uF cap keeps brownouts from happening, and a 1S LiPo cell provides the power.

Electronics are easy, and the inverse kinematics and walking algorithms aren’t. For that, [deshipu] has a few tutorials for these topics. It’s a very complete guide to building a quadruped robot, but it’s still a work in progress. That’s okay, because [deshipu] says it will probably remain a work in progress until every kid on Earth builds one.

School Kids Build Ontario Power Generation System Model

The STEAMLabs community makerspace teamed up with a grade 6 class from Vocal Music Academy, a public elementary school in downtown Toronto, to create a working model of the Ontario Power System. It pulls XML files and displays the live power generation mix from renewable and other sources on a 3D printed display on RGB LED strips. Arduino coding on a Spark Core provides the brains.

The kids learned HTML, CSS and Javascript to build a web interface to send commands to the Spark and explain how the system works. Their project was accepted as an exhibition at the TIFF DigiPlaySpace. The kids presented their project to adults and other kids at the event. STEAMLabs has also published a free, open source Internet of Things teaching kit to enable other educators to make projects with Internet brains.

STEAMLabs is currently crowd-funding a new makerspace in Toronto. They’re almost there, a few hundred dollars short of their target, with a couple of days to go. Help them help kids and adults make amazing things! When Hackaday visited Toronto recently, [Andy Forest] dropped in to show off this project. Projects like these which let kids become creators of technology, rather than mere consumers, is one of the best ways to get them hooked to hacking from an early age.

Continue reading “School Kids Build Ontario Power Generation System Model”

A Tool For Spying On Serial Data

[Piotr] was working on a recent Arduino project when he ran into a problem. He was having trouble getting his Arduino Pro Mini to communicate with an ESP8266 module. He needed a way to snoop on the back and forth serial communications. Since he didn’t have a specialized tool for this task, [Piotr] ended up building his own.

spying-on-serial-thumb
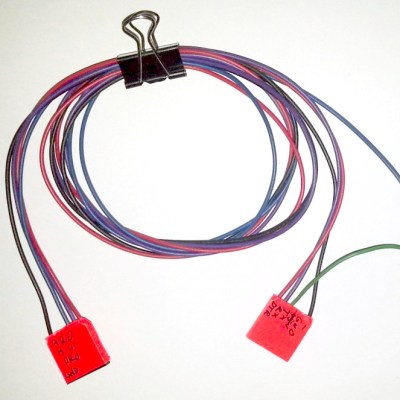
The setup is pretty simple. You start with a standard serial cable containing the TX, RX, DTR, and GND wires. This cable connects the Arduino to the ESP8266 WiFi module. The TX and RX lines are then tapped into. Each wire is routed to the RX pin of two different serial to USB adapters. This way, the data being sent from the Arduino shows up on one COM port and the data being transmitted from the module shows up on the other.

The next piece of the puzzle was coming up with a way to see the data more clearly. [Piotr] could have opened two serial terminals simultaneously, but this wasn’t ideal because it would be difficult to compare the timing of the data. Instead, [Piotr] spent less than an hour writing his own simple serial terminal. This one connects to two COM ports at the same time and prints the data on the same screen. The data from each COM port is displayed in a separate color to make it easy to differentiate. The schematic and source code to this project can be found on [Piotr’s] website.

Pinball Simulator Makes The Neighbors Happy

There are a lot of simulators out there if you want to try something out that would be otherwise impossible. Great examples are flight simulators for simulating the piloting of a fighter jet, or goat simulators for simulating the life of a goat who destroys a town. [Erland] wanted a pinball machine, but like planes and goats, found it was impractical to get a real one because it would probably upset his neighbors in his apartment. Instead, he set out to build a pinball simulator.

The cabinet is miniature-sized compared to a regular pinball machine so it can more easily fit in the apartment. It utilizes three monitors, a 24″ one in portrait mode for the main playing area, a 20″ one for the back screen, and a smaller one for the “dot matrix” style scoreboard. Once the woodwork was completed, a PC was put together to control everything and an Arduino was installed to handle the buttons and output USB commands to the PC.

Of course, we’ve featured many other pinball simulators before, but this one is no slouch when it comes to features either. It is very well crafted and the project is very well documented, and the miniature size sets it apart as well. However, if you want to go a step further with your pinball simulator, you might want to check out this augmented reality pinball system.