Unlocking Animal Crossing’s Debug Mode

Originally released on the Nintendo 64 in 2001, Animal Crossing was the first entry into what has become a massively successful franchise. But while the game has appeared on more modern Nintendo consoles, most recently Android and iOS, the version released on the GameCube holds a special place in many fan’s hearts. The GameCube version was the first time those outside of Japan got a taste of the unique community simulation offered by Animal Crossing, and maintains a following nearly 20 years after its release.

[James Chambers] has recently been investigating creating mods for the GameCube version of Animal Crossing, and in the process uncovered some interesting references to a debug mode. That launched a deep dive into the game’s assembly code in an attempt to find what the debug functions did and if they could be enabled without having to patch the game ROM. In the end, he was able to find a push button code that enables debug mode on the retail copy of the game.

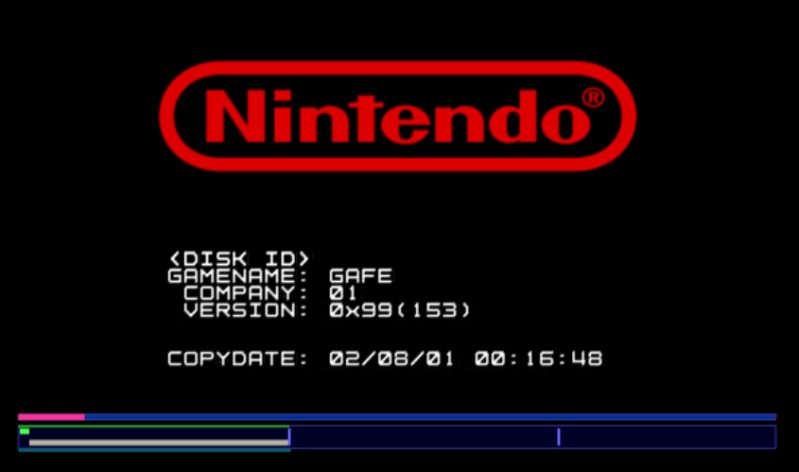
[James] starts by using the debugger provided by the Dolphin GameCube emulator to poke around and figure out exactly what flags need to be modified to activate the debug mode. This leads to a few interesting finds, such as being able to pop up a performance monitor graph and some build info. Eventually he finds the proper incantation to bring up a functional debug display in the game, but there was still the mystery of how you do it on the real hardware with a retail copy of the game.

It wouldn’t be unreasonable to think that some special dongle or development version of the GameCube would be required to kick the game into debug mode. But through careful examination of the code path, [James] was able to figure out that hitting a specific combination of buttons on the controller was all that was required to use the debug mode on the stock game. Once the debug mode is started, a controller plugged into the second port allows the user to navigate through options and perform tasks. Not everything is currently understood, but some progress has been made, such as figuring out how to add items to your inventory.

It’s hardly Nintendo’s most popular console, but there’s still a healthy interest in GameCube hacking as the machine approaches its 20th anniversary. We recently saw some impressive work being done to reverse engineer the system’s wireless controllers, though some people are more interested in just cutting the thing in half.

[Thanks to Tim Trzepacz for the tip.]

Writing A New Game For The Game Boy Color

If you’re bored with the Game Boy Color’s offerings, it’s understandable: it’s been around for nearly 20 years, and doesn’t get a lot of new releases these days. [Antonio Niño Díaz] spent over a year coding a game for the GBC: µCity, a Sims City style game. He designed the graphics and even wrote his own music.

[Antonio] did all the programming in Assembly Language, creating modules for managing traffic and the power grid, building creation and destruction, as well as disaster simulations. He has extensive notes in his GitHub page detailing each module and describing how it all works together. He’s given it a GPLv3+ license, so hack away.

The ROM works on emulators, but [Antonio] has verified it works on the original hardware; it just reduces the number of saved cities to accommodate the handheld’s lesser stats.

Hackaday loves our GBC: we’ve written up DIY coprocessors for the GBC, adding an audio amp, and even making a solar-powered Game Boy.

Continue reading “Writing A New Game For The Game Boy Color”

Reading Bingo Balls With Microcontrollers

Every once in a while a project comes along with that magical power to consume your time and attention for many months. When you finally complete it, you feel sorry that you don’t have to do anything more.

What is so special about this Bingo ball reader? It may seem like an ordinary OCR project at first glance; a camera captures the image and OCR software recognizes the number. Simple as that. And it works without problems, like every simple gadget should.

But then again, maybe it’s not that simple. Numbers are scattered all over the ball, so they have to be located first, and the best candidate for reading must be selected. Then, numbers are painted onto a sphere rather than a flat surface, sometimes making them deformed to the point where their shape has to be recovered first. Also, the angle of reading is not fixed but somewhere on a 360° scale. And then we have the glare problem to boot, as Bingo balls are so shiny that every light source reflects as a saturated bright spot.

So, is that all of it? Well, almost. The task is supposed to be performed by an embedded microcontroller, with limited speed and memory, yet the recognition process for one ball has to be fast — 500 ms at worst. But that’s just one part of the process. The project includes the pipelined mechanism which accepts the ball, transports it to be scanned by the OCR and then shot by the public broadcast camera before it gets dumped. And finally, if the reading was not reliable enough, the ball has to be subtly rotated so that the numbers would be repositioned for another reading attempt.

Despite these challenges I did manage to build this system. It’s fast and reliable, and I discovered some very interesting tricks along the way. Take a look at the quick demo video below to get a feel for the speed, and what the system “sees”. Then join me after the break to dive into the details of this interesting embedded build.

Continue reading “Reading Bingo Balls With Microcontrollers”

Does This Demo Remind You Of Mario Kart? It Should!

Here’s a slick-looking VGA demo written in assembly by [Yianni Kostaris]; it’s VGA output from an otherwise stock ATmega2560 at 16MHz with no external chips involved. If you’re getting some Super Mario Kart vibes from how it looks, there’s a good reason for that. The demo implements a form of the Super Nintendo’s Mode 7 graphics, which allowed for a background to be efficiently texture-mapped, rotated, and scaled for a 3D effect. It was used in racing games (such as Super Mario Kart) but also in many others. A video of the demo is embedded below.

[Yianni] posted the original demo a year earlier, but just recently added detailed technical information on how it was all accomplished. The AVR outputs VGA signals directly, resulting in 100×120 resolution with 256 colors, zipping along at 60 fps. The AVR itself is not modified or overclocked in any way — it runs at an entirely normal 16MHz and spends 93% of its time handling interrupts. Despite sharing details for how this is done, [Yianni] hasn’t released any code, but told us this demo is an offshoot from another project that is still in progress. It’s worth staying tuned because it’s clear [Yianni] knows his stuff.

Continue reading “Does This Demo Remind You Of Mario Kart? It Should!”

Assembly Required: Subroutine Calls And The 1K Challenge

The first computer I personally owned had 256 bytes of memory. Bytes. The processor in my mouse and keyboard both have more memory than that. Lots more. Granted, 256 bytes was a bit extreme, but even the embedded systems I was building as part of my job back then generally had a small fraction of the 64K bytes of memory they could address.

Some people are probably glad they don’t have to worry about things like that anymore. Me, I kind of miss it. It was often like a puzzle trying to squeeze ten more bytes out of an EPROM to get a bug fix or a new feature put in. I though with the 1K challenge underway, I might share some of the tricks we used in those days to work around the small memory problems.

Continue reading “Assembly Required: Subroutine Calls And The 1K Challenge”

Linux: Assembly Required

Sometimes you might need to use assembly sometime to reach your project objectives. Previously I’ve focused more on embedding assembly within gcc or another compiler. But just like some people want to hunt with a bow, or make bread by hand, or do many other things that are no longer absolutely necessary, some people like writing in assembly language.

In the old days of DOS, it was fairly easy to write in assembly language. Good thing, because on the restricted resources available on those machines it might have been the only way to get things to fit. These days, under Windows or Linux or even on a Raspberry Pi, it is hard to get oriented on how to get an assembly language off the ground.

Continue reading “Linux: Assembly Required”

Gcc: Some Assembly Required

There was a time when you pretty much had to be an assembly language programmer to work with embedded systems. Yes, there have always been high-level languages available, but it took improvements in tools and processors for that to make sense for anything but the simplest projects. Today, though, high-quality compilers are readily available for a lot of languages and even an inexpensive CPU is likely to outperform even desktop computers that many of us have used.

So assembly language is dead, right? Not exactly. There are several reasons people still want to use assembly. First, sometimes you need to get every clock cycle of performance out of a chip. It can be the case that a smart compiler will often produce better code than a person will write off the cuff. However, a smart person who is looking at performance can usually find a way to beat a compiler’s generated code. Besides, people can make value trades of speed versus space, for example, or pick entirely different algorithms. All a compiler can do is convert your code over as cleverly as possible.

Besides that, some people just like to program in assembly. Morse code, bows and arrows, and steam engines are all archaic, but there are still people who enjoy mastering them anyway. If you fall into that category, you might just want to write everything in assembly (and that’s fine). Most people, though, would prefer to work with something at a higher level and then slip into assembly just for that critical pieces. For example, a program might spend 5% of its time reading data, 5% of its time writing data, and 90% of the time crunching data. You probably don’t need to recreate the reading and writing parts. They won’t go to zero, after all, and so even if you could cut them in half (and you probably can’t) you get a 2.5% boost for each one. That 90% section is the big target.

The Profiler

Sometimes it is obvious what’s taking time in your programs. When it isn’t, you can actually turn on profiling. If you are running GCC under Linux, for example, you can use the -pg option to have GCC add profiling instrumentation to your code automatically. When you compile the code with -pg, it doesn’t appear to do anything different. You run your program as usual. However, the program will now silently write a file named gmon.out during execution. This file contains execution statistics you can display using gprof (see partial output below). The function b_fact takes up 65.9% of CPU time.

screenshot_232

If you don’t have a profiling option for your environment, you might have to resort to toggling I/O pins or writing to a serial port to get an idea of how long your code spends doing different functions. However you do it, though, it is important to figure it out so you don’t waste time optimizing code that doesn’t really affect overall performance (this is good advice, by the way, for any kind of optimization).

Assembly

If you start with a C or C++ program, one thing you can do is ask the compiler to output assembly language for you. With GCC, use a file name like test.s with the -o option and then use -S to force assembly language output. The output isn’t great, but it is readable. You can also use the -ahl option to get assembly code mixed with source code in comments, which is useful.

You can use this trick with most, if not all, versions of GCC. Of course, the output will be a lot different, depending. A 32-bit Linux compiler, a 64-bit Linux compiler, a Raspberry Pi compiler, and an Arduino compiler are all going to have very different output. Also, you can’t always figure out how the compiler mangles your code, so that is another problem.

If you find a function or section of code you want to rewrite, you can still use GCC and just stick the assembly language inline. Exactly how that works depends on what platform you use, but in general, GCC will send a string inside asm() or __asm__() to the system assembler. There are rules about how to interact with the rest of the C program, too. Here’s a simple example from the a GCC HOWTO document (from a PC program):

__asm__ ("movl %eax, %ebx\n\t"
"movl $56, %esi\n\t"
"movl %ecx, $label(%edx,%ebx,$4)\n\t"
"movb %ah, (%ebx)");

You can also use extended assembly that lets you use placeholders for parts of the C code. You can read more about that in the HOWTO document. If you prefer Arduino, there’s a document for that, too. If you are on ARM (like a Raspberry Pi) you might prefer to start with this document.

So?

You may never need to mix assembly language with C code. But if you do, it is good to know it is possible and maybe not even too difficult. You do need to find what parts of your program can benefit from the effort. Even if you aren’t using GCC, there is probably a way to mix assembly and your language, you just have to learn how. You also have to learn the particulars of your platform.

On the other hand, what if you want to write an entire program in assembly? That’s even more platform-specific, but we’ll look at that next time.