Atari Tape Drive Turned Security DVR

We know that a lot of our beloved readers don’t take kindly to abuse of vintage hardware, so the Atari fans in the audience may want to avert their eyes for this one. Especially if they’re particularly keen on spinning up their Jawbreaker cassette on authentic hardware, as [iot4c] has gutted an Atari XC12 Program Recorder to turn it into an enclosure for a Raspberry Pi video storage device.

Step one of this conversion was, as you might expect, removing all the original hardware from the cassette recorder case. From there, [iot4c] fitted the Raspberry Pi, a USB hard drive, and a YDS-5A DC-DC converter to power them. Depending on what the drive setup looks like, it might also make sense to add a USB powered hub. A length of Ethernet cable was left hanging out the back of the Atari XC12 so it could be plugged into the network, but a panel mount RJ45 connector could spruce things up a bit.

Of course, gutting an old piece of hardware and sticking a Pi into it isn’t exactly breaking any new ground at this point. But we did appreciate that [iot4c] went the extra mile to wire it up so the “Save” LED now doubles as a network activity indicator. Which pretty much brings it full circle in terms of functionality for a network-attached video recorder.

Earlier in the year [iot4c] converted a 65XE into a USB keyboard with the help of an Arduino Leonardo, but the vintage Atari aficionados will be happy to note that at least in that case the donor machine remained fully functional.

Entombed Secrets Partially Unearthed As Researchers Dissect Clever Maze-Generating Algorithm

If you look at enough of another developer’s code, you will eventually say, “What were you thinking, you gosh-darn lunatic?” Now, this exchange can precede the moment where you quit a company and check into a padded room, or it can be akin to calling someone a mad genius and offering them a beer. In the case of [Steven Sidley]’s 1982 game Entombed, [John Aycock] and [Tara Copplestone] found a mysterious table for generating pseudo-random mazes and wrote a whitepaper on how it all works (PDF). The table only generates solvable mazes, but if any bits are changed, the puzzles become inescapable.

The software archaeologists are currently in a labyrinth of their own, in which the exit is an explanation of the table, but the path is overgrown with decade-old vines. The programmer did not make the table himself, and its creator’s name is buried somewhere in the maze. Game cart storage was desperately limited so mazes had to be generated on-the-fly rather than crafted and stored. Entombed‘s ad-hoc method worked by assessing the previous row and generating the next based on particular criteria, with some PRNG in places to keep it fresh. To save more space, the screen was mirrored down the center which doubles the workload of the table. Someday this mysterious table’s origins may be explained but for now, it is a work of art in its own right.

Aside from a table pulled directly from the aether, this maze game leaned on pseudo-random numbers but there is room for improvement in that regard too.

Via BBC Future.

Doing What Id Couldn’t: Returning Music To Jaguar Doom

While the rest of the world has by and large forgotten the Atari Jaguar, the generously marketed console still has a fan base, and even some dedicated hackers prodding away at it. [Cyrano Jones] is one of them, and he managed something many considered unthinkable: restoring in-game music to the Jaguar port of Doom.

The Jaguar version of the classic shooter was developed by id Software themselves, and is generally considered one of the better console ports. For example, the large number of buttons on the Jaguar controller allowed players to select weapons directly rather than having to cycle through them. Unfortunately, the complete lack of music during gameplay was a glaring omission that took several points off of an otherwise fairly solid presentation.

The common culprit blamed for this was that the Jaguar’s DSP was already being used for math processing, so it didn’t have any cycles left for music playback. Coupled with a tight deadline, id probably cut their losses and released it without in-game music rather than try and spend more time engineering a solution. To compensate for the lack of in-game music, id did include the famous soundtrack in the intermission screens rather than entirely strip it out.

As [Cyrano] found out by studying the source code that’s been available since 2003, sound effects in the Jaguar version of Doom are played using something called a “ring buffer”: a cyclical fixed-length data buffer which constantly gets outputted as audio. With a patch of unused memory he could fit a second ring buffer in, rendering the music to it with close to no performance hit elsewhere in the code and then mixing both buffers for the final audio output. It looks as though id already had some of this solution in place, but with enough issues that forced them to abandon the idea in order to release the game on time.

Software hacks are not the only things that the Jaguar fan base can do though, and a fine example of a hardware one is this custom mod showing what it could’ve looked like with the CD add-on in an integrated unit.

Continue reading “Doing What Id Couldn’t: Returning Music To Jaguar Doom”

Vintage Atari Becomes Modern Keyboard

The modern keyboard enthusiast is blessed with innumerable choices when it comes to typing hardware. There are keyboards designed specifically for gaming, fast typing, ergonomics, and all manner of other criteria. [iot4c] undertook their own build for no other reason than nostalgia – which sounds plenty fun to us.

An Arduino Leonardo is pressed into service for this hack. With its USB HID capabilities, it’s perfectly suited for custom keyboard builds. It’s built into a working Atari 65XE computer, and connected to the keyboard matrix. The Keypad and Keyboard libraries are pressed into service to turn keypresses on the 80s keyboard into easily digseted USB data.

There’s plenty of room inside the computer for the added hardware, with the USB cable neatly sneaked out the rear. [iot4c] notes that everything still works and the added hardware does not cause any problems, as long as it’s not used as a computer and a keyboard at the same time.

It’s possible to do a similar hack on the Commodore 64, too. If you’re doing tricky keyboard builds yourself, you know where to send ’em.

SVG Rendering Comes To 8-bit Atari Computers

Bringing modern protocols and techniques to vintage computers is a favorite pastime for hackers, and over the years we’ve seen some absolutely incredible hardware and software projects designed specifically to do what most people would consider impossible. They’re very rarely practical projects, of course. But that’s never really the point.

The product of 45 minutes of work.

Today we present another excellent entry into this niche avenue of hacking: Renderific, a tool to render SVGs on 8-bit Atari computers by [Kevin Savetz]. The MIT licensed program is written in Turbo-BASIC XL and allows computers such the 1200XL and 800XL to not only render the image on screen but output it to an attached plotter. There are a few niggling issues with some files, and apparently the plotter draws the image upside-down for some reason, but on the whole we can now add “SVG Rendering” to the list of things you can do with a nearly 40-year-old computer.

Of course, those who are familiar with these 1980’s machines might wonder how their limited CPUs can possibly cope with such a task. Well, that’s where the impracticality comes in. According to [Kevin], you can be in for quite a wait depending on the complexity of the image. In his tests, some SVGs took up to 45 minutes to fully render on the screen, so you might want to have a snack handy.

If you’re interested in lending a hand with the project, it sounds as though [Kevin] could use some assistance in figuring out why the Atari 1020 plotter doesn’t like the output of his program. There’s also a few SVG functions and forms of Bézier curves that need some work if you’ve got your Turbo-BASIC XL programming books handy.

Will you ever have a need to view SVG files on an Atari 1200XL? No, probably not. You might not have a desire to play Spotify on the Macintosh SE/30 either, but that hasn’t stopped hackers from figuring out how you can do it. As long as these old machines are still up and running, we’re confident that the community will continue to teach them new tricks.

2600-Inspired Handheld Brings The Faux Woodgrain

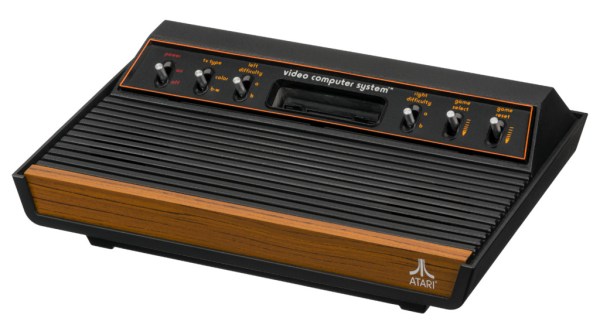
The Atari 2600 is a console from a very different time, when home appliances, furniture, and even automobiles were all covered in fake vinyl woodgrain veneer. Somehow it was the in thing for a decade, and then immediately became tacky overnight. Regardless, if you want to evoke the era, that’s what you do – and that’s exactly what [Christian] did with this handheld RetroPie build.

An early concept sketch shows off [Christian]’s art skills.
The technical side of things is fairly routine in these parts – a Pi Zero runs RetroPie so you can play emulated games from the mid-90s and earlier. It’s the visual presentation that we particularly enjoy. The look of the early Atari is evoked through clever use of materials. The body is in black plastic, with blocky red buttons for controls. It’s finished with a vinyl woodgrain applique around the screen, and we think it’s a wonderful aesthetic.

The files to print your own are available on Thingiverse, and [Christian] has provided a basic guide to sourcing similar parts. It’s all common stuff, readily available on eBay or elsewhere.

We love seeing retro throwbacks like this – the tiny Macintosh Plus from the 2017 Superconference is a particular highlight.

FPGA Hack Becomes An Atari Game Genie

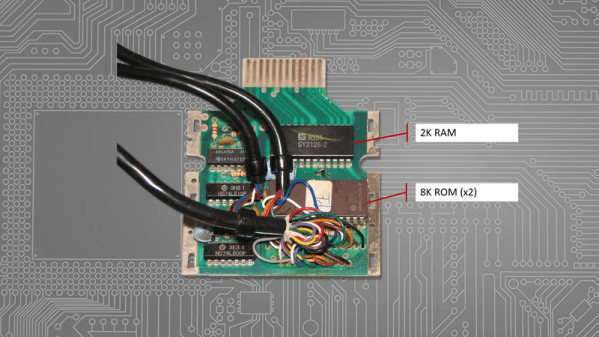
The Game Genie is a classic of the early 90s video game scene. It’s how you would have beaten the Ninja Turtles game, and it’s why the connector in your NES doesn’t work as it should. They never made a Game Genie for the Atari 2600, though, because by the time the Game Genie was released, the Atari was languishing on the bottom shelves of Toys R Us. Now though, we have FPGAs and development tools. We can build our own. That’s exactly what [Andy] did, and his Game Genie for the 2600 works as well as any commercial product you’d find for this beleaguered console.

To understand how to build a Game Genie for an Atari, you first have to understand how a Game Genie works. The hacks for a Game Genie work by replacing a single byte in the ROM of a game. If your lives are stored at memory location 0xDEAD for example, you would just change that byte from 3 (the default) to 255 (because that’s infinite, or something). Combine this with 6-letter and 8-letter codes that denote which byte to change and what to change it to, and you have a Game Genie.

This build began by setting up a DE0 Nano FPGA development board to connect to an Atari 2600 cartridge. Yes, there are voltage level differences, but this can be handled with a few pin assignments. Then, it’s just a matter of writing Verilog to pass all the data from one set of address and data pins to another set of address and data pins. The FPGA becomes a man-in-the-middle attack, if you will.

With the FPGA serving as a pass-through for the connections on the cartridge, it’s a simple matter to hard-code cheats into the device. For the example, [Andy] found the code for a game, figured out where the color of the fireballs were defined as red, and changed the color to blue. It worked, and all was right with the world. The work was then continued to create a user interface to enter three cheat codes, and finally wrapped up in a 3D printed enclosure. Sure, the Atari Game Genie works with ribbon cables, but it wouldn’t be that much more work to create a similar project with Lock-On™ technology. You can check out the entire build video below, or get the info over on Element14

Continue reading “FPGA Hack Becomes An Atari Game Genie”