Every Computer Deserves A Rotary Encoder

In the era of touch screens and capacitive buttons, we’d be lying if we said we didn’t have the occasional pang of nostalgia for the good old days when interfacing with devices had a bit more heft to it. The physical clunk and snap of switches never seems to get old, and while you can always pick up a mechanical keyboard for your computer if you want to hear that beautiful staccato sound while firing off your angry Tweets, there’s a definite dearth of mechanical interface devices otherwise.

[Jeremy Cook] decided to take matters into his own hands (literally and figuratively) by designing his own multipurpose USB rotary input device. It’s not a replacement for the mouse or keyboard, but a third pillar of the desktop which offers a unique way of controlling software. It’s naturally suited to controlling things like volume or any other variable which would benefit from some fine tuning, but as demonstrated in the video after the break even has some gaming applications. No doubt the good readers of Hackaday could think of even more potential applications for a gadget like this.

The device is built around the diminutive Arduino-compatible PICO board by MellBell, which features a ATmega32u4 and native USB. This allowed him to very rapidly spin up a USB Human Interface Device (HID) with minimal headaches, all he had to do was hang his buttons and rotary encoder on the PICO’s digital pins. To that end, he [Jeremy] used the fantastic I2C rotary encoder designed by [fattore.saimon], which readers may remember as a finalist in the Open Hardware Design Challenge phase of the 2018 Hackaday Prize. He also added a NeoPixel ring around the encoder to use for some visual feedback and because, well, it just looks cool.

Since all of the core components are digital, there’s not a whole lot required in the way of wiring or passive components. This let [Jeremy] put the whole thing together on a piece of perfboard, freeing him up to spend time designing the 3D printed enclosure complete with translucent lid so he can see the NeoPixel blinkenlights. He got the tolerances tight enough that the whole device can be neatly press-fit together, and even thought to add holes in the bottom of the case so he could push the perfboard back out if he needed to down the line.

[Jeremy] spends a good chunk of the video going over the software setup and development of the firmware, and details some of the nuances he had to wrap his head around when working with the I2C encoder. He also explains the math involved in getting his encoder to emulate a mouse cursor moving in a circle, which he thinks could be useful when emulating games that originally used an encoder such as Tempest or Pong.

We’ve seen similar USB “knobs” in the past for controlling volume, but the additional inputs that [Jeremy] built into his version definitely makes it a bit more practical. Of course we’re suckers for interesting USB input devices to begin with.

Continue reading “Every Computer Deserves A Rotary Encoder”

Micro-ATX Arduino Is The Ultimate Breakout Board

If you’ve been hanging around microcontrollers and electronics for a while, you’re surely familiar with the concept of the breakout board. Instead of straining to connect wires and components to ever-shrinking ICs and MCUs, a breakout board makes it easier to interface with the device by essentially making it bigger. The Arduino itself, arguably, is a breakout board of sorts. It takes the ATmega chip, adds the hardware necessary to get it talking to a computer over USB, and brings all the GPIO pins out with easy to manage header pins.

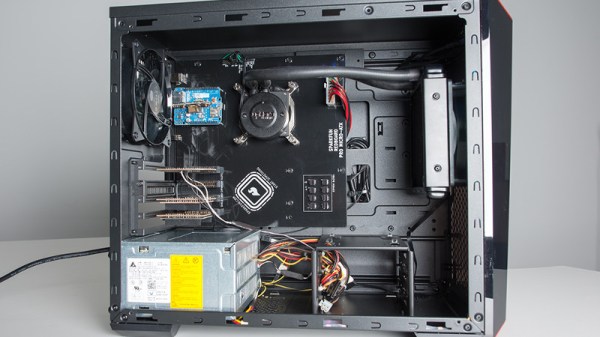
But what if you wanted an even bigger breakout board for the ATmega? Something that really had some leg room. Well, say no more, as [Nick Poole] has you covered with his insane RedBoard Pro Micro-ATX. Combining an ATmega32u4 microcontroller with standard desktop PC hardware is just as ridiculous as you’d hope, but surprisingly does offer a couple tangible benefits.

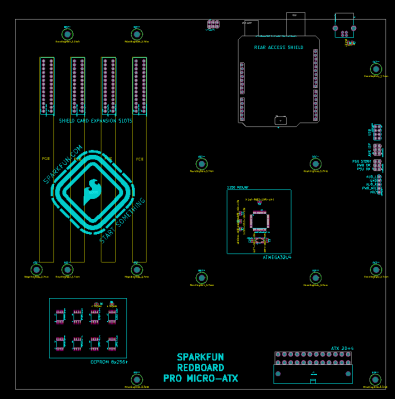
RedBoard PCB layout

The RedBoard is a fully compliant micro-ATX board, and will fit in pretty much any PC case you may have laying around in the junk pile. Everything from the stand-off placement to the alignment of the expansion card slots have been designed so it can drop right into the case of your choice.

That’s right, expansion slots. It’s not using PCI, but it does have a variation of the standard Arduino “shield” concept using 28 pin edge connectors. There’s a rear I/O panel with a USB port and ISP header, and you can even add water cooling if you really want (the board supports standard LGA 1151 socket cooling accessories).

While blowing an Arduino up to ATX size isn’t exactly practical, the RedBoard is not without legitimate advantages. Specifically, the vast amount of free space on the PCB allowed [Nick] to add 2Mbits of storage. There was even some consideration to making removable banks of “RAM” with EEPROM chips, but you’ve got to draw the line somewhere. The RedBoard also supports standard ATX power supplies, which will give you plenty of juice for add-on hardware that may be populating the expansion slots.

With as cheap and plentiful as the miniITX and microATX cases are, it’s no surprise people seem intent on cramming hardware into them. We’ve covered a number of attempts to drag other pieces of hardware kicking and screaming into that ubiquitous beige-box form factor.

Cheap DIY MIDI To USB Adapter

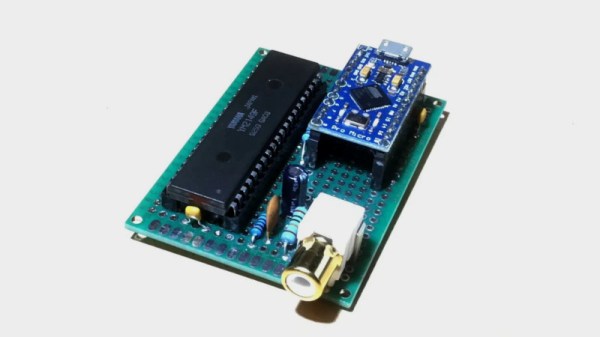
[Joonas] became frustrated with cheap but crappy MIDI to USB converters, and the better commercial ones were beyond his budget. He used a Teensy LC to build one for himself and it did the job quite well. But he needed several converters, and using the Teensy LC was going to cost him a lot more than he was willing to spend. With some tinkering, he was able to build one using an Adafruit Pro Trinket which has onboard hardware UART (but no USB). This lack of USB support was a deal killer for him, so after hunting some more he settled on a clone of the Sparkfun Pro Micro. Based on the ATmega32U4, these clones were just right for his application, and the cheapest to boot. He reckons it cost him about $5 to build each of his cheap USB MIDI adapters which receive notes and pedal data from the keyboard’s MIDI OUT and transmit them to a computer

Besides the Pro Micro clone, the only other parts he used are a generic opto-coupler, a couple of resistors and a MIDI connector. After testing his simple circuit on a bread board, he managed to squeeze it all inside an old USB dongle housing, stuffing it in dead-bug style.

The heavy lifting is all done in the firmware, for which [Joonas] used LUFA — the Lightweight USB Framework for AVR’s. He wrote his own code to handle MIDI (UART) to USB MIDI messages conversion. The interesting part is his use of a 32.15 kbps baud rate even though the MIDI specification requires 31.25 kbps. He found that a slightly higher baud rate fixes a problem in the AVR USART implementation which tends to miss consecutive bytes due to the START edge not being detected. Besides this, his code is limited in functionality to only handle a few messages, mainly for playing a piano, and does not have full-fledged MIDI capabilities.

We’ve featured several of [Joonas]’s hacks here over the years, the most recent being the Beaglebone Pin-Toggling Torture Test and from earlier, How to Turn A PC On With a Knock And An ATTiny.

Jenkins Given An Industrial Stack Light For Build Reporting

When working on software development in a team environment, it’s important to know the status of your build at all times. Jenkins can display build automation info on a screen but where’s the fun in that? A popular office project is to build some kind of visual display of a project’s status, and [dkt01] has done just that with this stack light build monitor.

In this day and age of online shopping, random bits of industrial hardware are just an eBay away, so it’s easy to find some cool lamps or indicators for any project. [dkt01] sourced a standard 24V stack light off the shelf. With its green, red, and yellow indicators, its perfect for showing the current status of their build server.

The project uses an Arduino Pro Micro combined with an ENC28J60 Ethernet adapter. We used to see that chip all the time but in 2017 it’s somewhat of a classic setup with the great unwashed masses largely migrating to the ESP8266. However, for the purposes of this project, it was perfect for connecting to the wired office network (after all, you want to know the status of your build and not of your WiFi). [dkt01] even managed to get a web configuration to work despite the relatively meager resources of the ATmega32u4.

The build is cleanly executed, with the microcontroller and Ethernet hardware tucked into a 3D printed base for the stack light’s enclosure. It’s far more likely to become a permanent office fixture if it’s a tidy build without wires hanging out everywhere so a custom PCB ties everything together neatly. In another nice touch, the stack lights flash on initialization to indicate if the DHCP lease was successful, which makes troubleshooting easier. There’s an overview of all different light combinations and meanings in the video after the break.

Overall it’s a solid build with some off-the-shelf components that serves a genuine purpose. For a similar project built on a smaller scale, check out the Indictron. For something bigger, show us how you’ve learned to output your server status on the city’s traffic lights. Ask first, though.
Continue reading “Jenkins Given An Industrial Stack Light For Build Reporting”

Balancing Robot Needs Innovative Controller And Motor

A self-balancing robot is a great way to get introduced to control theory and robotics in general. The ability for a robot to sense its position and its current set of circumstances and then to make a proportional response to accomplish its goal is key to all robotics. While hobby robots might use cheap servos or brushed motors, for any more advanced balancing robot you might want to reach for a brushless DC motor and a new fully open-source controller.

The main problem with brushless DC motors is that they don’t perform very well at low velocities. To combat this downside, there are a large number of specialized controllers on the market that can help mitigate their behavior. Until now, all of these controllers have been locked down and proprietary. SmoothControl is looking to create a fully open source design for these motors, and they look like they have a pretty good start. The controller is designed to run on the ubiquitous ATmega32U4 with an open source 3-phase driver board. They are currently using these boards with two specific motors but plan to also support more motors as the project grows.

We’ve seen projects before that detail why brushless motors are difficult to deal with, so an open source driver for brushless DC motors that does the work for us seems appealing. There are lots of applications for brushless DC motors outside of robots where a controller like this could be useful as well, such as driving an airplane’s propeller.

Hacking The Thotcon 0x8 Badge

[Kenjo] attended Chicago’s Thotcon this past week and has started hacking the convention badge and detailing what he learned. Thotcon’s badge, designed by [Jedha] and programmed by [John Wallis] of Workshop 88, is packed with the requisite electronic hardware and cryptic clues. There are four NeoPixel LEDs, three pots, and a micro USB, all run by an ATmega32u4.

The stock firmware is a game called tesserHack, a maze game using the three pots for navigation. You can also connect via USB to play through the serial console, and this version includes a map view and help menu.

[Kenjo] who previously hacked the Thotcon 0x6 badge, accidentally deleted the stock firmware on this year’s badge, so he used a Bus Pirate as an ISP to burn the Arduino boot loader back on, and has started mapping out the pots and LEDs. If you’re interested in helping out, check out the project on Hackaday.io. [Thanks, gigawatts]

MalDuino — Open Source BadUSB

MalDuino is an Arduino-powered USB device which emulates a keyboard and has keystroke injection capabilities. It’s still in crowdfunding stage, but has already been fully backed, so we anticipate full production soon. In essence, it implements BadUSB attacks much like the widely known, having appeared on Mr. Robot, USB Rubber Ducky.

It’s like an advanced version of HID tricks to drop malicious files which we previously reported. Once plugged in, MalDuino acts as a keyboard, executing previous configured key sequences at very fast speeds. This is mostly used by IT security professionals to hack into local computers, just by plugging in the unsuspicious USB ‘Pen’.

[Seytonic], the maker of MalDuino, says its objective is it to be a cheaper, fully open source alternative with the big advantage that it can be programmed straight from the Arduino IDE. It’s based on ATmega32u4 like the Arduino Leonardo and will come in two flavors, Lite and Elite. The Lite is quite small and it will fit into almost any generic USB case. There is a single switch used to enable/disable the device for programming.

The Elite version is where it gets exciting. In addition to the MicroSD slot that will be used to store scripts, there is an onboard set of dip switches that can be used to select the script to run. Since the whole platform is open sourced and based on Arduino, the MicroSD slot and dip switches are entirely modular, nothing is hardcoded, you can use them for whatever you want. The most skilled wielders of BadUSB attacks have shown feats like setting up a fake wired network connection that allows all web traffic to be siphoned off to an outside server. This should be possible with the microcontroller used here although not native to the MalDuino’s default firmware.

For most users, typical feature hacks might include repurposing the dip switches to modify the settings for a particular script. Instead of storing just scripts on the MicroSD card you could store word lists on it for use in password cracking. It will be interesting to see what people will come up with and the scripts they create since there is a lot of space to tinker and enhanced it. That’s the greatness of open source.

Continue reading “MalDuino — Open Source BadUSB”