Umbrella And Tin Cans Turned Into WiFi Dish Antenna

There’s something iconic about dish antennas. Chances are it’s the antenna that non-antenna people think about when they picture an antenna. And for many applications, the directionality and gain of a dish can really help reach out and touch someone. So if you’re looking to tap into a distant WiFi network, this umbrella-turned-dish antenna might be just the thing to build.

Stretching the limits of WiFi connections seems to be a focus of [andrew mcneil]’s builds, at least to judge by his YouTube channel. This portable, foldable dish is intended to increase the performance of one of his cantennas, a simple home-brew WiFi antenna that uses food cans as directional waveguides. The dish is built from the skeleton of an umbrella-style photographer’s flash reflector; he chose this over a discount-store rain umbrella because the reflector has an actual parabolic shape. The reflective material was stripped off and used as a template to cut new gores of metal window screen material. It’s considerably stiffer than the reflector fabric, but it stretches taut between the ribs and can still fold up, at least sort of. An arm was fashioned from dowels to position the cantenna feed-horn at the focus of the reflector; not much detail is given on the cantenna itself, but we assume it’s similar in design to cantennas we’ve featured before.

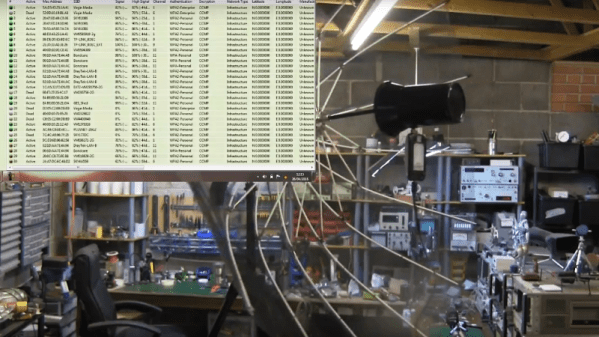
[andrew] hasn’t done rigorous testing yet, but a quick 360° scan from inside his shop showed dozens of WiFi signals, most with really good signals. We’ll be interested to see just how much this reflector increases the cantenna’s performance.

Continue reading “Umbrella And Tin Cans Turned Into WiFi Dish Antenna”

Mechanisms: Couplings

I was splitting wood one day a few years back, getting next winter’s firewood ready on my hydraulic splitter. It normally handled my ash and oak with ease, but I had a particularly gnarly piece of birch queued up, and the splitter was struggling. The 20-ton cylinder slowed as the wedge jammed in the twisted grain, the engine started to bog down, then BANG! I jumped back as something gave way and the engine revved out of control; I figured a hydraulic hose gave out. Whatever it was, I was done for the day.

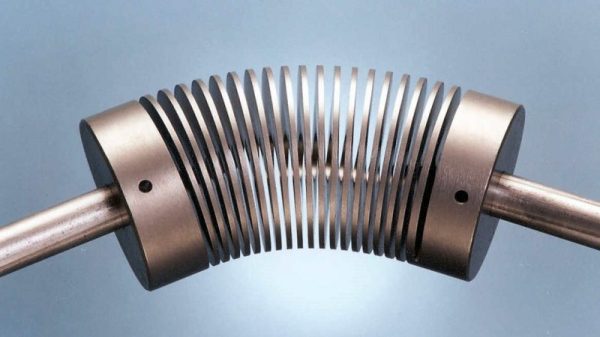
I later discovered that a coupler between the engine shaft and the hydraulic pump failed dramatically. It was an easy fix once I ordered the right part, and I’ve since learned to keep extras in stock. Couplings are useful things, and they’re the next up in our series on mechanisms.

Continue reading “Mechanisms: Couplings”

Real-Life Electronic Neurons

All the kids down at Stanford are talking about neural nets. Whether this is due to the actual utility of neural nets or because all those kids were born after AI’s last death in the mid-80s is anyone’s guess, but there is one significant drawback to this tiny subset of machine intelligence: it’s a complete abstraction. Nothing called a ‘neural net’ is actually like a nervous system, there are no dendrites or axions and you can’t learn how to do logic by connecting neurons together.

NeruroBytes is not a strange platform for neural nets. It’s physical neurons, rendered in PCBs and Molex connectors. Now, finally, it’s a Kickstarter project, and one of the more exciting educational electronic projects we’ve ever seen.

Regular Hackaday readers should be very familiar with NeuroBytes. It began as a project for the Hackaday Prize all the way back in 2015. There, it was recognized as a finalist for the Best Product, Since then, the team behind NeuroBytes have received an NHS grant, they’re certified Open Source Hardware through OSHWA, and there are now enough NeuroBytes to recreate the connectome of a flatworm. It’s doubtful the team actually has enough patience to recreate the brain of even the simplest organism, but is already an impressive feat.

The highlights of the NeuroBytes Kickstarter include seven different types of neurons for different sensory systems, kits to test the patellar reflex, and what is probably most interesting to the Hackaday crowd, a Braitenberg Vehicle chassis, meant to test the ideas set forth in Valentino Braitenberg’s book, Vehicles: Experiments in Synthetic Psychology. If that book doesn’t sound familiar, BEAM robots probably do; that’s where the idea for BEAM robots came from.
It’s been a long, long journey for [Zach] and the other creators of NeuroBytes to get to this point. It’s great that this project is now finally in the wild, and we can’t wait to see what comes of it. Hopefully a full flatworm connectome.

Simplest Jumping Kangaroo Bot

One of the takeaway ideas that we got from BEAM robotics was the idea that the machine itself, rather than tons of processing power, can do a lot. Your hand affords gripping, and humans have made a pretty good living out of manipulating things (he says, typing). None of this is about the brain; it’s all about the mechanism.

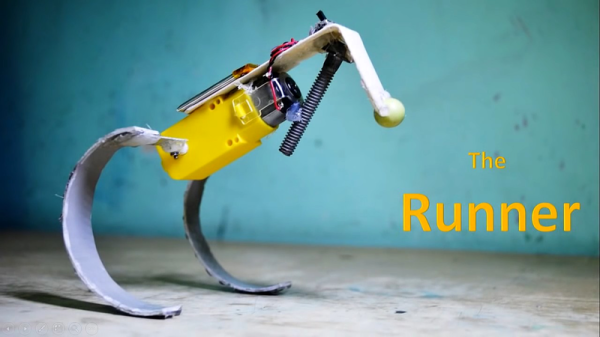
Which brings us to the one-motor “Runner” robot. We’ll admit that we were a little bit disappointed to see that it doesn’t run so much as hop, flop, or scoot along on the two legs and that front wheel-nose. Still, it’s an awesome mechanism, and gets the locomotion job done in a very theatrical way. We’re left wondering if using two motors would allow it to steer or just flip over and flail around on its back. Going to a six “leg” design will definitely get the job done, as demonstrated by Boston Dynamics RHex robot.
Continue reading “Simplest Jumping Kangaroo Bot”

Solving ISP Problem With A Homebrew LTE Yagi

We’ve heard reports that internet connectivity in Australia can be an iffy proposition, and [deandob] seems to back that up. At the limit of a decent DSL connection and on the fringe of LTE, [deandob] decided to optimize the wireless connection with this homebrew Yagi antenna.

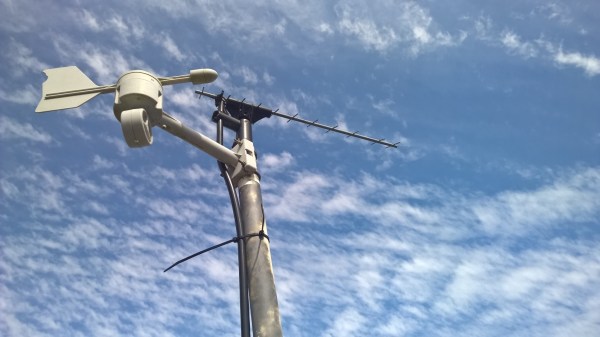
Officially known as the Yagi-Uda after its two Japanese inventors from the 1920s, but generally shortened to the name of its less involved but quicker to patent inventor, the Yagi is an antenna that provides high gain in one direction. That a homebrew antenna was even necessary at all is due to [deandob]’s ISP using the 2300MHz band rather than the more popular 2400MHz – plenty of cheap 2.4GHz antennas out there, but not so much with 2.3GHz. With multiple parallel and precisely sized and spaced parasitic elements, a Yagi can be a complicated design, but luckily for [deandob] the ham radio community has a good selection of Yagi design tools available. His final design uses an aluminum rod for a boom, 2mm steel wire for reflectors and directors, and a length of coax as the driven element. The result? Better connectivity that pushes his ISP throttling limit, and no more need to mount the modem high enough in his house to use the internal antenna.

People on the fringes of internet coverage go to great lengths to get connections, like this off-grid network bridge. Or if you’d rather use a homebrew Yagi to listen to meteors, that’s possible too.

Tape Measure VHF Yagi Antenna

tap measure yagi vhf antenna

Radio direction finding and fox hunting can be great fun and is a popular activity with amateur radio (ham radio) enthusiasts. These antennas are great and are not only good for finding transmitters but also will greatly increase directional distance performance including communicating with satellites and the international space station (ISS).

[jcoman] had a nephew who was interested in learning about amateur radio so [jcoman] figured building and using a cheap and portable 2 meter band VHF Yagi style beam antenna would be the perfect activity to captivate the young lad’s interest in the hobby.

His design is based on [Joe Leggio’s] (WB2HOL) design with some of his own calculated alterations. We have seen DIY Yagi antenna designs before but what makes this construction so interesting is that the elements come together using bits of cut metal tape measure sections. These tape measure sections allow the Yagi antenna, which is normally a large and cumbersome device, to be easily stowed in a vehicle or backpack. When the antenna is needed, the tape measure sections naturally unfold and function extremely well with a 7 dB directional gain and can be adjusted to get a 1:1 SWR at any desired 2 m frequency.

The other unique feature is that the antenna can be constructed for under $20 if you actually purchase the materials. The cost would be even less if you salvage an old tape measure. You might even have the PVC pipes, hose clamps and wire lying around making the construction nearly free.

We were quite surprised to find that such a popular antenna construction method using tape measure elements had not yet been featured on Hackaday. For completeness this is not the only DIY tape measure Yagi on Instructables so also check out [FN64’s] 2 m band “Radio Direction Finding Antenna for VHF” and [manuka’s] 70 cm band “433 MHz tape measure UHF antenna” postings. The other Yagi antenna designs featured on Hackaday were “Building a Yagi Uda Antenna” and “Turning an Easter Egg Hunt into a Fox Hunt” but these designs were not so simple to construct nor as cleverly portable.

Turbot Is A Beam/Picaxe Hybrid

[James] wanted to build a BEAM turbot. He ran into some problems with the BEAM circuitry though, and ended up with a BEAM/Picaxe hybrid.
Beam robotics
are the brainchild of Mark Tilden. The acronym stands for Biology, Electronics, Aesthetics, and Mechanics. BEAM based bots were very popular with hobbyists in the 90’s and early 2000’s, but popularity has since died down. BEAM robots tend not to use microcontrollers, instead attempting to simplify things down to the lowest number of elements.

[James’] turbot uses a miller solar engine. The original design used the engine to drive a Solar Turbot Latch. [James’] problem was that the photodiode “eyes” of the robot were not properly enabling the 74AC245 to pass current to the motor. Since the robot was built in a tiny space, debugging the circuit was extremely hard. After struggling with the ‘245 for some time, [James] decided to swich out the BEAM circuit for a Picaxe microcontroller.

The Picaxe can only sink or source about 20ma per pin, which is slightly less than the no load current of [James’] motors. To make up for this, he ganged up four pins per motor. There was some risk in the motors blowing up the Picaxe. However between the lightly loaded gearmotors and low current solar panels it seems to be working just fine.  Overall the bot is a very clean, compact build. Jump past the break to check out its really smooth crablike walking action.

Continue reading “Turbot Is A Beam/Picaxe Hybrid”