Plasma Cutting And 3D Printing Team Up To Make Bending Thick Sheet Steel Easier

Metalworking has always been very much a “mixed method” art. Forging, welding, milling, grinding; anything to remove metal or push it around from one place to another is fair game when you’ve got to make something fast. Adding in fancy new tools like CNC plasma cutting and computer-aided drafting doesn’t change that much, although new methods often do call for a little improvisation.

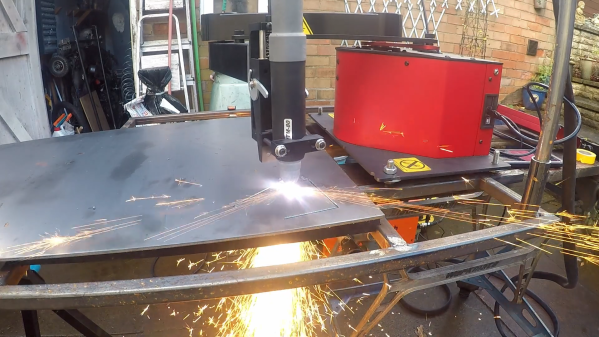
Getting several methodologies to work and play well together is what [tonygoacher] learned all about while trying to fabricate some brackets for an electric trike for next year’s EMF Camp. The parts would have been perfect for fabrication in a press brake except for the 4 mm thickness of the plate steel, which was a little much for his smallish brake. To make the bending a little easier, [tony] made a partial-thickness groove across the plasma-cut blank, by using a reduced power setting on the cutter. This worked perfectly to guide the brake’s tooling, but [tony] ran into trouble with more complicated bends that would require grooves on both sides of the steel plate.

His solution was to 3D print a couple of sacrificial guide blocks to fit the bed of the press brake. Each guide had a ridge to match up with a guide groove, this allowed him to cut his partial grooves for both bends on the same side of the plate but still align it in the press brake. Yes, the blocks were destroyed in the process, but they only took a few minutes to print, so no big deal. And it’s true that the steel tore a little bit when the groove ended up on the outside radius of the bend, but that’s nothing a bead of weld can’t fix. Good enough for EMF is good enough, after all.

The brief video below shows the whole process, including [tony]’s interesting SCARA-like CNC plasma cutter, which we’re a little in love with now. This isn’t the first time we’ve seen 3D prints used as tools in metalworking, of course, but we picked up some great tips from this one. Continue reading “Plasma Cutting And 3D Printing Team Up To Make Bending Thick Sheet Steel Easier”

Prepare To Brake: Quick Intro To Metal Bending

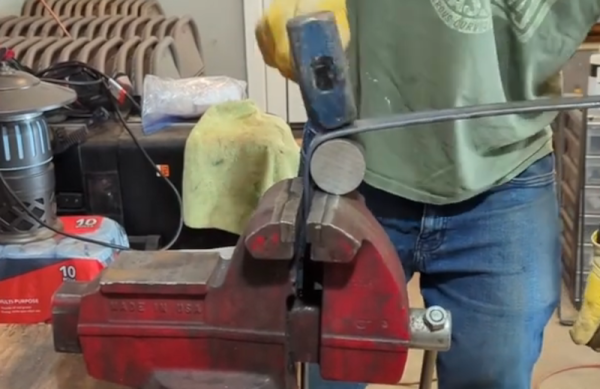
If you want to bend metal to make shapes, you might use equipment like a brake. But if you don’t have one, no worries. You can still do a lot with common tools like a vise and torches. [Bwrussell] shows you how. He welds together a die to use as a bending jig and makes a set of table legs.

You might think that putting metal in a vise and bending it isn’t exactly brain surgery. It isn’t, but there is more to it than that. Starting with a bending plan and the creation of the jigs, clamping and bending is only part of it. You can see a little bit of the action in the video below.

Speaking of planning, the design was in Fusion 360’s sheet metal workflow. To facilitate the bends, the build uses two torches. A MAPP torch gets very hot, and a propane torch makes sure that a larger area stays hot. There are quite a few tips you can pick up in this post, even if you aren’t making table legs.

Fusion 360 does a lot of the design work, but if you want a quick lesson on what happens when you bend metal, we can help. Want to make your own metal brake?

Continue reading “Prepare To Brake: Quick Intro To Metal Bending”

A Steam Box For Not A Lot

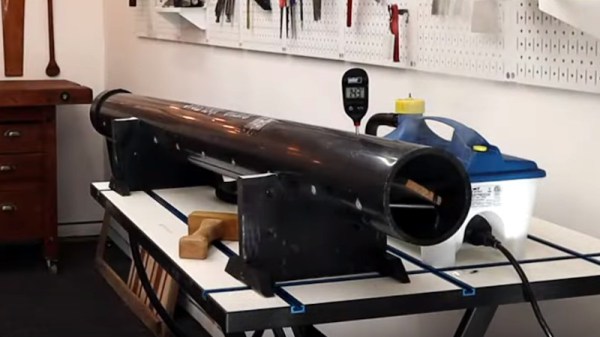
If you have ever marveled at the complex wooden curves used by shipbuilders or some furniture makers, then you have probably at some point hankered after a steam box. This is as its name suggests, a chamber in which a piece of wood is steamed until it becomes flexible, at which point it can be pressed into a new shape that it will retain once cooled. The ever-resourceful [Xyla Foxlin] shows us how to make a steam box using easy-to-find parts, as can be seen in the video below the break.

The steam supply comes from a commercial steam boiler of the type used by decorators for wallpaper stripping, and the steam box itself is made from a length of PVC pipe. Inside the pipe are a series of aluminium dowels that form a rack upon which the wood sits away from any condensation, and the whole things sits at a slant with the steam inlet and a condensation drain at the bottom end.

In use, a piece of wood is loaded into the tube and steamed, before being bent using a set of forms in a vice.  The process looks straightforward enough that even we could give it a go, so we’re sure Hackaday readers will find it interesting.

We think this may be the first steam box we’ve brought you, but it’s not the first time we’ve discussed bending wood.

Continue reading “A Steam Box For Not A Lot”

3D-Printed Tools Turn Bench Vise Into Expedient Press Brake

Chances are pretty good that most of us have used a bench vise to do things far beyond its intended use. That’s understandable, as the vise may be the most powerful hand tool in many shops, capable of exerting tons of pressure with the twist of your wrist. Not taking advantage of that power wouldn’t make any sense, would it?

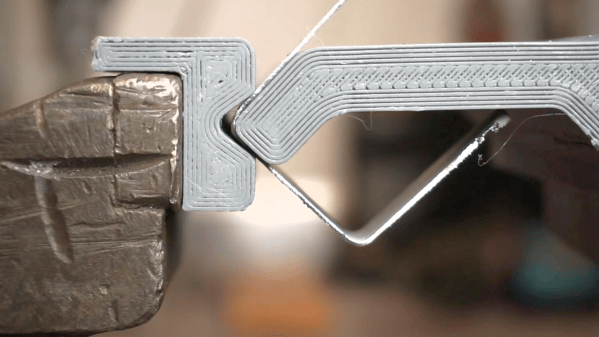
Still, the clamping power of the vise could sometimes use a little finesse, which is the thinking behind these 3D-printed press brake tools.  [Brauns CNC] came up with these tools, which consist of a punch and a die with mating profiles. Mounted to the jaws of the vise with magnetic flanges, the punch is driven into the die using the vise, forming neat bends in the metal. [Braun] goes into useful detail on punch geometry and managing springback of the workpiece, and handling workpieces wider than the vise jaws. The tools are printed in standard PLA or PETG and are plenty strong, although he does mention using his steel-reinforced 3D-printing method for gooseneck punches and other tools that might need reinforcement. We’d imagine carbon-fiber reinforced filament would add to the strength as well.

To be sure, no matter what tooling you throw at it, a bench vise is a poor substitute for a real press brake. Such machine tools are capable of working sheet metal and other stock into intricate shapes with as few setups as possible, and bring a level of power and precision that can’t be matched by an improvised setup. But the ability to make small bends in lighter materials with homemade tooling and elbow grease is a powerful tool in itself.

Continue reading “3D-Printed Tools Turn Bench Vise Into Expedient Press Brake”

DIY Electric Roller Bender Can Handle The Thick(er) Stuff

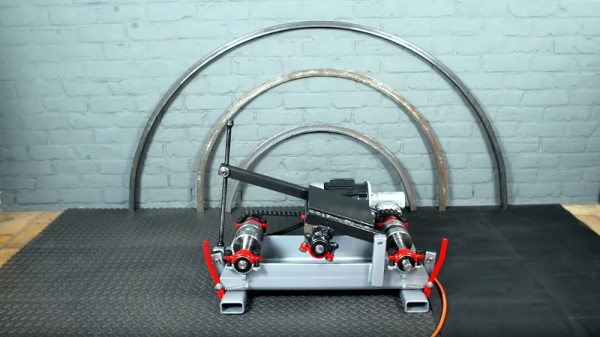
Every serious metal worker will end up getting themself a roller bender at some point, but if you’re as dedicated as [Meanwhile in the Garage], you might just start building the things yourself. His heavy-duty electric roller bender, demonstrated in the video after the break, is perfect for the thicker steel and bigger radii his smaller manual machine can’t handle.

The basic concept is the same in both machines, with two fixed rollers and a third adjustable opposing one between them. Most of the components are pieces of scrap metal, and each shaft runs on bearings mounted in homemade pillow blocks. The two fixed shafts are connected together by a chain drive, and a scrap industrial motor provides the rotating power through a worm gearbox.  There are two adjustable bushings on each shaft to keep the work piece aligned. The lead screw from an old car jack is used to adjust the position of the moving roller.

We picked up a few interesting tips from the video, like how to properly align a cylindrical workpiece in a drill press for drilling radial holes.  He also used toggle switches as limit switches in a pretty ingenious way, and F-clamps on the work piece to activate them when it reaches the end.

Building your own tools at home is a time-honoured hacking tradition, which we have never seen a shortage of here on Hackaday. Check out this DIY drill press and vertical CNC mill.

Circuit Sculpture Hack Chat

Join us on Wednesday, November 6 at noon Pacific for the Circuit Sculpture Hack Chat with Mohit Bhoite!

For all the effort engineers put into electronic design, very few people ever get to appreciate it. All the hard work that goes into laying out a good PCB and carefully selecting just the right components is hidden the moment the board is slipped into an enclosure, only to be interacted with again through a user interface that gets all the credit for the look and feel of the product.

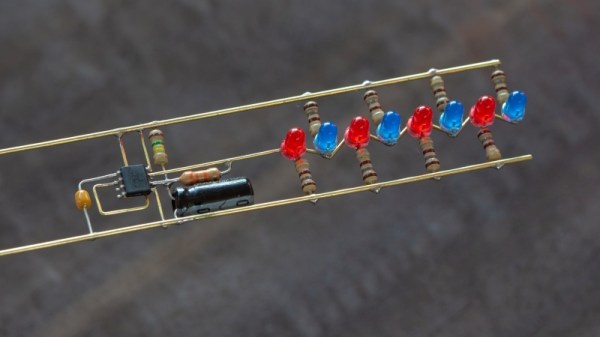
And yet there are some who design circuits purely as works of art. They may do something interesting or useful, but function is generally secondary to form for these circuit sculptors. Often consisting of skeletons of brass wire bent at precise angles to form intricate structures, circuit sculptures are the zen garden of electronic design: they’re where the designer turns to quiet the madness of making deadlines and meeting specs by focusing on the beauty of components themselves and putting them on display for all to enjoy.

By day, our host Mohit designs and builds hardware at Particle. By night, however, the wires and pliers come out, and he makes circuit sculptures that come alive. Check out his portfolio; you won’t be disappointed. This Hack Chat will be your chance to find out everything that goes into making these sculptures. Find out where Mohit gets his inspiration, learn his secrets for such precise, satisfyingly crisp wire-bending, and see what it takes to turn silicon into art.

join-hack-chat

Our Hack Chats are live community events in the Hackaday.io Hack Chat group messaging. This week we’ll be sitting down on Wednesday, November 6 at 12:00 PM Pacific time. If time zones have got you down, we have a handy time zone converter.

Click that speech bubble to the right, and you’ll be taken directly to the Hack Chat group on Hackaday.io. You don’t have to wait until Wednesday; join whenever you want and you can see what the community is talking about. Continue reading “Circuit Sculpture Hack Chat”

Basic Acrylic Bending, No Special Tools Needed

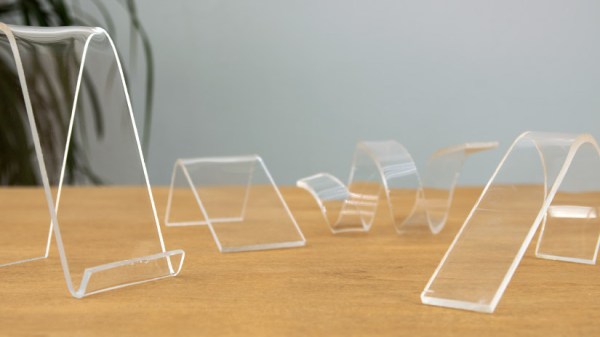
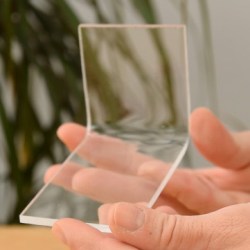
Acrylic sheets are relatively inexpensive, pretty, and can be heat-shaped very effectively. There are blades and tools made specifically for cutting, heating, and bending acrylic but [Marija] shows that even without them acrylic can be cut and bent with a bit of care and patience.

Acrylic sheets are brittle and crack easily, but a hacksaw is a good way to cut it by hand. After cutting, [Marija] uses a small portable gas stove at its lowest setting to provide gentle heat until the acrylic becomes soft, then it can be formed into different shapes using common shop and household items. It’s a process that requires patience and practice, so she shares some useful tips:

  • Remove the protective film after cutting, but before heat forming. Otherwise the film will be much harder to remove.
  • Heating too aggressively will result in bubbles that ruin the acrylic.
  • Uneven heating will result in a bad bend, or “hot spots” which can result in bubbles as mentioned above.
  • This heating method naturally softens a wide area, but it’s still possible to get straight and flat bends by using wood forms and letting the acrylic cool before moving it.

[Marija] used this method of heating and bending acrylic to complete an earlier lamp project of hers that we featured in the past. Acrylic might laser-cut beautifully, and there may be inexpensive tools for heating and bending it, but it’s always nice to have some tried and true techniques that don’t require anything special.

Continue reading “Basic Acrylic Bending, No Special Tools Needed”