Crowdfunding: A Wireless Oscilloscope

One of the most ingenious developments in test and measuring tools over the last few years is the Mooshimeter. That’s a wireless, two-channel multimeter that can measure voltage and current simultaneously. If you’ve ever wanted to look at the voltage drop and power output on a souped up electrified go-kart, the Mooshimeter is the tool for you.

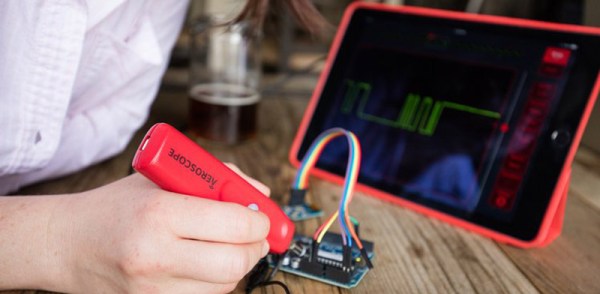
A cheap, wireless multimeter was only the fevered dream of a madman a decade ago. We didn’t have smartphones with Bluetooth back then, so any remote display would cost much more than the multimeter itself. Now this test and measurement over Bluetooth is bleeding over into the rest of the electronics workbench with the Aeroscope,  a wireless Bluetooth oscilloscope.

[Alexander] and [Jonathan], the devs for the Aeroscope got the idea for this device while debugging a mobile robot. The robot would work on the bench, but in the field the problem would reappear. The idea for a wireless troubleshooting tool was born out of necessity.

The specs for the Aeroscope are about equal to the quite capable ‘My First Oscilloscope’ Rigol DS1052E. Analog bandwidth is 100MHz, sample rate is 500 Msamples/second, and the memory depth is 10k points. Resolution per division is 20mV to 10V, and the Aeroscope “Deluxe Package” that includes a few leads, tip, clip, USB cable, and case is about the same price as the Rigol 1052E. The difference, of course, is that the Aeroscope is a single channel, and wireless. That’s fairly impressive for two guys who aren’t a team of Rigol engineers.

As is the case with all Bluetooth test and measurement devices, the proof is in the app. Right now, the Aeroscope only supports iOS 9 devices, but according to the crowdfunding campaign, Android support is coming. Since the device is Open Source, you can always bang something out in Python if you really need to.

While this is a crowdfunding campaign, it’s hosted on Crowd Supply. Crowd Supply isn’t Indiegogo or Kickstarter; there are people at Crowd Supply vetting projects. The campaign still has a month to go, but the first few pledges are putting the Aeroscope right on track to a successful campaign.

A Robot In A Day

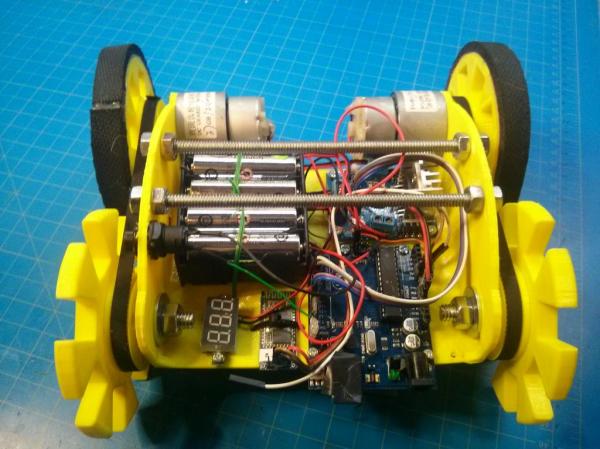
While building a robot (nearly) from scratch isn’t easy, it needn’t be a lengthy process.  Is it possible to build a bot in a single day? With some musical motivation (a 10 hour loop of the A-Team theme song), [Tyler Bletsch] answers with a resounding ‘yes’ in the shape of his little yellow robot that he built for a local robotics competition.

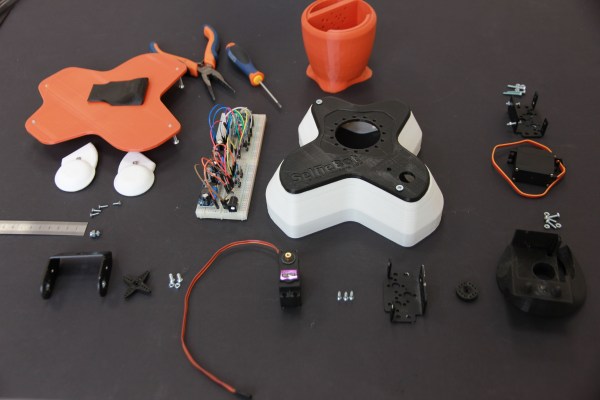
Designing and fabricating on the fly, [Bletsch] used Sketchup to design the chassis, and OpenSCAD to model the wheels while the former was being 3D printed. Anticipating some structural weakness, he designed another version that could bolt to wood if the original failed, but the addition of some metal support rods provided enough stability. Mouse pad material gave the wheels ample traction. An Arduino with the L298 control module receives input via an HC-06 Bluetooth board. Eight AA batteries provide 12V of power to two Nextrox mini 12V motors with an integrated voltmeter to measure battery life.

Continue reading “A Robot In A Day”

Easy DIY Telemetry Goes The Distance

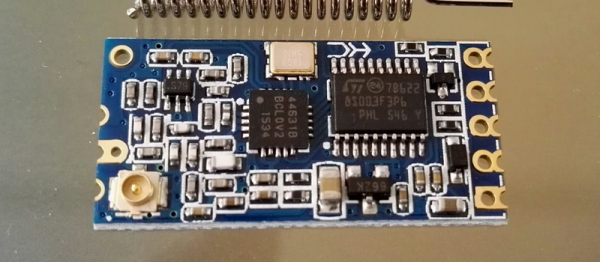
[Paweł Spychalski] wrote in to tell us about some experiments he’s been doing, using cheap 433 MHz HC-12 radio units as a telemetry radio for his quadcopter.

In this blog post, he goes over the simple AT command set, and some of the limitations of the HC-12 part. Then he takes it out for a spin on his quadcopter, and finds out that his setup is good for 450 meters in an open field. Finally, he ties the radio into his quad’s telemetry system and tethers the other end to his cellphone through a Bluetooth unit for a sweet end-to-end system that only set him back around $20 and works as far out as 700 meters.

The secrets to [Paweł]’s success seem to be some hand-made antennas and keeping the baud rate down to a reasonable 9600 baud. We wonder if there’s room (or reason?) for improvement using a directional antenna on the ground. What say you, Hackaday Antenna Jockeys?

Also check out this very similar build where an ESP8266 replaces the Bluetooth module. And stashes it all inside a nice wooden box! Nice work all around.

Fight That Tesla Envy With A Tablet Dash For Your Car

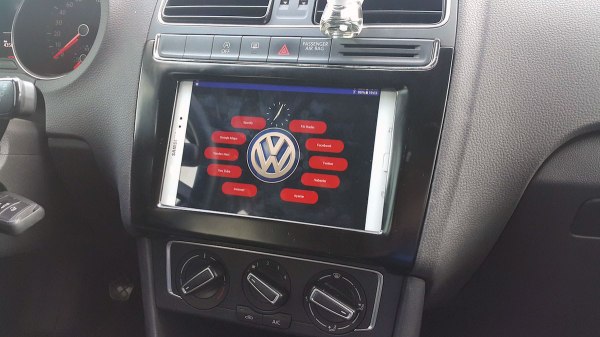
[Aykut Çelik] uses some strong words to describe how he feels about his VW Polo’s current radio set-up. Words like, “useless,” are bandied about. What is a modern man supposed to do with a car that doesn’t have built-in navigation or Bluetooth connectivity with phones? Listen to the radio? There are actual (mostly) self driving cars on the road now. No, [Aykut] moves forward, not backwards.

To fix this horrendous shortcoming in his car’s feature package, he set out to install a tablet in the dash. His blog write-up undersells the amount of work that went into the project, but the video after the break rectifies this misunderstanding. He begins by covering the back of a face-down Samsung tablet with a large sheet of plastic film. Next he lays a sheet of fiberglass over the tablet and paints it with epoxy until it has satisfactorily clung to the back of the casing. Afterwards comes quite a bit of work fitting an off-the-shelf panel display mount to the non-standard hardware. He eventually takes it to a local shop which does the final fitting on the contraption.

The electronics are a hodgepodge of needed parts: An amplifier, to replace the one that was attached to the useless husk of the prior radio set; a CAN shield for an Arduino, so that he could still use the steering wheel buttons; and a Bluetooth shield, so that the Arduino could talk to the tablet. Quite a bit of hacking happened, and the resulting software is on GitHub.

The final assembly went together well. While it’s no Tesla console. It does get over the air updates whenever he feels like writing them. [Aykut] moves forward with the times.

Continue reading “Fight That Tesla Envy With A Tablet Dash For Your Car”

Hackaday Prize Entry: Wirelessly Charged Self-Heating Coffee Mug

Many productive hackers bleed a dark ochre. The prevailing theory among a certain group of commenters is that they’re full of it, but it’s actually a healthy sign of a low blood content in the healthy hacker’s coffee stream. [Bharath] is among those who enjoy the caffeinated bean juice on a daily basis. However, he’d suffer from a terrible condition known as cold coffee. To combat this, he built an app-enabled, wirelessly chargeable, self-heating coffee mug.

We know that most hackers don’t start off planning to build objects with ridiculous feature lists, it just happens. Is there an alternate Murphy’s law for this? Any feature that can be added will? The project started off as some low ohm resistors attached to a rechargeable power bank. A insulated flask with a removable inner stainless steel lining was chosen. The resistors were fixed to the outside with a thermal epoxy.

However, how do we control the resistors? We don’t want to burn through our battery right away (which could end up more literally than one would like), so [Bharath] added a Linkit One microcontroller from Seeed Studio. With all this power at his disposal, it was natural to add Bluetooth, a temperature sensor, and app control to the cup.

After getting it all together, he realized that while the insides were perfectly isolated from the liquids held in the flask under normal use, the hole he’d have to cut to connect to the charging circuit would provide an unacceptable ingress point for water. To combat this he added the wireless charging functionality.

With his flask in hand, we’re sure the mood boost from not having to slog through the dregs of a cold container of coffee will produce a measureable improvement in productivity. Video after the break.

Continue reading “Hackaday Prize Entry: Wirelessly Charged Self-Heating Coffee Mug”

Graduation cap LED display demo

Stealthy Mortar Board Unleashes Bling At Graduation Ceremony

Decorating graduation caps is often frowned upon by the administration but [Dan Barkus] is challenging his school authorities to keep from smiling when they see what he has in store. His build will dazzle the audience by mounting 1024 RGB LEDs in a 32×32 matrix on top of his cap, but hidden under the cap’s black cloth. When the LEDs are off he’s indistinguishable, and when he fires up the LEDs, shine through and put on a heck of a show. He can type messages on his phone to be displayed on the cap. He can even display images and animated GIFs.

LED array control components

The LED display is an Adafruit 32×32 RGB LED matrix panel.  To control the display, [Dan] uses a Teensy, a 32 bit ARM Cortex-M4 microcontroller board. Wireless communication is done via a JBtek HC-06 Bluetooth board.

The LED display can draw up to 4 amps at full white brightness so he picked up a USB battery with two output ports, one capable of 2.1 amps and the other 2.4 amps. He then hacked together a cable that has two USB connectors on one end, connected in parallel, and a DC jack on the other end. Altogether the battery bank is capable of up to 4.5 amps output combined out those two ports, meeting the LED display’s needs. The DC jack is plugged into the Teensy and all power goes through there.

One problem [Dan] had was that the Bluetooth module was booting up before the Teensy. It didn’t see the Teensy in time, causing the Bluetooth not to work. The solution he found is shown in the 2nd video embedded below. The fix powers the Bluetooth module separately, using a current limiting resistor and a capacitor to build up the voltage, delaying just long enough for the Teensy to win.

Continue reading “Stealthy Mortar Board Unleashes Bling At Graduation Ceremony”

Tiling Your TV Remote

The Tile is a small Bluetooth chip, speaker, and enough battery for a year in a keychain format. If you lose your keys in the morning, simply use the app on your phone to find the keychain. If you lose your phone simply get out your second phone.

This planned obsolescence didn’t jive with [JM] when his Tile stopped being discoverable. He didn’t want to toss a gadget that had served him so well into the landfill. So, like any good hacker, he cracked its plastic case open.

The Tile itself is a really interesting product. The largest component is the battery which has tabs spot-welded to its surface. Attached to those is a well laid out board. [JM] points out the clever use of spring contacts to engage the piezo element for the speaker as a nice example of good design for manufacture.

The hack itself was pretty easy to complete. Some electrical tape and soldering was all it took to embed the tile into the remote. Now he can take out his phone and press a button to hear a forlorn beep coming from under the couch cushions.