2025 One Hertz Challenge: Abstract Aircraft Sculpture Based On Lighting Regulations

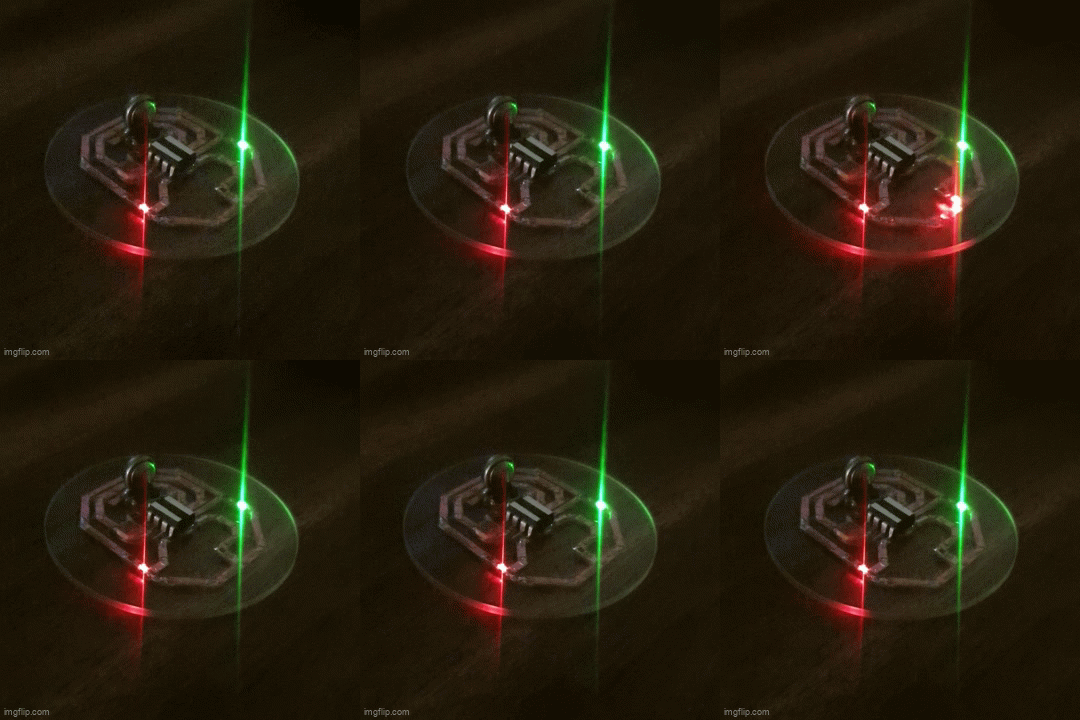
The 2025 One Hertz Challenge is really heating up with all kinds of projects that do something once every second. [The Baiko] has given us a rather abstract entry that looks like a plane…if you squint at it under the right conditions.

It’s actually quite an amusing abstract build. If you’ve ever seen planes flying in the night sky, you’ve probably noticed they all have similar lights. Navigation lights, or position lights as they are known, consist of a red light on the left side and a green light on the right side. [The Baiko] assembled two such LEDs on a small sliver of glass along with an ATtiny85 microcontroller.

Powered by a coin cell, they effectively create a abstract representation of a plane in the night sky, paired with a flashing strobe that meets the requirements of the contest. [The Baiko] isn’t exactly sure of the total power draw, but notes it must be low given the circuit has run for weeks on a 30 mAh coin cell.

It’s an amusing piece of PCB art, though from at least one angle, it does appear the red LED might be on the wrong side to meet FAA regulations. Speculate on that in the comments.

In any case, we’ve had a few flashers submitted to the competition thus far, and you’ve got until August 19 to get your own entry in!

LED Ring Brings The Bling

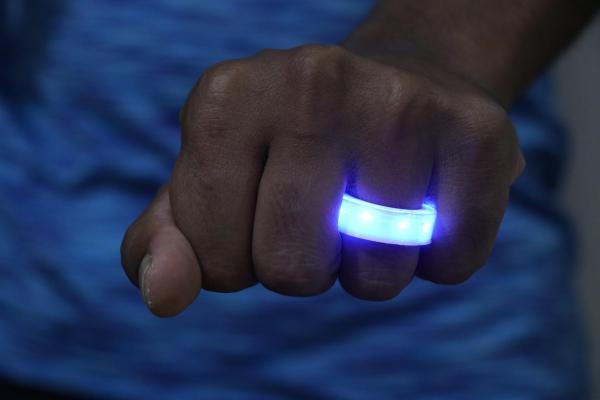
We’ve seen our share of light-up jewelry over the years, but for some reason — probably power — it’s almost always earrings or necklaces. So when we saw [ROBO HUB]’s LED ring, we had to check it out. It involves a bit of behind-the-scenes action in the form of a battery holder that you palm, but the end effect is quite cool.

Essentially, this is a 3D printed ring with SMD LEDs painstakingly soldered together in parallel along a pair of thin copper wires. The ring itself is in two parts: a base, and a cover to diffuse and protect the LEDs. A pair of wires run out from the ring and connect to a printed coin cell holder.

Continue reading “LED Ring Brings The Bling”

2023 Halloween Hackfest: Flickering Pumpkin Pin Is Solidly Built

Now first of all, [Steph] grants that you can already take your pick of several LED pumpkin badges out there on IO. That’s not the point. The point is that this flickering pumpkin pin is nicely-built as well as being open source.

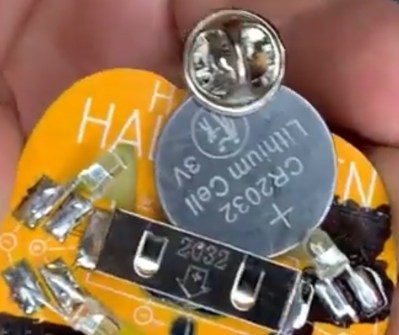
Even though it’s fully featured — it flickers, it’s wearable, and it’s lightweight — the build couldn’t be more simple. It’s fancy through-hole LEDs and a coin cell holder, plus a tack pin to stick it through your shirt. But the final result is quite elegant thanks to clever use of PCB layering.

The first version was to get all the layers right to let the light through and embellish the jack-o-lantern’s lines with manufacturer-applied silver solder, but as [Steph] points out, it looked ‘like something a disturbed child might carve into their desk in detention’. So [Steph] enlisted [Mx. Jack Nelson], who improved the artwork.

Pretty much every component does double duty here, including the tack pin — it serves as a switch because it can hold the battery in place. The battery’s edges reflect the glowing light quite nicely around the edge of the pin. And the LEDs beneath the battery prevent it from slipping out. You can see how it goes together in the video after the break.

Continue reading “2023 Halloween Hackfest: Flickering Pumpkin Pin Is Solidly Built”

Minimizing Stress On A Coin Cell Battery

When it comes to powering tiny devices for a long time, coin cell batteries are the battery of choice for things like keyfobs, watches, and even some IoT devices. They’re inexpensive and compact and a great choice for very small electricity needs. Their major downside is that they have a relatively high internal resistance, meaning they can’t supply a lot of current for very long without decreasing the lifespan of the battery. This new integrated circuit uses a special DC-DC converter to get over that hurdle and extend the life of a coin cell significantly.

A typical DC-DC converter uses a rapidly switching transistor to regulate the energy flow through an inductor and capacitor, effectively stepping up or stepping down the voltage. Rather than relying on a single converter, this circuit uses a two-stage system. The first is a boost converter to step the voltage from the coin cell up to as much as 11 volts to charge a storage capacitor. The second is a buck converter which steps that voltage down when there is a high current demand. This causes less overall voltage drop on the battery meaning less stress for it and a longer operating life in the device.

There are a few other features of this circuit as well, including an optimizer which watches the behavior of the circuit and learns about the power demands being placed on it. That way, the storage capacitor is only charged up to its maximum capacity if the optimizer determines that much charge is needed. With all of these features a coin cell could last around seven times as long as one using more traditional circuitry. If you really need to get every last bit of energy from a battery, though, you can always use a joule thief.

A Handy OSHW USB Cable Tester For Your Toolkit

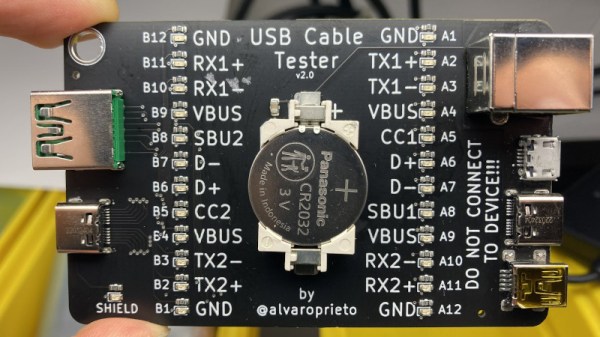
There’s no shame in admitting you’ve been burned by a cheapo USB cable — ever since some bean counter realized there was a few cents to be saved by producing “power only” USB cables, no hardware hacker has been safe. But with this simple tester from [Álvaro Prieto] in your arsenal, you’ll never be fooled again.

It’s about as straight-forward a design as possible, utilizing nothing more than a two dozen LEDs, their associated resistors, and a common CR2032 coin cell. Simply plugging both sides of your cable into the various flavors of USB connectors on the tester will complete the necessary circuits to light up the corresponding LEDs, instantly telling you how many intact wires are inside the cable. So whether you’re dealing with some shady cable that doesn’t have the full complement of conductors, or there’s some physical damage that’s severed a connection or two, you’ll know at a glance.

A sage warning for most of the devices we build.

Obviously the tester is designed primarily for the 24 pins you’ll find in a proper USB-C connector, but it’s completely backwards compatible with older cables and connectors. We appreciate that he even included the chunky Type B connector, which we’ve always been fond of thanks to its robustness compared to the more common Mini and Micro variants.

Keep in mind though that this tester will only show you if there’s a connection between two pins, it won’t verify how much power it can actually handle. For that, you’ll need some extra equipment.

Careful Cuts Lets Logger Last A Year On A Coin Cell

Coin cells are great for backup power for things like real-time clocks, or even for powering incredibly small mechanical devices like watches. But for something like a data logger, running on a standard microcontroller, most people would reach for a lithium cell of some sort. Not so with this build, though, which squeezes every joule of energy from a coin cell in order to run a data logger for a full year.

Won’t be needing that anymore.

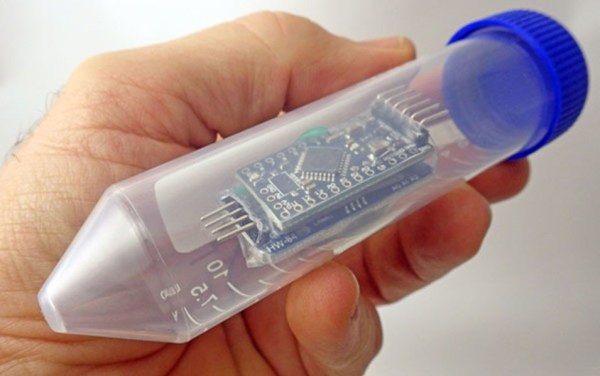
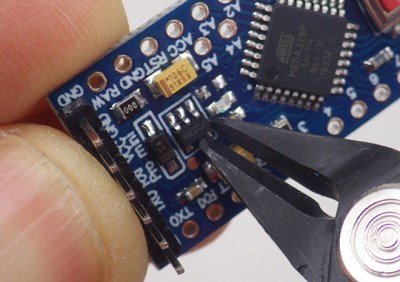
Most of the design and engineering required to improve the efficiency of the data logger involve standard practices for low-power devices such as shutting off unnecessary components and putting the device to sleep when not actively running, but this build goes far beyond that. The Vcc pin on the RTC was clipped which disables some of its internal logic but still keeps its basic functionality intact.

All of the voltage regulators were removed or disabled in favor of custom circuitry that doesn’t waste as much energy. The status and power LEDs were removed where possible, and the entire data logger is equipped with custom energy-efficient code as well.

If you’re starting a low-power project, even one that isn’t a datalogger, it’s worth checking out this build to see just how far you can go if you’re willing to hack at a PCB with cutting tools and a soldering iron. As to why this data logger needed such a low power requirement, it turns out it’s part of a kit being used in classrooms and using a coin cell brought the price of the entire unit down tremendously. Even if you have lithium cells on hand, though, it’s still worthwhile to check out the low power modes of your microcontroller.

Thanks to [Adrian] for the tip!

UV sensing amulet

Tiny Talisman Warns Wearer About UV Exposure

Given how important our Sun is, our ancestors can be forgiven for seeing it as a god. And even now that we know what it actually is and how it works, it’s not much of a reach to think that the Sun pours forth evil spirits that can visit disease and death on those who bask too long in its rays. So an amulet of protection against the evil UV rays is a totally reasonable project, right?

As is often the case with [mitxela]’s projects, especially the more bedazzled ones, this one is approximately equal parts electronics and fine metalworking. The bulk of the video below focuses on the metalwork, which is pretty fascinating stuff. The case for the amulet was made from brass and sized to fit a CR2032 coin cell. The back of the amulet is threaded to act as a battery cover, and some fancy lathe work was needed there. The case was also electroplated in gold to prevent tarnishing, and lends a nice look when paired up with the black solder mask of the PCB.

On the electronics side, [mitxela] took pains to keep battery drain as low as possible and to make the best use of the available space, choosing an ATtiny84 to support a TTP223 capacitive sensing chip and a VEML6075 UV sensor. The touch sensor allows the wearer to wake the amulet and cycles through UV modes, which [mitxela] learned were not exactly what the sensor datasheet said they were. This required a few software hacks, but in the end, the amulet does a decent job of reporting the UV index and looks fantastic while doing it.

Continue reading “Tiny Talisman Warns Wearer About UV Exposure”