High-Speed Sled Adds Bicycle Suspension

While you might have bought the best pair of skis in the 90s or 00s, as parts on boots and bindings start to fail and safety standards for ski equipment improve, even the highest-quality skis more than 15 or 20 years old will eventually become unsafe or otherwise obsolete. There are plenty of things that can be done with a pair of old skis, but if you already have a shot ski and an Adirondack chair made of old skis, you can put another pair to use building one of the fastest sleds we’ve ever seen.

[Josh Charles], the creator of this project, took inspiration from his father, who screwed an old pair of skis to the bottom of an traditional runner sled when he was a kid. This dramatically increased the speed of the sled, but eliminated its ability to steer. For this build [Josh] built a completely custom frame rather than re-use an existing sled, which allowed him to not only build a more effective steering mechanism for the skis, but also to use bicycle suspension components to give this sled better control at high speeds.

This build is part of a series that [Josh] did a few years ago, and you can find additional videos about it documenting his design process and his initial prototypes and testing. The amount of work he put into this build is evident when it’s seen finally traversing some roads that had been closed for winter; he easily gets the sled up in the 30 mph range several times. If you’re looking to go uphill in the snow, though, take a look at this powered snowboard instead.
Continue reading “High-Speed Sled Adds Bicycle Suspension”

Make Your Own Pot And Encoder Knobs, Without Reinventing Them

Rotary potentiometers, switches, and encoders all share a basic design: adjustment is done via a shaft onto which a knob is attached, and knobs are sold separately. That doesn’t mean one knob fits all; there are actually a few different standards. But just because knobs are inexpensive and easily obtained doesn’t mean it’s not worth making your own.

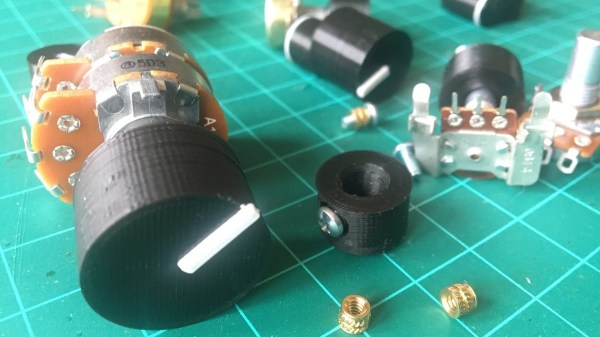
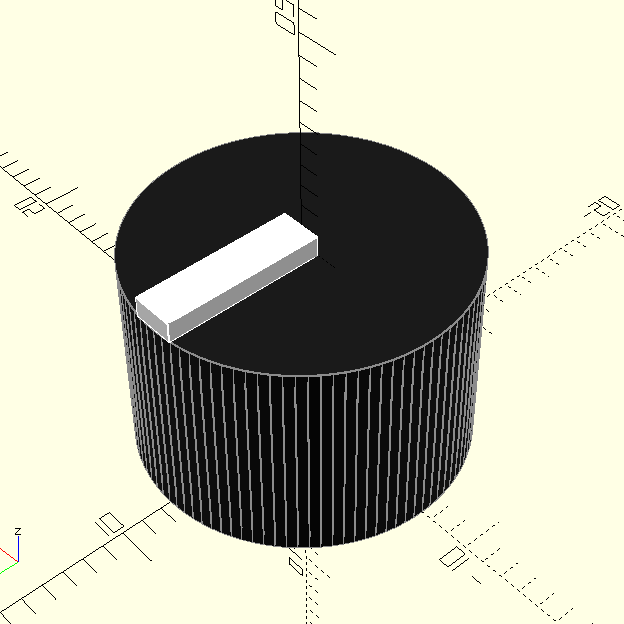
A simple and effective indicator can be easily printed in a contrasting color.

Why bother 3D printing your own knobs instead of buying them? For one thing, making them means one can rest assured that every knob matches aesthetically. The ability to add custom or nonstandard markings are another bonus. Finally, there’s no need to re-invent the wheel, because [Tommy]’s guide to making your own knobs has it all figured out, with the OpenSCAD script to match.

By default, [Tommy]’s script will generate a knob with three shims (for interfacing to a splined shaft) when pot_knob(); is called. The number of shims can be adjusted by modifying potKnobDefaultShimCount. To give the knob a flat side (to interface with D-shafts), change flatted = false to flatted = true. And for adding a screw insert suitable for a set screw? Change tightenerDiameter = 0 from zero to the diameter desired.

The script is quite comprehensive and has sensible defaults, but it does require a bit of knowledge about OpenSCAD itself to use effectively. We have covered the basics of OpenSCAD in the past, and if you’re ready for a resource that will help you truly master it, here’s where to look.

Home-Built CPU Runs With Home-Built Toolchain

A few years ago [Takaya Saeki] and fellow students of the University of Tokyo, were given a very limited instruction during their ‘CPU exercise’ class, along the lines of:

Take this ray-tracing program written in OCaml and run it on your CPU implemented on an FPGA

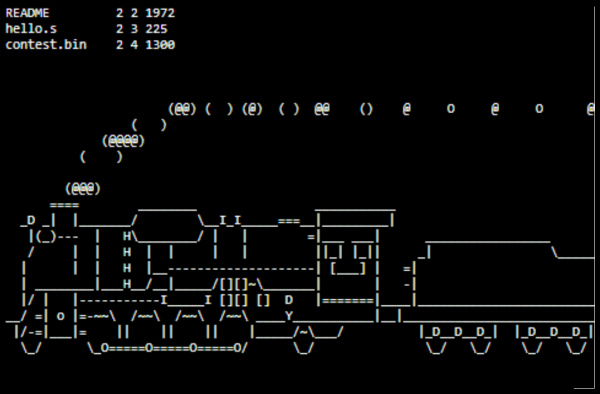
Splitting into groups to cover the CPU, FPU, simulator tool, and compiler toolchain, the students started with designing a RISC ISA, then designed a CPU around that. You can follow along with theĀ retrospective writeup of the class, then dive into the GitHub pages for each of the components of the system, although the commentary is mainly in Japanese. Hey, you can google translate right? Continue reading “Home-Built CPU Runs With Home-Built Toolchain”

Tiny Arcade Uses Tiny CRT

Restoring vintage electronics is a difficult hobby to tackle. Even the most practical builds often have to use some form of modern technology to work properly, or many different versions of the machine need to be disassembled to get a single working version. Either way, in the end someone will be deeply hurt by the destruction of anything antique, except perhaps with [Marco]’s recent tiny arcade with a unique CRT display.

The CRT is a now-obsolete technology, but Arcade and MAME purists often seek them out because of the rounded screen and vintage feel these devices have when compared to modern LCD or LED displays. For a build this small, though, [Marco] couldn’t just use parts from an old TV set as there wouldn’t be clearance in the back of the cabinet. An outdated video conferencing system turned out to have just the part he needed, though. It has a CRT mounted perpendicularly to a curved screen in order to reduce the depth needed dramatically.

The final build uses a tiny Namco system meant to plug into the RCA jack on a standard TV, but put in a custom case that makes it look like an antique video game cabinet. It’s an interesting build that doesn’t destroy any valuable antique electronics, while still maintaining a classic arcade feel. If you’re building a larger arcade cabinet which will still satisfy the purists out there, make sure you’re using a CRT with the right kind of control system.

Continue reading “Tiny Arcade Uses Tiny CRT”

Building Faster Rsync From Scratch In Go

For a quick file transfer between two computers, SCP is a fine program to use. For more complex, large, or regular backups, however, the go-to tool is rsync. It’s faster, more efficient, and usable in a wider range of circumstances. For all its perks, [Michael Stapelberg] felt that it had one major weakness: it is a tool written in C. [Michael] is philosophically opposed to programs written in C, so he set out to implement rsync from scratch in Go instead.

[Michael]’s path to deciding to tackle this project is a complicated one. His ISP upgraded his internet connection to 25 Gbit/s recently, which means that his custom router was the bottleneck in his network. To solve that problem he migrated his router to a PC with several 25 Gbit/s network cards. To take full advantage of the speed now theoretically available, he began using a tool called gokrazy, which turns applications written in Go into their own appliance. That means that instead of installing a full Linux distribution to handle specific tasks (like a router, for example), the only thing loaded on the computer is essentially the Linux kernel, the Go compiler and libraries, and then the Go application itself.

With a new router with hardware capable of supporting these fast speeds and only running software written in Go, the last step was finally to build rsync to support his tasks on his network. This meant that rsync itself needed to be built from scratch in Go. Once [Michael] completed this final task, he found that his implementation of rsync is actually much faster than the version built in C, thanks to the modernization found in the Go language and the fact that his router isn’t running all of the cruft associated with a standard Linux distribution.

For a software project of this scope, we find [Michael]’s step-by-step process worth taking note of for any problem any of us attempt to tackle. Not only that, refactoring a foundational tool like rsync is an involved task on its own, let alone its creation simply to increase network speeds beyond what most of us would already consider blazingly fast. We’re leaving out a ton of details on this build so we definitely recommend checking out his talk in the video below.

Thanks to [sarinkhan] for the tip!

Continue reading “Building Faster Rsync From Scratch In Go”

Motorcycle Regulator By Popular Demand

A few weeks ago we posted a build of an avid motorcycle enthusiast named [fvfilippetti] who created a voltage regulator essentially from the ground up. While this was a popular build, the regulator only works for a small subset of motorcycles. This had a large number of readers clamoring for a more common three-phase regulator as well. Normally we wouldn’t expect someone to drop everything they’re doing and start working on a brand new project based on the comments here, but that’s exactly what he’s done.

It’s important to note that the solutions he has developed are currently only in the simulation phase, but they show promise in SPICE models. There are actually two schematics available for those who would like to continue his open-source project. Compared to shunt-type regulators, these have some advantages. Besides being open-source, they do not load the engine when the battery is fully charged, which improves efficiency. The only downside is that they have have added complexity as they can’t open this circuit except under specific situations, which requires a specific type of switch.

All in all, this is an excellent step on the way to a true prototype and eventual replacement of the often lackluster regulators found on motorcycles from Aprilia to Zero. We hope to see it further developed for all of the motorcycle riders out there who have been sidelined by this seemingly simple part. And if you missed it the first time around, here is the working regulator for his Bajaj NS200.

Motorcycle Voltage Regulator Uses MOSFETs

For how common motorcycles are, the designs and parts used in them tend to vary much more wildly than in cars and trucks. Sometimes this is to the rider’s advantage, like Honda experimenting with airbags or automatic transmissions. Sometimes it’s a little more questionable, like certain American brands holding on to pushrod engine designs from the ’40s. And sometimes it’s just annoying, like the use of cheap voltage regulators that fail often and perform poorly. [fvfilippetti] was tired of dealing with this on his motorcycle, so he built a custom voltage regulator using MOSFETs instead.

Unlike a modern car alternator, which can generate usable voltage even at idle, smaller or older motorcycle alternators often can’t. Instead they rely on a simpler but less reliable regulator that is typically no more than a series of diodes, but which can only deliver energy to the electrical system while the motor is running at higher speeds. Hoping to improve on this design, [fvfilippetti] designed a switched regulator from scratch out of MOSFETs with some interesting design considerations. It is capable of taking an input voltage between 20V and 250V, and improves the ability of the motorcycle to use modern, higher-power lights and to charge devices like phones as well.

In the video below, an LED was added in the circuit to give a visual indication that the regulator is operating properly. It’s certainly a welcome build for anyone who has ever dealt with rectifier- or diode-style regulators on older bikes before. Vehicle alternators are interesting beasts in their own right, too, and they can be used for much more than running your motorcycle’s electrical system.

Continue reading “Motorcycle Voltage Regulator Uses MOSFETs”