Nvidia Brings Computer Vision And Deep Learning To The Embedded World

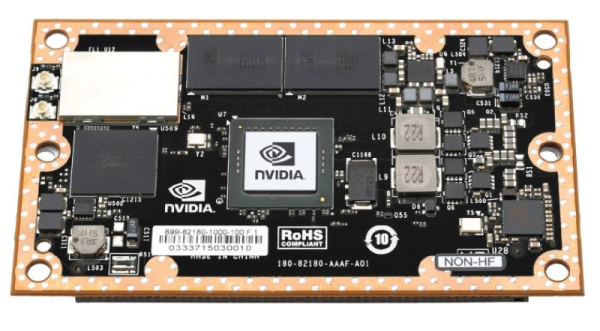
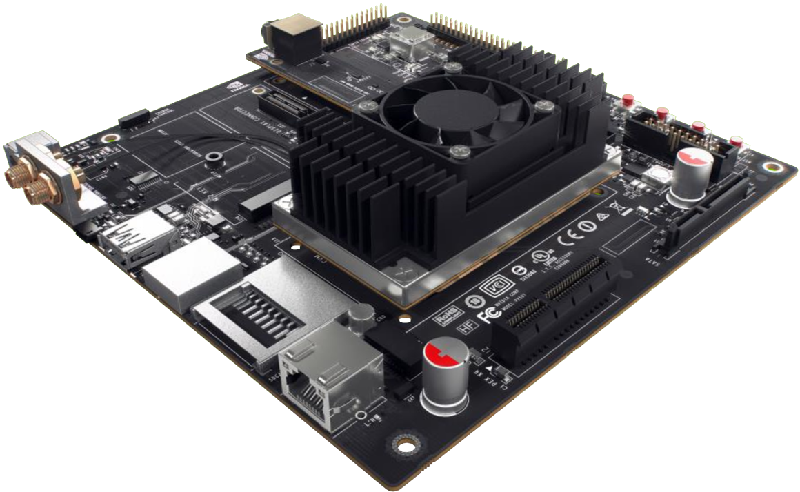
Today, Nvidia announced their latest platform for advanced technology in autonomous machines. They’re calling it the Jetson TX1, and it puts modern GPU hardware in a small and power efficient module. Why would anyone want GPUs in an embedded format? It’s not about frames per second; instead, Nvidia is focusing on high performance computing tasks – specifically computer vision and classification – in a platform that uses under 10 Watts.

For the last several years, tiny credit card sized ARM computers have flooded the market. While these Raspberry Pis, BeagleBones, and router-based dev boards are great for running Linux, they’re not exactly very powerful.  x86 boards also exist, but again, these are lowly Atoms and other Intel embedded processors. These aren’t the boards you want for computationally heavy tasks. There simply aren’t many options out there for high performance computing on low-power hardware.

Nvidia
The Jetson TX1 and Developer Kit. Image Credit: Nvidia

Tiny ARM computers the size of a credit card have served us all well for general computing tasks, and this leads to the obvious question – what is the purpose of putting so much horsepower on such a small board. The answer, at least according to Nvidia, is drones, autonomous vehicles, and image classification.

Image classification is one of the most computationally intense tasks out there, but for autonomous robots, there’s no other way to tell the difference between a cyclist and a mailbox. To do this on an embedded platform, you either need to bring a powerful general purpose CPU that sucks down 60 or so Watts, or build a smaller, more efficient GPU-based solution that sips a meager 10 Watts.

Continue reading “Nvidia Brings Computer Vision And Deep Learning To The Embedded World”

Firmware Factory: Bit Fields Vs Shift And Mask

Working with embedded systems usually involves writing code which will interface with hardware. This often means working on the register level. It doesn’t matter if we’re talking about a UART, an analog to digital converter, an LCD controller, or some other gizmo. Sooner or later, you’re going to have to break out the datasheets and figure out how to talk to an external device. To succeed at this you must become a master of bit manipulation.

Hardware designers don’t like wasting space, so modes, settings and other small pieces of information are often stored as packed bits. Our processors usually access things a byte (or a word) at a time, so what is the best way to handle this? Like so many other topics in software engineering, there are multiple ways to skin this cat. In C (and its derivatives) there are two major options: shift and mask, and bit fields.

Continue reading “Firmware Factory: Bit Fields Vs Shift And Mask”

Micro:bit — BBC Gets A Million Kids Into Embedded Dev

In the Early 1980s, the BBC launched a project to teach computer literacy to a generation of British schoolchildren. This project resulted in the BBC Micro, a very capable home computer that showed a generation exactly what a computer could do. These children then went home, turned on their ZX Spectrums, and became a generation of software engineers. Still, the BBC Micro is remembered fondly.

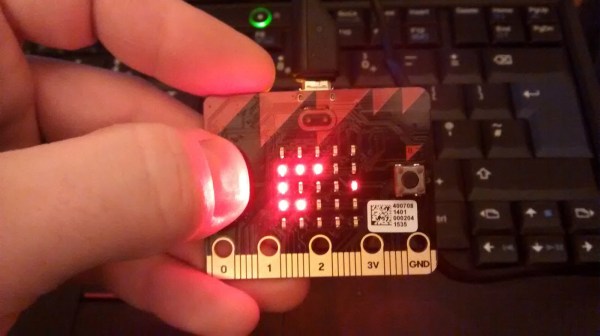
The computer revolution is long over, but today we suffer a sea change of embedded processors and microcontrollers. With Arduinos and Raspberry Pis, the BBC has decided it’s time to put the power of an ARM microcontroller into the hands of a million 11- and 12-year olds. The result is the Micro:bit. It’s a small microcontroller board with an ARM processor, an IMU, buttons, Bluetooth and a 5×5 LED array – exactly what you need if you’re teaching a million kids how to blink an LED.

Although the BBC has finalized the design for the Micro:bit, there are no specs at all. However, a few educated guesses can be made. The USB controller is provided by Freescale, who also provide the digital compass and magnetometer. Programming is done through a web-based, Arduino-like IDE with what appears to be a decent Micro:bit specific library. The board is also mbed compatible. Bluetooth, and apparently the ARM Cortex M0 core, is provided by a Nordic nRF51822. There are only three alligator clip-compatible I/Os, and its doubtful any student will be building anything that would be too complex for an entry level ARM. It’s also 3V logic; finally, the tyranny of 5V has fallen.

The Micro:bit is best seen as a tool that enables the relatively recent addition of a computer science curriculum in UK schools. There is now a requirement for seven-year-olds to understand algorithms and create simple programs. Previously computer education in the UK has consisted of PowerPoint. Now, secondary school students will be learning Boolean logic.

While the Micro:bit is utterly useless as a tool for doing real work, education is not real work. For blinking a few LEDs, having a device react to movement, playing with Bluetooth, and other lesser evils of electronics, the Micro:bit is great. Not everyone will become the digital technologists this initiative is trying to create, but for those who have an inclination towards semicolons and electrons, this is a great introduction to technology.

2048: Embedded Edition

Embedded touch version of 2048 tile gameHow ’bout that 2048 game? Pretty addictive, huh? Almost as addictive as embedded systems are, at least if you’re [Andrew]. Armed (pun intended) with a Nucleo F4 and a Gameduino 2 shield, he decided to have a go at making an embedded version of the popular tile pusher web game.

If you’re unfamiliar with the Nucleo boards from STMicroelectronics, check out our post on the Nucleo family from a couple of months ago. The Gameduino 2 shield ships with a 4.3″ touchscreen driven by an FT800 GPU EVE. [Andrew] wrote his own driver for it and his blog post goes into great detail about its programming model and the SPI read, write, and command functions he wrote. Full code is available from [Andrew]’s repo.

He started by generating a blank screen based on clues found in the Gameduino 2 source. Pretty soon he had rendered a rectangle and then a full 2048 board. A minor difference between [Andrew]’s creation and the original is that his always creates new tiles as ‘2’ while the web game cranks out the occasional ‘4’.

We were unable to embed [Andrew]’s gameplay videos, but you’ll find two on his blog.


Discrete 6502 Processor Sucked Into Linux By A BeagleBone

Often when we see projects using embedded Linux we think of them as not being hardware hacks. But this is a horse of an entirely different color. [Matt Porter] is leveraging a little known feature to directly access a 6502 processor from inside a Linux environment. In other words, this hack lets you write code for a 6502 processor, then load and execute it all from the same Linux shell.

The project leverages the best parts of the BeagleBone, which is an ARM development board running embedded Linux. It’s got a lot of GPIO pins that are easy to get via the boards pin sockets. And the design of the processor makes it fast enough to work well as a host for the 6502 chip. Which brings us back to how this is done. The Linux kernel has support for Remote Processors and that’s the route [Matt] traveled. With everything wired up and a fair amount of kernel tweaking he’s able to map the chip to the /dev/bvuart directory. If you want all the details the best resource is this set of slides (PDF) from his talk at Embedded Linux Conference – Europe.

This is one way to get out of all that hardware work [Quinn Dunki] has been doing to build her own computer around a 6502 chip.

[Thanks Andrew via Dangerous Prototypes]

Disco Isn’t Dead: Diy Dance Floor Spotted At Student Parties

Your party is lame if it doesn’t include interactive blinking lights on the dance floor. [Mario] and [Lukas] didn’t want to have lame parties, so they enlisted some fellow students to build an interactive dance floor (translated). The finished party-piece is 4 meters by 2.5 meters (that’s about 13’x8′ for us yanks) and includes 160 lighted squares. But it’s the electronics that really make this a heavy project.

Milled into the underside of the pressboard base are a series of pockets and channels to hold various components. If you look hard enough, you’re going to find eight AVR microcontrollers which control the LEDs, 8 CPLDs to manage the weight sensors which make the floor interactive, and an FPGA and embedded computer to tie everything together. It’s movable, a hit at parties, and so far it seems to hold up to the occasional spilled beverage.

You can’t share a project like this without some video. See it after the break.

Continue reading “Disco Isn’t Dead: Diy Dance Floor Spotted At Student Parties”

Another Approach To Power Meter Data Harvesting

[Dodgy] wrote in to talk about his power meter data harvesting programs. This uses the same hardware by CurrentCost as the hack we looked at over the weekend but [Dodgy’s] implementation is different. It’s separated into two parts, the first is a webserver written in C that harvests the data and makes it available at an address on the network, the second is written in Perl to format and upload data to Google PowerMeter.

The C program serves data on a configurable port, defaulting to 3090. All of the data can be accessed in one line of code by loading http://127.0.0.1:3090, or individually with subdirectories like /watts, /time, or /tempr. From there you can do what you want with the data. The second part of [Dodgy’s] suite is a Perl script that polls the C server and sends the data to your Google account.

One thing that interests us is his comment that you should be able to compile the server side C code for an embedded device. It would be a nice energy savings to be able to upload data regularly without a PC running constantly.