Fail Of The Week: The 3D Printer Nozzle Wipe That Won’t

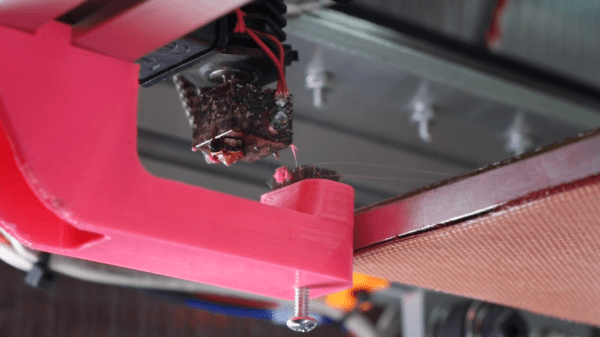
Some of you will be familiar with the idea of using a brush as a nozzle wipe on a 3D printer. The idea is that passing the hot end over the brush cleans any stray plastic from the nozzle, ensuring that those plastic bits don’t end up in unwelcome places. [Mark Rehorst] attempted to implement a nozzle brush system in his own printer, but hasn’t so far been successful.
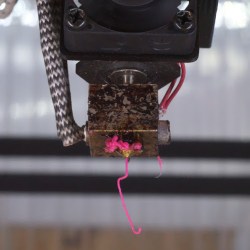
One of the things [Mark] makes is 3D printed lamp shades and this led to his experiments in setting up an automatic nozzle cleaner. Despite best efforts, the hot ends of 3D printers can occasionally accumulate bits of molten plastic which can sometimes end up deposited on the print. Because the lamp shades are so thin and so big, having a charred blob end up on the print is pretty unwelcome. Having the nozzle automatically wiped clean would be a very handy feature, but is proving to be a troublesome one.

[Mark] based his design on a small, dense wire brush used for cleaning the print nozzle of a Stratasys printer. Sadly, he found no combination of motion or brush height that got the nozzle reliably clean every time. Sometimes a blob would be dislodged, but the hot end would pick it back up again on subsequent passes. You can see it in slow motion from a variety of angles in the video below.

Continue reading “Fail Of The Week: The 3D Printer Nozzle Wipe That Won’t” →
Fail Of The Week: How Not To Re-Reflow

There’s no question that surface-mount technology has been a game-changer for PCB design. It means easier automated component placement and soldering, and it’s a big reason why electronics have gotten so cheap. It’s not without problems, though, particularly when you have no choice but to include through-hole components on your SMT boards.

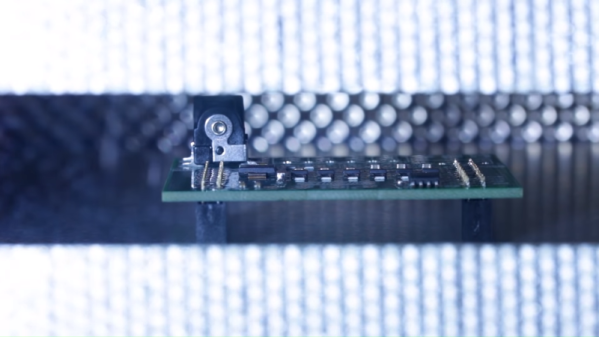
[James Clough] ran into this problem recently, and he tried to solve it by reflowing through-hole connectors onto assembled SMT boards. The boards are part of his electronic lead screw project, an accessory for lathes that makes threading operations easier and more flexible. We covered the proof-of-concept for the project; he’s come a long way since then and is almost ready to start offering the ELS for sale. The PCBs were partially assembled by the board vendor, leaving off a couple of through-hole connectors and the power jack. [James]’ thought was to run the boards back through his reflow oven to add the connectors, so he tried a few experiments first on the non-reflow rated connectors. The Phoenix-style connectors discolored and changed dimensionally after a trip through the oven, and the plastic on the pin headers loosened its grip on the pins. The female header socket and the power jack fared better, so he tried reflowing them, but it didn’t work out too well, at least for the headers. He blames poor heat conduction due to the lack of contact between the board and the reflow oven plate, and we agree; perhaps an aluminum block milled to fit snugly between the header sockets would help.

Hats off to [James] for trying to save his future customers a few steps on assembly, but it’s pretty clear there are no good shortcuts here. And we highly recommend the electronic leadscrew playlist to anyone interested in the convergence of machine tools and electronics.

Continue reading “Fail Of The Week: How Not To Re-Reflow” →

Fail Of The Week: How Not To Light Pipe

You’d think that something made out of glass and epoxy would transmit a decent amount of light. Unfortunately for [Jeremy Ruhland], it turns out that FR4 is not great light pipe material, at least in one dimension.

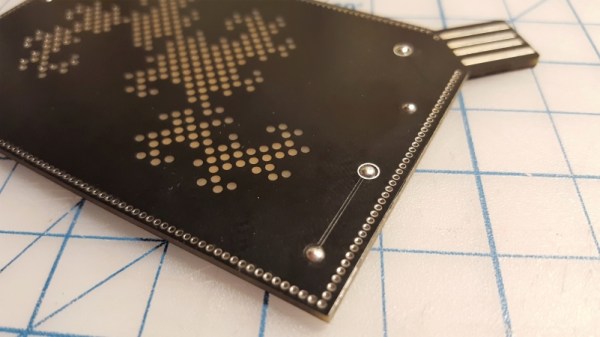
The backstory on this has to do with #badgelife, where it has become popular to reverse mount SMD LEDs on areas of PCBs that are devoid of masking, allowing the light to shine through with a warm, diffuse glow – we’ve even featured a through-PCB word clock that uses a similar technique to wonderful effect. [Jeremy]’s idea was to use 0603 SMD LEDs mounted inside non-plated through-holes to illuminate the interior of the board edgewise. It seems like a great idea, almost like the diffusers used to illuminate flat displays from the edge.

Sadly, the light from [Jeremy]’s LEDs just didn’t make it very far into the FR4 before being absorbed – about 15 mm max. That makes for an underwhelming appearance, but all is certainly not lost. Valuable lessons about PCB design were had, like exactly how to get a fab to understand what you’re trying to do with non-plated holes and why you want to fence the entire edge of the board in vias. But best of all, [Jeremy] explored what’s possible with Oreo construction, and came away with ideas for other uses of the method. That counts as a win in our book.

Fail Of The Week: Toilets And High Voltage Do Not Mix

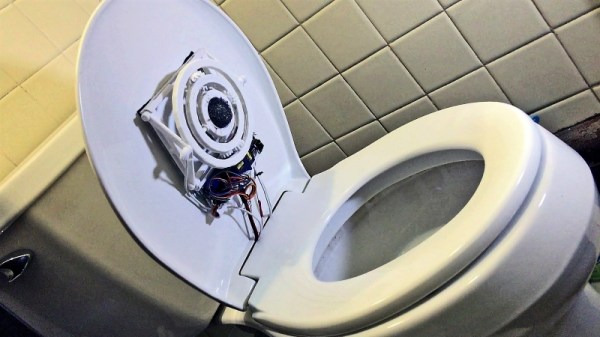
Imagine if you will that you are enthroned upon the porcelain, minding your own business while doing your business. You’re catching up on Hackaday on your phone – c’mon, admit it – when a whir and a buzz comes from behind you. You sit up in alarm, whereupon your lower back suddenly feels as if someone is scrubbing it with a steel wool pad. Then the real pain sets in as super-hot plasma lances into your skin, the smell of burning flesh fills the bathroom, and you crack your head on the towel bar trying to escape this torture chamber in a panic.

Sound good? Then [Vije Miller]’s plasma-powered toilet air freshener is a must-build for you. We’re not entirely sure where this was going, but the name of the project seems to indicate a desire to, ahem, clear the air near your derrière with the power of ions. While that might work – we’ve recently seen an electrostatic precipitator for 3D-printer fumes – the implementation here is a bit sketchy. The ball of steel wool? It was possibly intended as a way to disperse the ions, but it served as nothing more than fuel when touched by the plasma. The Contact-esque gimballed rings? Not a clue what they’re for, but they look cool. And hats off to [Vije] for the intricate 3D-printed parts, the geartrain and linkages, and the DIY slip rings.

It may be a head-scratcher of a build, but the video below is entertaining. Check out some of [Vije]’s other projects of dubious value, like his licorice launcher or the smartphone back scratcher.

Continue reading “Fail Of The Week: Toilets And High Voltage Do Not Mix” →

Fail Of The Week: The Arduino Walkie That Won’t Talkie

There’s something seriously wrong with the Arduino walkie-talkie that [GreatScott!] built.

The idea is simple: build a wireless intercom so a group of motor scooter riders can talk in real-time. Yes, such products exist commercially, but that’s no fun at all. With a little ingenuity and a well-stocked parts bin, such a device should be easy to build on the cheap, right?

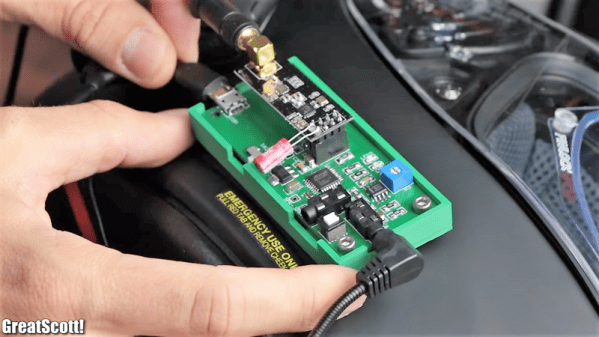
Apparently not. [GreatScott!] went with an Arduino-based design, partly due to familiarity with the microcontroller but also because it made the RF part of the project seemingly easier due to cheap and easily available nRF24 2.4 GHz audio streaming modules. Everything seems straightforward enough on the breadboard – an op-amp to boost the signal from the condenser mic, a somewhat low but presumably usable 16 kHz sampling rate for the ADC. The radio modules linked up, but the audio quality was heavily distorted.

[GreatScott!] assumed that the rat’s nest of jumpers on the breadboard was to blame, so he jumped right to a PCB build. It’s a logical step, but it seems like it might be where he went wrong, because the PCB version was even worse. We’d perhaps have isolated the issue with the breadboard circuit first; did the distortion come from the audio stage? Or perhaps did the digitization inject some distortion? Or could the distortion be coming from the RF stage? We’d want to answer a few questions like that before jumping to a final design.

We love that [GreatScott!] has no issue with posting his failures – we’ve covered his suboptimal CPU handwarmer, and his 3D-printed BLDC motor stator was a flop too. It’s always nice to post mortem these things to avoid a similar fate.

Continue reading “Fail Of The Week: The Arduino Walkie That Won’t Talkie” →

Fail Of The Week: How Not To Electric Vehicle

If you ever doubt the potential for catastrophe that mucking about with electric vehicles can present, check out the video below. It shows what can happen to a couple of Tesla battery modules when due regard to safety precautions isn’t paid.

The video comes to us by way of [Rich], a gearhead with a thing for Teslas. He clearly knows his way around the EV world, having rebuilt a flood-soaked Tesla, and aspires to open an EV repair shop. The disaster stems from a novelty vehicle he and friend [Lee] bought as a side project. The car was apparently once a Disney prop car, used in parades with the “Mr. Toad’s Wild Ride” theme. It was powered by six 6-volt golf cart batteries, which let it maintain a stately, safe pace on a crowded parade route. [Rich] et al would have none of that, and decided to plop a pair of 444-cell Tesla modules into it. The reduced weight and increased voltage made it a real neck-snapper, but the team unwisely left any semblance of battery management out of the build.

You can guess what happened next, or spin up to the 3:00 mark in the video to watch the security camera mayhem. It’s not clear what started the fire, but the modules started cooking off batteries like roman candles. Quick action got it pushed outside to await the fire department, but the car was a total loss long before they showed up. Luckily no other cars in the garage were damaged, nor were there any injuries – not that the car didn’t try to take someone out, including putting a flaming round into [Lee]’s chest and one into the firetruck’s windshield.

[Rich] clearly knew he was literally playing with fire, and paid the price. The lesson here is to respect the power of these beefy batteries, even when you’re just fooling around.

Continue reading “Fail Of The Week: How Not To Electric Vehicle” →

Fail Of The Week: Did My Laser Cutter Tube Really Burn Out?

All the cool kids are doing it these days, or more like for many years now: you can get a laser cutter for a song if you don’t mind doing your own repairs and upgrades — you know, being a hacker. The downside is that some failures can really ruin your day. This is what [Erich Styger] encountered with his cutter that is just a bit more than a year old. This Fail of the Week looks at the mysterious death of a CO2 laser tube.

This is the infamous K40 laser cutter. Our own [Adam Fabio] just took one on a couple of months back and [Erich] even references Hackaday coverage of the K40 Whisperer project as what pushed him over the edge to make the purchase. We’ve followed his blog as he acquired the cutter and made upgrades along the way, but after an estimated 500 hours of use, a horrible teeth-gnashing screech sprung forth from the machine. [Erich’s] reaction was to hit the e-stop; that’s certainly why it’s there.

Chasing down the problem is a story well-told, but as is often the case with these FotW articles, in the end what caused the failure is not entirely known. We’d love to hear what you think about it in the comments below.

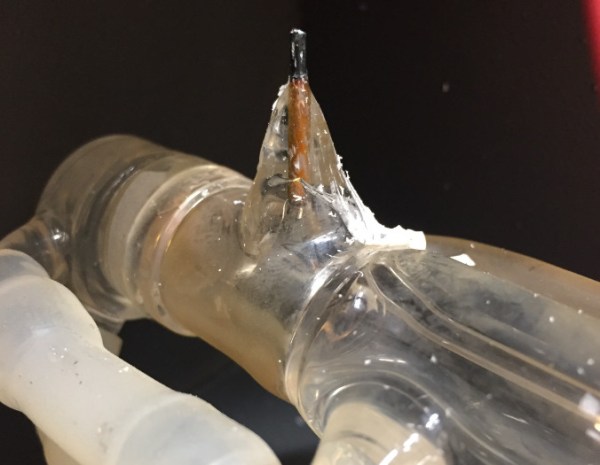
The investigation began at the power supply for the laser, but that didn’t yield any answers. Next he moved to the tube itself, noticing that the wire connection to the tube’s anode wasn’t soldered. The anode is an unknown material he suspects to be graphite and he found a video showing the “soldering” process for connecting a wire. (We added quotes to that as the video he linked doesn’t actually solder anything but the wrapped wire strands themselves.) The solution he found is a great tip to take away from the story. It’s a socket by TE Connectivity to which he soldered the wire. Assuming it’s power rated for the task, and won’t fall off during normal operation, this is a great way to do it.

But we digress. Even with the connection made, the old tube had to be replaced with a new one. It’s also notable that the portion of that anode inside the bad tube is orange in color when a new tube would be black like the part on the outside. Does this hint at why that tube died, and could this have been avoided? If you have insight, help us learn from this failure by leaving a comment below.